18
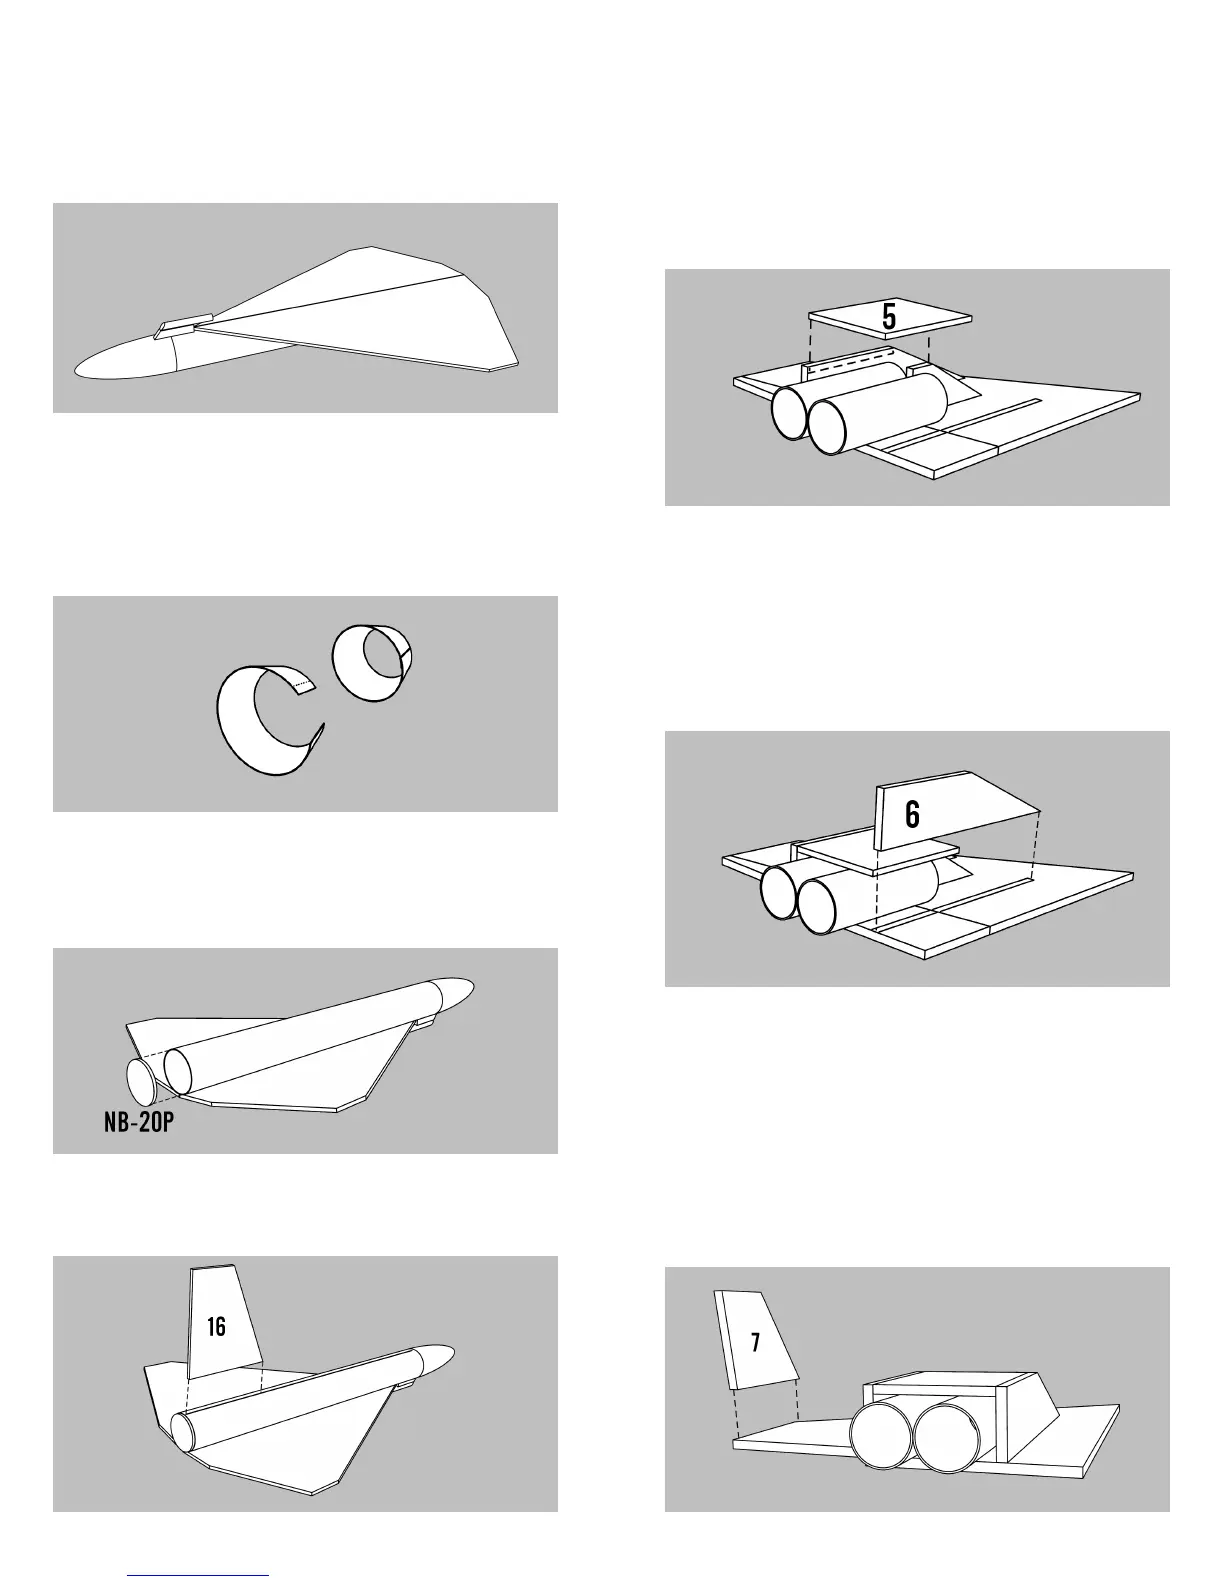
42. Cut out the nozzle shroud from the pat-
tern sheet. Form it into a cone and apply a small
amount of glue to the tab on one end as denoted by
the dotted line. Attach the free end over the glue so
its end is even with the dotted line and hold in place
until the glue sets.
43. Apply a small bead of glue around the
outside edge of the paper nose block (NB-20P) and
attach it to the end of the glider body tube. Align it
carefully and wipe away any excess glue.
44. Attach the glider rudder(16) on Line N on
the top of the glider body tube. Make sure it is per-
pendicular to the body tube and allow to dry.
41. Attach the hold-down assembly to the
bottom of the glider even with the leading edge of
the wing and perpendicular to the body tube. It will
project slightly over the nose cone.
7
11. Sand the leading edge of the inboard
housing (6) round. Apply a bead of glue along the
etched line on the main wing and along the edge of
the lower housing and the edge of the scramjet en-
gine and fit the inboard housing into place. All
these parts should make a rectangular box around
the two scramjet engines. Allow to dry.
10. Test the scramjet lower housing (5) for fit
against the scramjet engines and the housing parts.
Apply glue to the tops of the scramjet engines and
the outboard housing and the intake vane and fit
the lower housing in place. The back edge should
be even with the trailing edge of the main fin.
12 . Round the leading and trailing edges of
the wingtip (7). Glue the wingtip even with the tip
edge of the main wing on the same side as the
scramjet engine housing. Make sure it is perpen-
dicular and even with the edge. Allow the assembly
to completely dry. Repeat this assembly with the
second set of parts for the other main wing assem-
bly and allow it to dry while assembling the engine
mount.