EN - 5
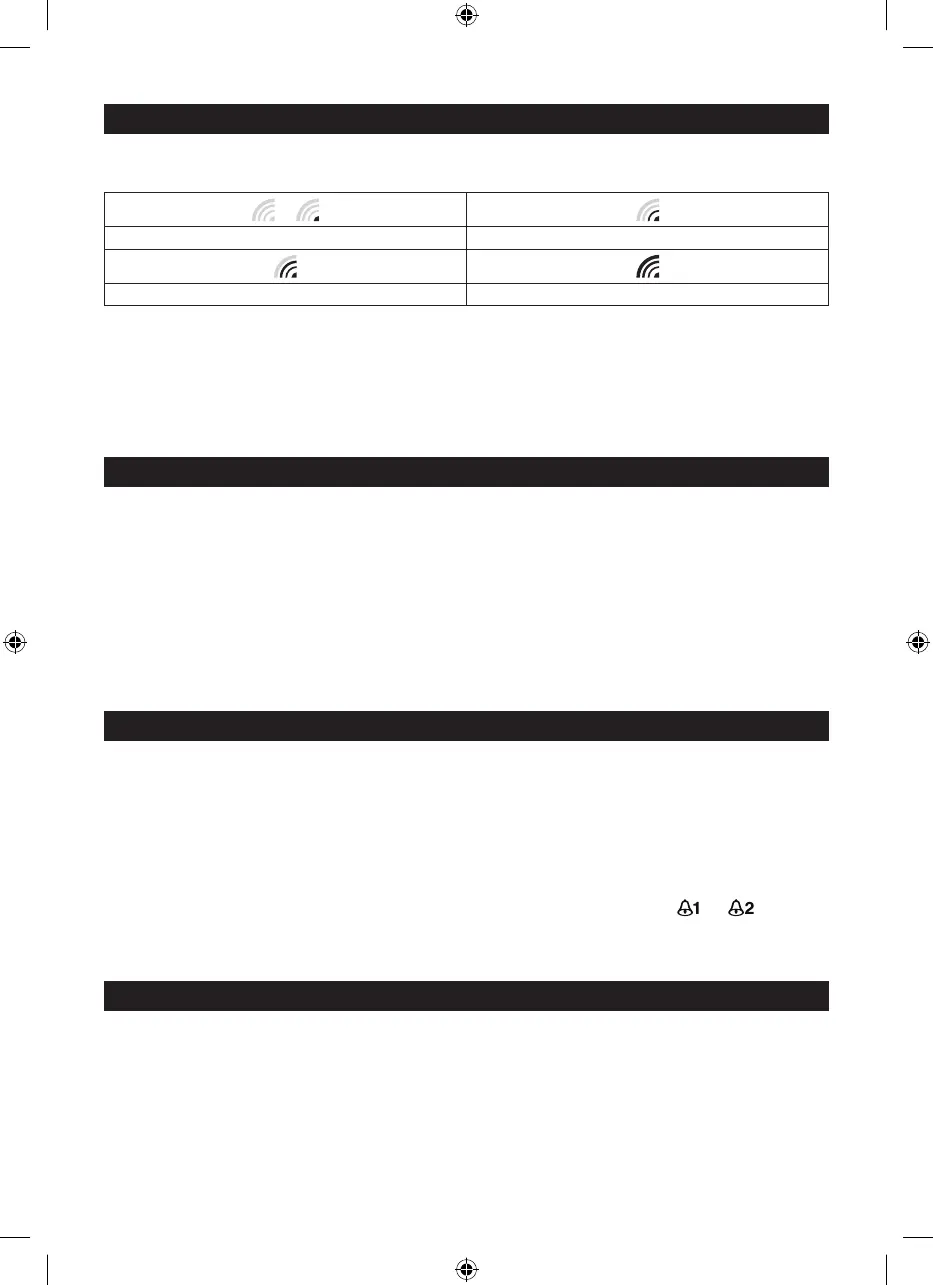
SIGNAL STRENGTH INDICATOR
The signal indicator displays signal strength in 4 levels. Wave segment fl ashing means time signals are being
received. The signal quality could be classifi ed into four types:
or
No signal quality Weak signal quality
Acceptable signal quality Excellent signal quality
NOTE:
1. Everyday the unit will automatically search for the time signal at 2:00am, 8:00am, 2:00pm and 8:00pm.
2. Always place the unit away from interfering sources such as TV set, computer, etc.
3. Avoid placing the unit on or next to metal plate.
4. Closed area such as airport, basement, tower block or factory is not recommended.
5. Do not start reception on a moving article such as vehicle or train.
MANUAL TIME SETTING
If you are out of the reach of the Radio Controlled Transmitter or if the reception is not reachable, the time can
be set manually. As soon as the transmitter is received again, the clock will automatically synchronize with
received time.
1. In normal time mode, press and hold [ TIME ] key for 2 seconds to enter the year setting.
2. Press [ UP ] or [ 12/24 / DOWN ] key to set the desired value.
3. Press [ TIME ] key again, Month digit fl ashes, press [ UP ] or [ 12/24 / DOWN ] key to change its value.
4. Repeat the above operation to set the time in this order: Year > Month > Date >Hour > Minute > Second >
Language.
5. Press [ TIME ] key to save and exit the setting or let it exit automatically 30 seconds later without pressing
any key.
ALARM AND SNOOZE SETTING
1. In normal time mode, press [ TIME ] key to select the ALM 1 or ALM 2.
2. In ALM 1/ALM 2 mode, press and hold [ ALARM ] key for 2 seconds until alarm Hour digit fl ashes.
3. Press [ UP ] or [ 12/24 / DOWN ] key to change the value.
4. Repeat the above operations to set time in this order: Hour > Minute
5. Press [ ALARM ] key to save and exit the setting, or let it exit automatically 30 seconds later without
pressing any key.
NOTE:
1. The alarm will be automatically turned on when you set the alarm time with the icon “ ” or “ ” displayed.
2. The dual-alarm (ALM 1&ALM 2) design of this unit will provide you with more convenience, and you can
set two-alarm time if needed.
USING ALARM FUNCTION
1. Set the alarm time as described in the previous section.
2. In normal time mode,press [ ALARM ] key once to turn on ALM 1, press it twice to turn on ALM 2, press
it thrice to turn on both ALM 1 and ALM 2, with the bell icons display on the LCD. Press it again to turn off
both ALM1 and ALM2, with the icons disappearing.