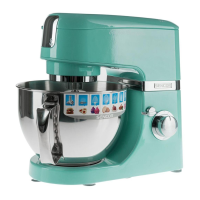
This document describes the SENCOR STM 6377CH / STM 6378BK Food Processor, a versatile kitchen appliance designed for household use.
Function Description
The SENCOR Food Processor is a multi-function kitchen machine capable of performing various tasks including beating, whipping, kneading, meat grinding, blending, grating, and slicing.
Main Unit (A):
- A1 Button for releasing the meat grinder from the front attachment hub: Facilitates easy removal of the meat grinder.
- A2 Removable cover of the front meat grinder attachment hub: Protects the front attachment hub when not in use.
- A3 A-shaped beater: Ideal for beating light and medium heavy yeast-free doughs, preparing sauces, creams, and fillings. Not suitable for heavy doughs.
- A4 Balloon whisk: Used for whisking whole eggs, egg whites, whipped cream, and foamy creams. Not for beating or kneading doughs.
- A5 Kneading hook: Designed for kneading various types of doughs, including heavy and thick doughs like bread dough, pizza dough, and fresh pastry doughs.
- A6 Removable cover of the top blender attachment hub: Covers the blender attachment point.
- A7 Tilt-out multi-function head: Allows for easy attachment and removal of accessories. Features an LED light that turns on automatically when connected to power and during operation.
- A8 Attachment hub for mounting attachments A3-A5: The primary connection point for beating, whipping, and kneading tools.
- A9 Bowl cover with a hole for adding ingredients: Prevents splashing and allows for adding ingredients during operation.
- A10 4.5-litre stainless steel bowl: The main mixing bowl for various preparations.
- A11 Base unit: The stable foundation of the appliance.
- A12 Speed control knob: Offers gradual speed settings (MIN-1-2-3-4-5-6-MAX), a pulse level (PULSE) for short bursts of maximum speed, and an OFF position to turn off the appliance.
- A13 Multi-function head release lock: Secures the multi-function head in either the tilted-out or horizontal working position.
- A14 Anti-slip feet: Ensures stability during operation.
- A15 Lid: Used for short-term storage of processed ingredients in the stainless steel bowl A10.
Meat Grinder Accessories (B):
- B1 Pusher: Safely pushes ingredients through the feed tube.
- B2 Stainless steel hopper: Holds ingredients before grinding.
- B3 Feed tube: The channel through which ingredients enter the grinding chamber.
- B4 Grinding chamber: Houses the grinding mechanism.
- B5 Screw shaft: Drives ingredients through the grinding plates.
- B6 Grinding blade: The cutting component for meat.
- B7 Screw ring: Secures the grinding plates and blade.
- B8 Fine grinding plate: For finely ground meat.
- B9 Medium fine grinding plate: For medium-fine ground meat.
- B10 Coarse grinding plate: For coarsely ground meat.
- B11 Separator: Used in conjunction with the sausage stuffer and cookie maker.
- B12 Sausage stuffer attachment: For making sausages.
- B13 Moulder: Part of the kebab maker attachment.
- B14 Conical attachment: Part of the kebab maker attachment.
- B15 Cookie maker: For shaping cookies.
- B16 Cookie maker holder: Secures the cookie maker.
- Note: Parts B11-B14 are contained inside the pusher B1. Certain models may only include B8 and B10.
Blender Accessories (C):
- C1 Inner cap of the blending jar: Seals the opening in the outer lid.
- C2 Outer lid of the blending jar with a hole for adding ingredients: Covers the blending jar and allows for adding ingredients during operation.
- C3 Handle: For easy handling of the blending jar.
- C4 Glass blending jar with 1.5l capacity: The main container for blending.
- C5 Cuff: Connects the blade assembly to the blending jar.
- C6 Blade assembly: The cutting mechanism for blending.
Grating and Slicing Attachment (D):
- D1 Pusher: Safely pushes ingredients into the feed tube.
- D2 Feed tube: The channel for ingredients.
- D3 Grating cone chamber: Houses the grating cones.
- D4 Locking pin: Secures the grating cone to the chamber.
- D5 Very fine grating cone: For very fine grating.
- D6 Fine grating cone: For fine grating.
- D7 Coarse grating cone: For coarse grating.
- D8 Thin slice cut cone: For thin slicing.
- D9 Thick slice cut cone: For thick slicing.
- D10 Chute for directing grated food into a container: Directs processed food into a collection container.
Important Technical Specifications
- Rated voltage range: 220-240 V
- Rated frequency: 50/60 Hz
- Rated power input: 1000 W
- Noise level: 85 dB(A) (acoustic power level A with respect to a reference acoustic power of 1 pW).
- Stainless steel bowl capacity: 4.5 litres
- Glass blending jar capacity: 1.5 litres
- Maximum continuous operating time: 10 minutes (general), 5 minutes (kneading mode), 2 minutes (blender). Allow 30 minutes to cool down before restarting after maximum operating time.
- Maximum load for light dough: 2.2 litres
- Maximum load for thick/heavy dough: 0.8 litres
- Maximum number of egg whites for whisking: 12 pcs
- Maximum hot liquid temperature for blending: 55 °C
Usage Features
General Operation:
- Always place the appliance on an even, dry, and stable surface.
- Ensure the multi-function head A7 is tilted down and locked in the horizontal position before operation.
- The safety mechanism prevents the motor from starting if the multi-function head is tilted out.
- In case of tilting during operation, the appliance automatically stops. To resume, set the speed control knob A12 to OFF and then re-select the desired speed.
- Avoid touching rotating parts and keep clothing, hair, and foreign items away.
- If ingredients stick, turn off, disconnect, wait for parts to stop, and use a silicone spatula to clean.
- The pulse mode (PULSE) provides maximum speed for short bursts.
- The LED light on the multi-function head A7 turns on automatically when connected to power and during operation, turning off after 2.5 minutes of inactivity.
Beating, Whipping, and Kneading:
- Select the appropriate attachment (A3, A4, or A5) based on the task.
- Insert the stainless steel bowl A10 and secure it by turning clockwise.
- Attach the bowl cover A9.
- Mount the chosen attachment to the hub A8 and secure it by turning anticlockwise.
- Add ingredients to the bowl A10.
- Use the speed control knob A12 to set the desired speed, gradually increasing it.
- Do not exceed recommended maximum loads (e.g., 2.2L light dough, 0.8L heavy dough, 12 egg whites).
- For whipping egg whites, ensure the bowl and whisk are perfectly clean and dry, and the cream is cooled to 6°C.
Meat Grinding:
- Assemble the meat grinder components (B5, B6, B8/B9/B10, B7, B2) into the grinding chamber B4.
- Attach the assembled meat grinder to the front attachment hub (A2 removed) at a 45° angle, then turn anticlockwise to secure.
- Prepare meat by removing bones, tendons, cartilage, and cutting into 2x2x6 cm pieces. Do not process frozen meat.
- Place a container under the meat grinder.
- Use the pusher B1 to feed meat through the tube B3. Do not use fingers or other items.
- Do not process more than 5 kg of meat per batch.
Sausage Stuffing:
- Assemble the meat grinder with separator B11 and sausage stuffer B12 instead of grinding plates and blade.
- Prepare sausage casing by soaking in lukewarm water.
- Feed ground meat mixture through the hopper B2 using the pusher B1, guiding the casing onto the attachment B12. Moisten the casing if it sticks.
Kebab Making:
- Assemble the meat grinder with moulder B13 and conical attachment B14 instead of grinding plates and blade.
- Feed prepared kebab meat mixture through the hopper B2 using the pusher B1 to form hollow meat tubes.
Blending:
- Assemble the blending jar C4 with outer lid C2 and inner cap C1.
- Remove the top blender attachment hub cover A6.
- Place the assembled blending jar onto the top hub and secure it by turning in the direction of the symbol.
- Add ingredients to the blending jar C4. Cut larger pieces in advance.
- Do not exceed 1.5L capacity or the maximum mark, especially for hot liquids (max 3/4 capacity).
- Use the speed control knob A12, starting with a slower speed and increasing as needed.
- For thick liquids, use the pulse mode.
- Hot liquids up to 55°C can be processed. Do not remove the inner cap C1 when blending hot liquids.
- If food sticks, turn off, disconnect, wait for parts to stop, remove the jar, clean with a plastic spatula, and reattach.
Grating and Slicing:
- Select the desired grating cone (D5-D9) and insert it into the chamber D3, securing it with the locking pin D4. Attach the chute D10.
- Attach the assembled grating/slicing attachment to the front attachment hub (A2 removed) at a 45° angle, then turn anticlockwise to secure.
- Prepare ingredients by cutting them into pieces that fit the feed tube D2. Remove hard kernels or stones. Do not process frozen food, nut shells, coffee beans, or hard fruit stones.
- Use the pusher D1 to feed ingredients. Do not use fingers or other utensils.
Maintenance Features
Cleaning:
- Always switch off the appliance and disconnect it from the power socket before cleaning.
- Disassemble the food processor into individual parts and wait for moving parts to stop.
- Thoroughly wash all removable parts that come into contact with food using warm water and a neutral kitchen detergent. Rinse under clean running water and wipe dry or allow to air dry.
- Metal parts of the meat grinder (B6, B8-B10), blade assembly (C6), and attachments A3-A5 are NOT dishwasher safe. Other removable parts may be washed in a dishwasher.
- After washing and drying, coat the grinding blade B6 and grinding plates B8-B10 with cooking oil.
- When handling grating cones (D5-D9), grinding blade (B6), and blender blade assembly (C6), be very careful due to sharp edges.
- For egg whites, rinse the bowl A10 and beater A4 under cold water first to prevent hardening of residues.
- Clean the blending jar C4 by filling with 0.5L clean water and a few drops of detergent, running for 10-15 seconds, then rinsing. For thorough cleaning, the cuff C5 with blade assembly C6 can be removed using a special wrench (ordered separately).
- Clean used grating cones D6-D9 in hot water and neutral kitchen detergent, then rinse and wipe dry.
- Clean the base unit A11 and multi-function head A7 with a cloth lightly dipped in a weak detergent solution, then wipe with a clean dampened cloth and dry.
- Do not use solvents or abrasive cleaning agents.
- Do not submerge the food processor or its power cord in water or any other liquids.
Storage:
- Store the appliance in a clean, dry place, out of children's reach.
- Ensure the multi-function head A7 is tilted down into the horizontal position during storage.
Safety Instructions:
- This appliance is not for use by children. Keep it and its power cord out of reach of children.
- Persons with reduced physical, sensory, or mental capabilities, or lack of experience/knowledge, may use it if supervised or instructed and understand potential dangers.
- Children must not play with the appliance.
- User cleaning and maintenance must not be performed by unsupervised children.
- If the power cord is damaged, have it repaired at a professional service center. Do not use if the power cord is damaged.
- Incorrect use may lead to injuries.
- Always turn off and disconnect from the power socket when not in use, before assembly, disassembly, cleaning, or moving.
- Before replacing accessories or moving parts, turn off and disconnect the appliance.
- Do not attempt to repair the appliance yourself. Have all repairs performed at an authorized service center.