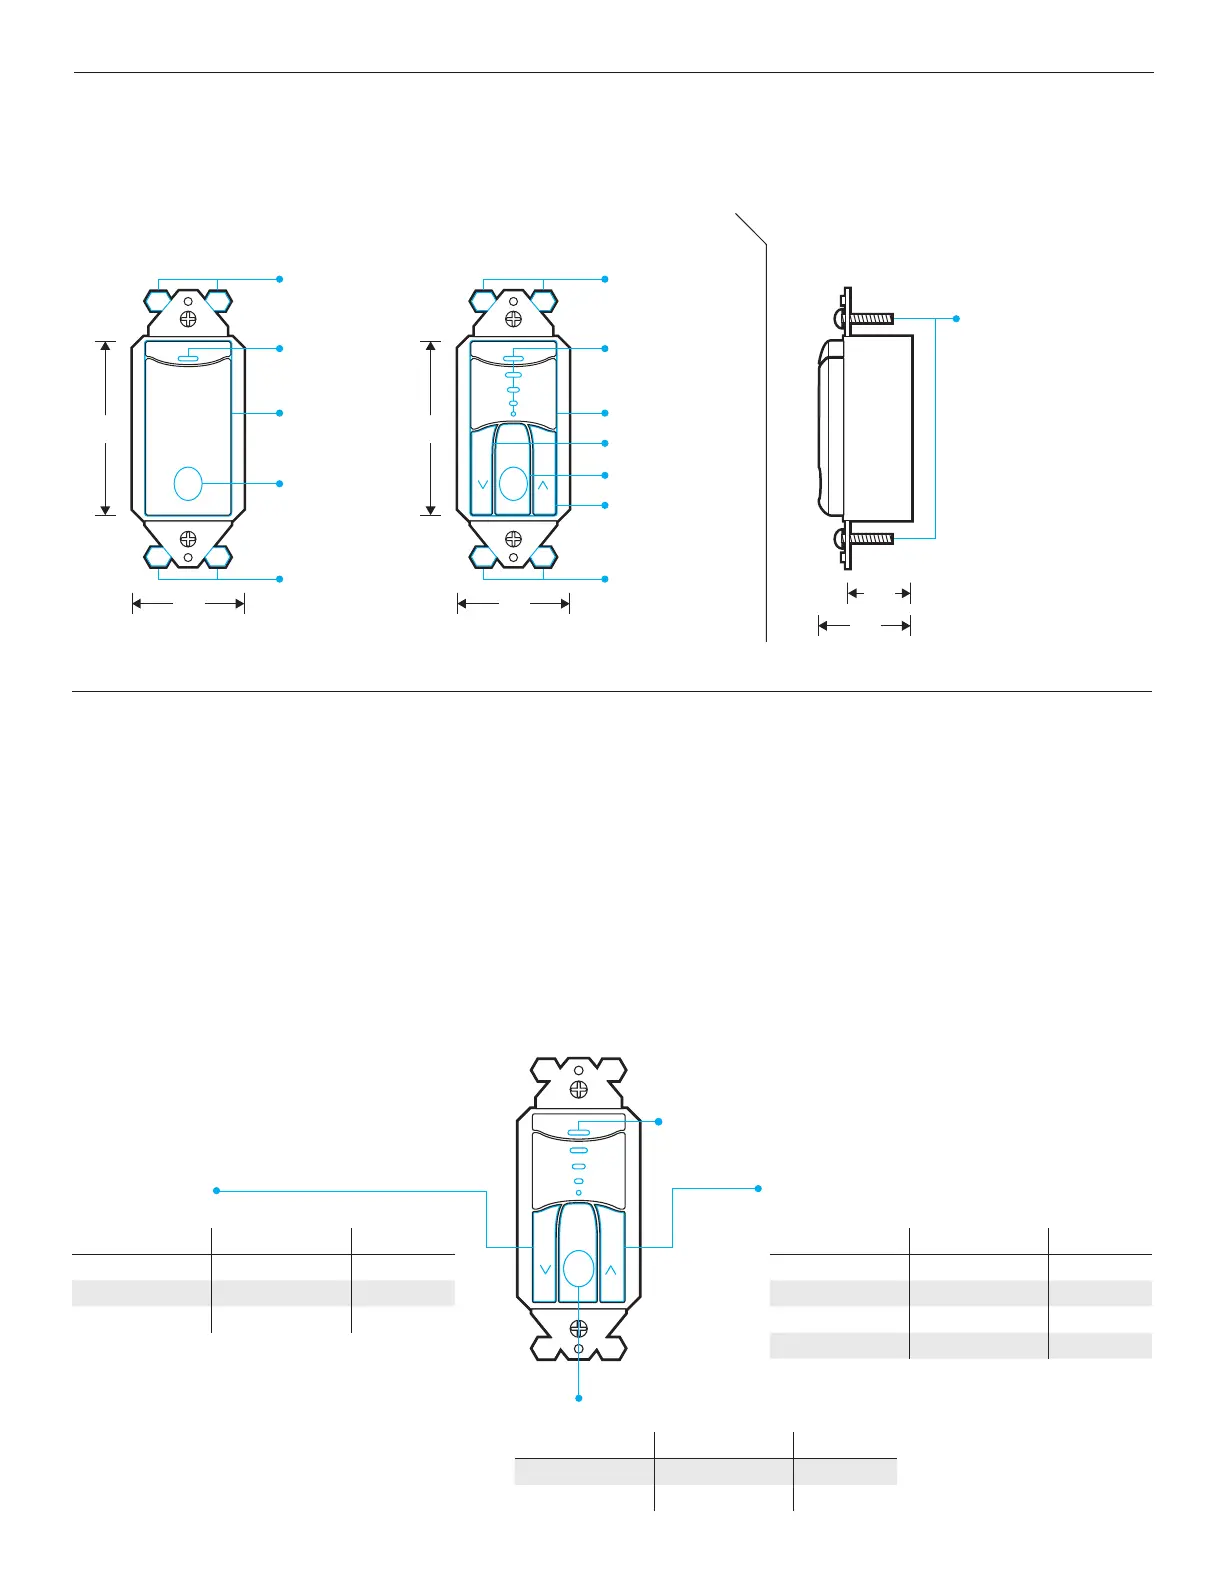
FRONT SIDE
BREAK-OFF
BRACKET EARS
BREAK-OFF
BRACKET EARS
LED INDICATOR
BUTTON
SENSOR FACE**
2.74”
SUPPLIED MOUNTING SCREWS
FOR MOUNTING TO
SINGLE GANG SWITCH BOX
1.39”
0.94”
1.69”
BREAK-OFF
BRACKET EARS
BREAK-OFF
BRACKET EARS
5 LED INDICATORS
RAISE
ON/OFF BUTTON
LOWER
SENSOR FACE**
2.74”
1.69”
** SENSOR FACE IS FIELD REMOVABLE IN ORDER TO CHANGE COLORS. CONTACT FACTORY FOR ADDITIONAL FACES
INSTALLATION
Designed to mount in 1-gang wall box with 3.28” hole spacing. Units can also share multiple gang wall boxes with other devices.
** SENSOR FACE IS FIELD REMOVABLE IN ORDER TO CHANGE COLORS. CONTACT FACTORY FOR ADDITIONAL FACES
CONFIGURATION SETTINGS
CONFIGURATION PROGRAMMING
1 From the lists of Conguration Functions below, note the Button Position and number (#) of the Function to be changed. For example, HIGH TRIM setting is the Right Button, #3.
2 Enter programming mode by pressing and holding the CENTER button until the blue LED begins rapid ashing.
3 Press and release the applicable button for the chosen function. For example, press the RIGHT button 3 times for the HIGH TRIM setting.
4 The LED will ash back the setting number of the current value as it appears in each function’s detailed table of values (see following pages). For example, the default HIGH TRIM is
setting #2 (10V) for the RIGHT button.
5 Press and release the applicable button the number of times equal to the new setting #. For example, RIGHT button 3 times (for 9V).
6 The LED will ash back the new setting number as conrmation.
7 To save and exit programming mode, press and hold the function’s applicable button again until the LED ashes rapidly. The LED will then blink white twice as conrmation of success.
NOTE IF THE LED DOUBLE FLASHES TWICE BLUE AT ANY POINT, REPEAT THE ABOVE PROCEDURE.
CENTER BUTTON
FUNCTION NAME BUTTON POSITION FUNCTION #
LED Center 7
Factory Reset Center 8
LEFT BUTTON
DIMMING
FUNCTION NAME BUTTON POSITION FUNCTION #
Turn Off Scheme Left 2
Low Trim Left 3
Fade Off Time Left 4
RIGHT BUTTON
DIMMING
FUNCTION NAME BUTTON POSITION FUNCTION #
Turn On Dimming Level Right 2
High Trim Right 3
Fade On Time Right 4
Dimming Curve Type Right 5
CONFIGURATION FUNCTIONS
5 LED INDICATORS
 Loading...