9 Eliminator V2-C M-03-17
SERVICING
Sentinel recommend that cleaning is carried out during the annual system
service.
Step 1:
Ensure heating system is turned off and allowed to cool prior to commencing
clean.
Step 2:
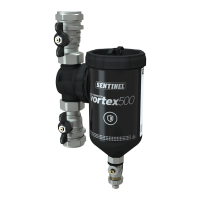
Squeeze to disengage magnetic tray, as per Figure 9.
Step 3:
Place suitable container under drain valve, as per Figure 10. Open drain valve
(see page 8). Close drain valve and re-engage magnetic tray. There is also an
option to clean by opening the bin.
Optional Removal of Bin
Close both isolation valves, allow drain water to stop flowing. Unscrew bin
to carry out thorough clean, as per Figure 11. After cleaning, replace bin and
tighten by hand. Close drain valve, re-engage magnetic tray, and open both
isolation valves to fill filter and release any trapped air using the bleed valve
(see page 8).
It is recommended after a filter flush to carry out an inhibitor test such as
Sentinel X100 Quick Test and top up with Sentinel X100 Inhibitor if required.
Eliminator Instructions V1-CM (14-03-17) (inc Spanish).indd 9 14/03/2017 14:20
 Loading...