A
cnurtont
Because abuse
will cause burns
and fire.
Please strictly comply
with the
following matters;
a
Please avoid abusing
the soldering
iron,
should
operate
according to the
working
instruction.
aDo not
touch the metal
parts
of
the soldering iron.
a
Do not use the soldering
iron nearby the
combustible.
a Notice
staffs that the soldering
nozzle is easy
to cause burn or other
dangerous accidents,
so
please
turn off the
powei
after
getting
off
work.
oBefore
replace soldering
nozzle,
please
confirm
the
power
is
shut
off and the nozzle
is cool.
a
lt
is
strictly
prohibited
to
use
the
product
when
any damage, especially
the
power
cord
damages.
o
This
product
uses three
lines
ground-plug
which must insert the
three hole socket.
Prohibit
changing
the
plug
or using
not
ground-plug
adapter
which results bad
ground
connection. lf
want to extend
wire,
please
use the three
lines
ground-
power
cord.
aPlease
don't knock
the
soldering
iron on the
table to clear the
residual tin slag on
iron. Because
thus doing shall
result in serious damage
to the soldering iron.
aPlease
don't replace
the solder iron without authorization.
o
lt is suggested that
replace
parts
with the original
accessories.
a
Don't
get
the solder
iron wet. Please do not use
or take apart the solder
iron and
pull
the cord
a
lt is suggested to
work in
good
ventilation environment,
or
providing
small fans by
yourselves
owing
to the soldering
iron will
produce
smoke
when soldering.
a Prohibit
making any damage
to body or objects
when use
the
soldering
iron.
oChildren
don't know
the
danger
of solder
iron, so this
product
should
be
placed
where children
are
not easy contact or used
and storage where
providing
admitted
supervision.
Use
numerical control
constant temperature
welding
table
I
. Boot Operation
1. Power-on.
Please remember to use
groundi
2. Turn on
power
switch of main
machine: ON
ll
.
Setup Function
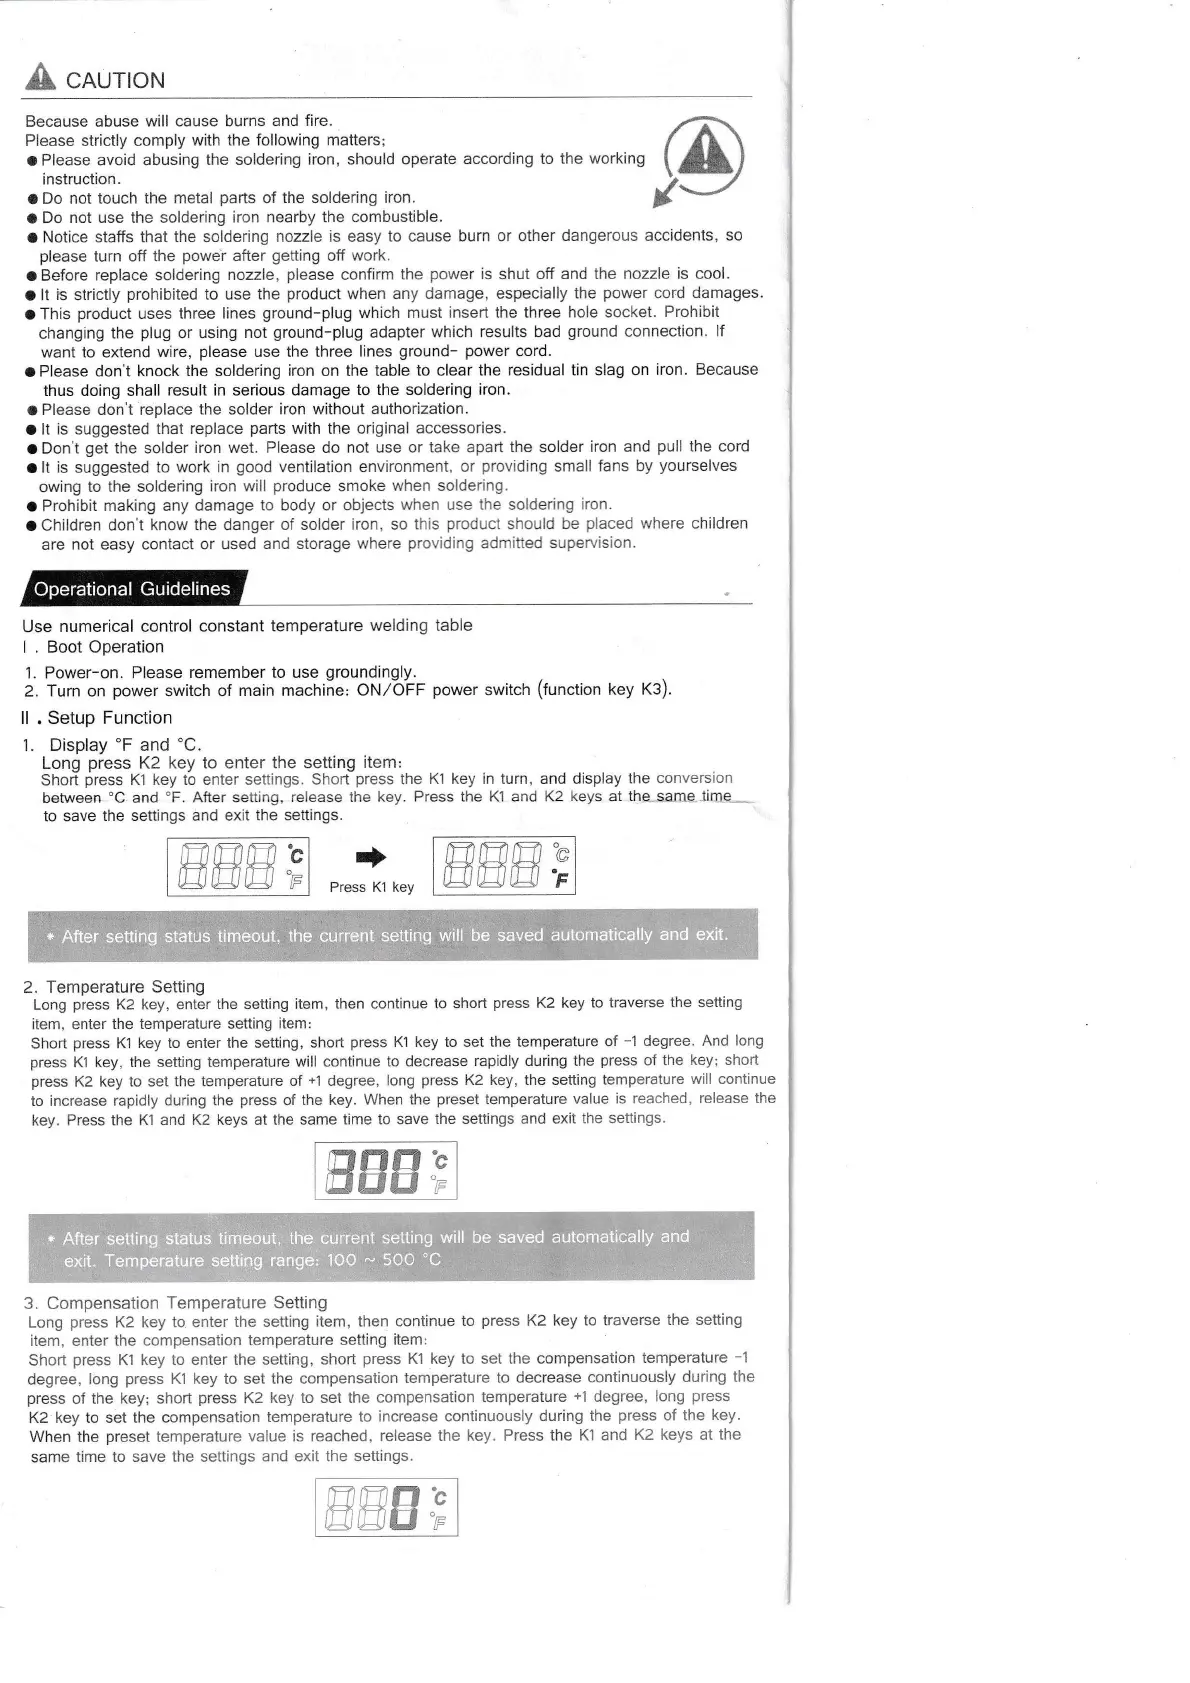
Display'F and
'C.
Long
press
K2 key to enter the setting
item:
Short
fress
K1 key tb enter settings.
Shorlpress the
K1 key in turn, and display
the conversion
between'C and'F.
After setting,
release the key.
Press the
KI
and K2 keys at
tha-same.time--
to save
the settings and
exit the settings.
)fl'r'a
oo*"r.
switch
(function
key
K3)
+
Press K1 key
2. Temperature
Setting
Long
press
K2 key, enter
the setting item, then
continue to short
press
K2 key
to traverse
the setting
item, enter
the temperature setting
item:
Short
press
K'1
key to enter the setting,
short
press
Kl key to set
the temperature of
-1 degree.
And long
press
Kl
key, the setting temperature
will continue
to decrease
rapidly during the
press
of
the key; short
press
K2
key
to set the temperature
of
+1
degree,
long
press
K2 key, the setting
temperature
will continue
to increase
rapidly during the
press
of the key.
When the
preset
temperature
value
is reached,
release the
key. Press the
K1 and K2 keys at the same
time to save
the settings and
exit the
settings.
ffitffiffi'c
ElInffi
"p
,mlm,f7'e
mmm.;
mmnb
HNEI'r
3. Compensation
Temperature
Setting
Long
press
K2 key to enter
the setting
item, then continue
to
press
K2
key to traverse
the setting
item, enter the compensation
temperature
setting
item:
Short
press
K'l
key to enter the setting,
short
press
Kl key to set
the compensation
temperature -1
degree, Iong
press
Kl key to set
the compensation
temperature to decrease
continuously
during
the
press
of the
key; short
press
K2
key to set the compensation
temperature
+1
degree,
long
press
K2 key to set the
compensation
temperature to
increase continuously during
the
press
of the
key.
When the
preset
temperature
value is reached,
release the key. Press
the Kl and
K2 keys at the
same
time to save the settings
and exit the seftings.
Operational
Guidelines
I
will be saved
I
*,Atteisiittin';statrst
l'ieott!,ithitaunay]islitinS
witl be saved
automatically
and exit.
 Loading...