This document is a user manual for the SereneLife SLFPS3 Propane Gas Fire Pit Table.
Function Description:
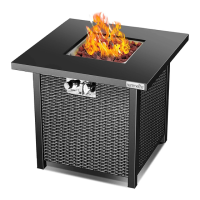
The SereneLife SLFPS3 is a 28-inch, 40,000 BTU square gas fire pit table designed for outdoor use. It provides an adjustable flame height and creates an elegant atmosphere in gardens, terraces, balconies, or backyards. The unit is intended for use with propane gas only and comes with a cover for outdoor protection. It is not convertible to natural gas. The fire pit table includes a stainless steel fire pan, a 201 SS burner, and a control panel. It is designed for easy assembly by two persons and is CSA certified and approved for safe operation. The unit is constructed with sturdy metal for durability and weather resistance, ensuring long-term use.
Important Technical Specifications:
- Model: SLFPS3
- Dimensions (L x W x H): 28" x 28" x 24.5"
- Heat Output: 40,000 BTU
- Fuel Type: Liquid Propane
- Propane Tank Compatibility: LP propane tanks with dimensions: diameter 12 in, height 18 in - capacity 20 lbs. (Propane tank not included). Must have a collar to protect the gas valve. DO NOT fill tank over 80 percent full. Tank system must be set up for vapor withdrawal.
- Gas Supply: Maximum 250 psi; Minimum 10 psi.
- Manifold Pressure: 11 inch w.c. (2.74kPa)
- Regulator Valve with Gas Hose Length: 19.7 inches (500mm)
- Ignition Type: Pulse igniter
- Battery Type: (1) x 'AA' Battery (not rechargeable)
- Construction Material: Metal +201 SS Fire Pan
- Included Accessories: 1 pc. Independently Metal Table Top, 6.6 lbs. Decorative lava rock set, PVC Cover, Steel Cover Lid.
- Clearance Requirements:
- Combustible material should not be within 60 inches of the top of the unit.
- Combustible material should not be within 48 inches around the entire unit.
- Keep gas tank at least 5 feet away from unit when lit (if external tank).
Usage Features:
- Outdoor Use Only: This product is strictly for outdoor use in a ventilated space and must not be used in any enclosed area.
- Propane Gas Only: Exclusively designed for use with propane gas. Do not attach a remote gas supply.
- Ignition: Features an electric igniter. To light, ensure the control knob is in the "OFF" position, slowly open the valve on the propane gas tank, push the ignition control knob in fully, and rotate it counter-clockwise about 1/4 turn until a click is heard. Hold the knob down for 15 seconds once lit. If ignition fails, release the knob, rotate to "OFF," wait 5 minutes for gas to clear, and repeat.
- Flame Adjustment: The flame height can be adjusted by turning the control knob clockwise or counter-clockwise. Flame height should be a yellow/blue color between 2-10 inches.
- Lava Rocks/Fire Glass: Do not exceed 1/4" depth of lava rocks/pumice stones/LavaGlass above the burner holes to prevent suffocation of the flame and gas pooling. Ensure lava rocks are completely dry before igniting to prevent cracking. Keep away from the firebowl for the first 20 minutes after initial ignition as rocks may pop out. Do not cover the ignition screen when placing lava rocks.
- Safety Precautions:
- Always ensure all parts are fully assembled before operation.
- Do not move the unit while hot or in use.
- Never leave the unit unattended while in use.
- Not intended for cooking.
- Keep flammable items away.
- Maintain a safe distance to avoid burns.
- Do not sit or rest hands/feet on the unit.
- Keep electrical cords and fuel supply hose away from heated surfaces.
- Do not add water into the unit.
- If the unit has been submerged in water, do not operate; call a qualified service technician.
- Do not disconnect any part while the unit is in use.
- Do not store a spare propane tank on or near the unit.
- If storing the heating unit indoors, detach the propane tank and leave it outdoors.
- Always remove the protective cover before operating.
- Do not set the protective cover over the unit until it is turned off and completely cooled down.
- Children should never operate this unit and must be supervised when near it.
- The gas hose needs to be straightened during use to prevent melting and fire.
- Leak Test: Before first use and after long periods of disuse, perform a leak test. Connect the propane gas tank, turn the unit valve to "off," apply a soap and water mixture to all connections, then turn on the gas supply. If bubbles appear, there is a leak. Turn off the gas, disconnect the tank, and do not use until repaired.
Maintenance Features:
- Regular Inspection: Inspect all elements of the heating unit before each use. If there is damage, the burner must be replaced. The appliance should be inspected before use and at least annually by a qualified service person.
- Cleaning:
- Keep the appliance area clear and free from combustible material, gasoline, and other flammable vapors and liquids.
- Visually inspect the burner for obstructions and keep the tank enclosure free of debris.
- Use a soft brush to remove mild stains, loose dirt, and soil after the burner and pumice stones/lava rocks/LavaGlass have cooled down. Wipe down with a soft cloth.
- More frequent cleaning may be required as necessary. The control compartment, burners, and circulating airways must be kept clean.
- Storage:
- Always disconnect the propane gas tank before performing any maintenance or storing the unit.
- Store the product indoors during winter months to prevent exposure damage from extreme cold temperatures.
- Keep the heating unit stored away from direct sunlight.
- Always place the lid or protective cover on the heating item when not in use.
- Hose Care: Keep the hose out of pathways to eliminate accidental damage (if using an external tank).
- Parts Replacement: Only use the regulator and hose assembly provided. Replacement parts must be supplied directly by the manufacturer. Not using manufacturer-approved parts may void the warranty.
- Troubleshooting: The manual includes a troubleshooting guide for common issues such as the heating unit not lighting, the burner not lighting with a match, sudden drops in gas flow, and flame blowing out easily. Solutions include checking battery insertion, reconnecting wires, tightening regulator connections, clearing burner ports, and straightening kinked hoses.