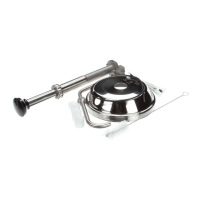
Page 5
During disassembly, collect small parts in
a container to prevent loss.
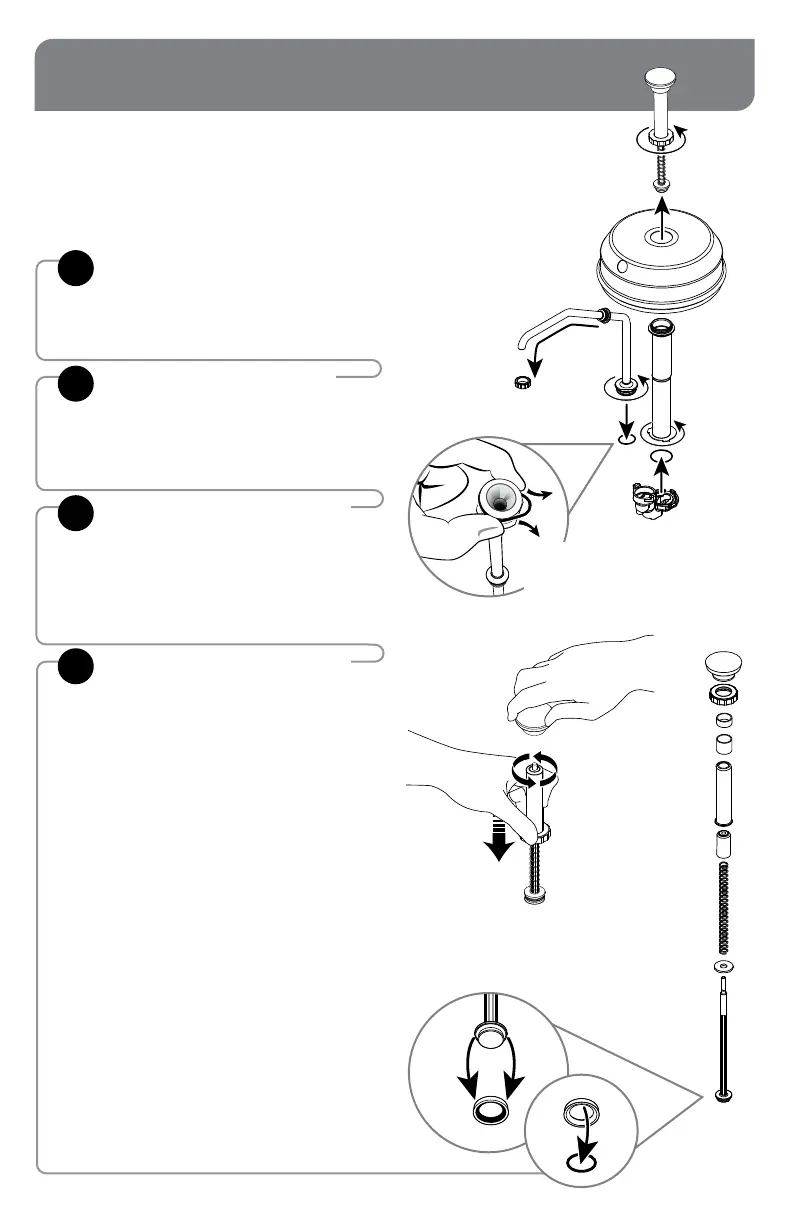
DISASSEMBLY
REMOVE PLUNGER & LID
Turn locking collar
(and discharge tube nut if used)
counterclockwise to loosen and remove.
1
REMOVE CYLINDER &
DISCHARGE TUBE
Twist each counterclockwise
to release from slots in valve body.
2
If pump has been in use, rst rinse and ush
pump. See PUMP CLEANING on page 3.
REMOVE LOCKING COLLAR
REMOVE GAGING COLLAR(S)
(if used).
REMOVE HEAD INSERT
from inside head tube.
REMOVE SPRING & WASHER
from piston.
REMOVE SEAL ASSEMBLY
from piston.
Pry off.
Do not use a sharp tool.
REMOVE O-RING
from inside seal.
DISASSEMBLE PLUNGER:
4
REMOVE KNOB
Prevent knob from springing off:
Press head tube towards piston base
while twisting knob off.
REMOVE BOTH O-RINGS
from the valve body and bottom of
discharge tube.
Do not use a sharp tool.
3
PINCH & PULL
to remove o-ring