3019 Alvin DeVane Blvd.
Ste. 560
Austin, TX 78741
Phone: (650) 965-8020
CORPORATION
®
TECH SUPPORT: 650-965-8020 ext. 703
Questions or technical issues? Please call:
Page of38
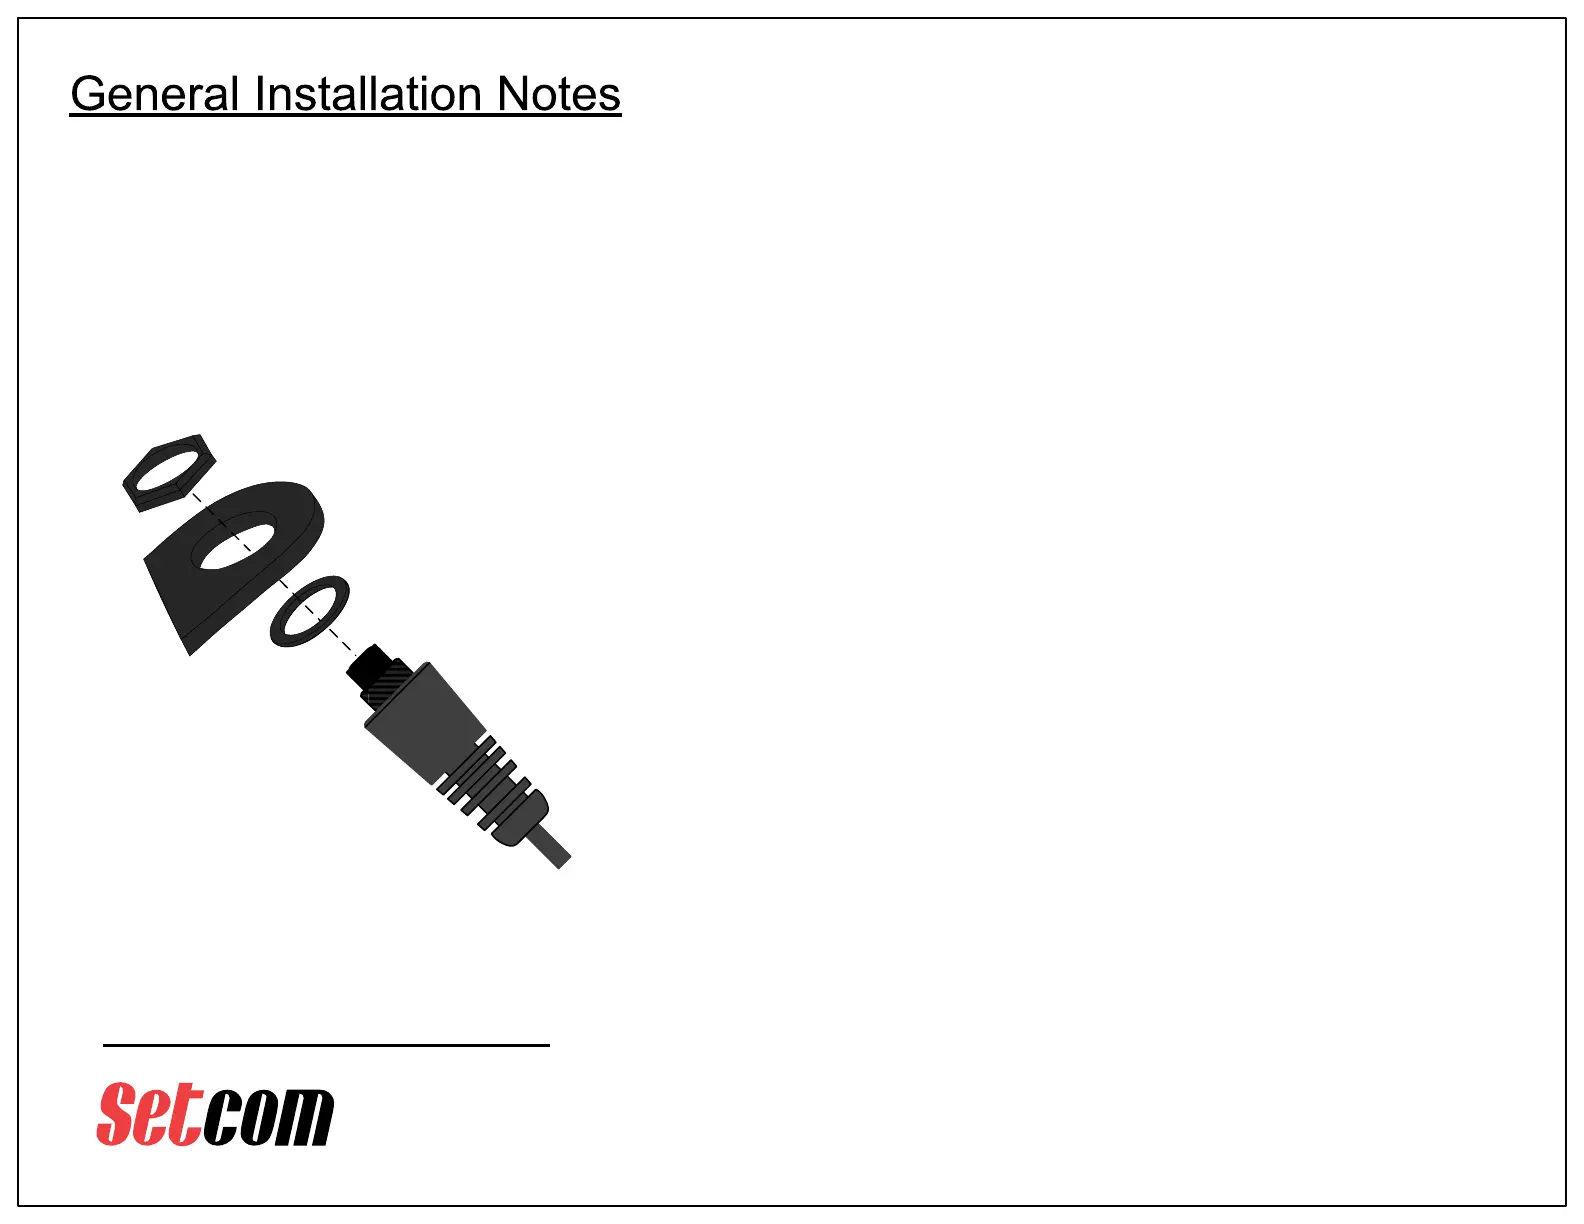
PTT Push-button Assembly Installation
(applies to all model numbers)
Use supplied hex nut
to secure pushbutton
switch to bracket
p/n 16-0001
Gasket
PTT
Subassembly
PTT
Bracket
Caution: Take care not to
scratch bracket when
securing hex nut.
The use of a non-marring
socket is recommended
Wiring:
The PTT pushbutton is usually hard-wired to the enclosure and only needs
to be mounted onto the included bracket (see diagram at left).
For the MWB15-31, installation only requires plugging a connector into the
motorcycle’s BCM unit.
DC Power wiring involves connecting the Green wire to a good ground point,
and the Red wire to a fused +12 VDC source (a 1A fuse is recommended).
The transmitter draws minimal power but it is recommended it be connected
to a switched DC source – Accessory power is typically used.
Checkout:
It is recommended to verify system operation before fastening down any
cabling or replacing any body panels that have been removed for access.
This requires a portable radio fitted with an SWE-xx or SWA-xx Supermic
and the cooperation of another radio operator for a radio transmission check.
Before completing the installation, it is important to make sure that any
cabling does not impair free movement of the handlebars, and that the
cabling will not be stretched, chafed, or broken by movement of the
handlebars or any other part of the motorcycle.
p/n HDWR 88
Hex Nut
MWx-31 Series_UserGuide_REV_B.pdf
 Loading...