12
142 x 208 mm
∙ The grill must not be used with any core thermometers
other than the ones supplied.
∙ No responsibility is accepted if damage results from
improper use, or if these instructions are not complied
with.
∙ This product complies with all binding CE labelling
directives.
Before using for the rst time
∙ Remove any packaging materials and stickers from the
appliance.
∙ Cleanthegrillrack,reectortray,thetrayinsertsand
wind-guard with warm soapy water; wipe thoroughly dry
afterwards.
∙ Assemble the appliance as described in Preparing the
unit.
∙ Let the grill heat up for approximately 10 minutes at
maximum power without any food (see ‘Boost-zone’
grilling). This will remove the smell typically encountered
whenrstswitchingonagrill.Alittlesmokemaybe
emitted; for that reason, adequate ventilation should
be ensured by opening windows or balcony doors; an
extractor hood is also suitable.
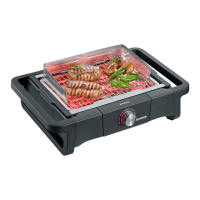
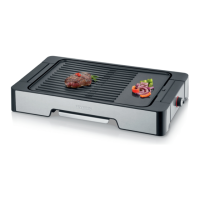
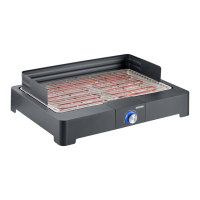
Grill assembly
∙ Assemble the grill as shown in the diagrams:
∙ Placethereectortrayintothegrillhousing.
∙ Note: Fit the tray inserts so that each insert covers
four protrusions.
∙ Fit the heating element with junction box into the
reectortray.Theapplianceisequippedwithasafety
switch. The unit can be operated only with the junction
box properly installed.
∙ Fit both grill rack elements so that the studs on the
racktintothecorrespondingopeningsinthereector
tray.
∙ Fitthewind-guardelementsrstattherearintothe
recesses on the grill rack, and then secure them on
the grill rack frame.
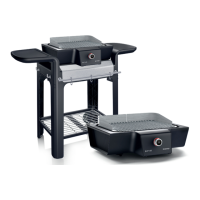
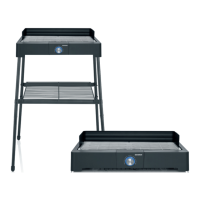
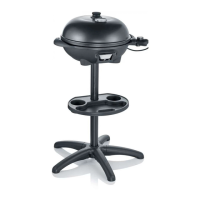
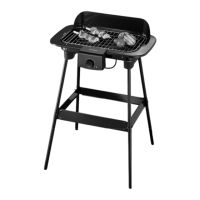
Grill cart assembly
∙ For grill models with grill cart, assemble the cart as
shown in the diagram.
∙ For assembly, a Phillips screwdriver is needed.
∙ Prior to assembly, check that all parts are complete as
listed in the Familiarisation section.
∙ Assembly:
∙ Placethegrillcartframeupside-downontheoor.
∙ Insert the four support legs into the housing and
secure each leg with two big bolts. The two support
legswithadditionalwheelopeningsarettedonthe
side without the stainless-steel hooks.
∙ Turn the frame with the support legs upright.
∙ Fit the plastic frame of the storage rack and secure it
on all four support legs, using the corresponding bolts
andnuts;thentthestoragerack.
∙ Slide the wheel axle through the openings on the
support legs and put on the wheels. Secure each
wheel with one of the cotter pins, and clip on the
wheel covers.
∙ Fit the side tables onto the corresponding metal pins.
∙ If required, hang the towel hooks on the stainless-steel
bar.
∙ Ensure that the grill cart is stable. Check the bolts
regularlyforrmconnection.
∙ Place the assembled grill on top.
Caution:
∙ Do not exceed a maximum load of 3 kg for the side
tables, and 20 kg for the storage rack.
∙ If you need to move the grill, remove the table on the
side opposite from the wheels and grip the frame.
Preparing the unit
∙ Assemble the appliance as described in Grill assembly.
For grill models with grill cart, refer to Grill cart
assembly.
∙ FillthereectortraywithwatertotheMax marking (max
2 litres). Do not pour water on the heating element or its
sensor.
Hint!
Duringgrilling,thewaterinthereectortrayshouldbe
replenished in good time. Caution: Always disconnect
theappliancefromthemainsbeforere-lling.
∙ Connect the appliance to the mains.
∙ The light ring lights up blue, the unit is ready for use.
Rotary control
The rotary control is used for function selection or switching
off (Sleep mode).
Turn:
Select the Function/Temperature/Timer.
Push - short:
Conrmtheselection.
Push - two seconds:
1 x: return to stand-by mode to change a function
2 x: return to sleep mode
Rotary control - light ring
The light ring indicates the current operating mode:
No light:
The unit is in sleep mode.
Blue light:
The unit is in stand-by mode.
Flashing:
The grill rack has not yet reached the selected temperature.
The unit is heating up or cooling down.
Steady:
The selected temperature has been reached.
Orange:
Grilling 80-320 °C
Red:
Boost-zone 330-500 °C