37
GB
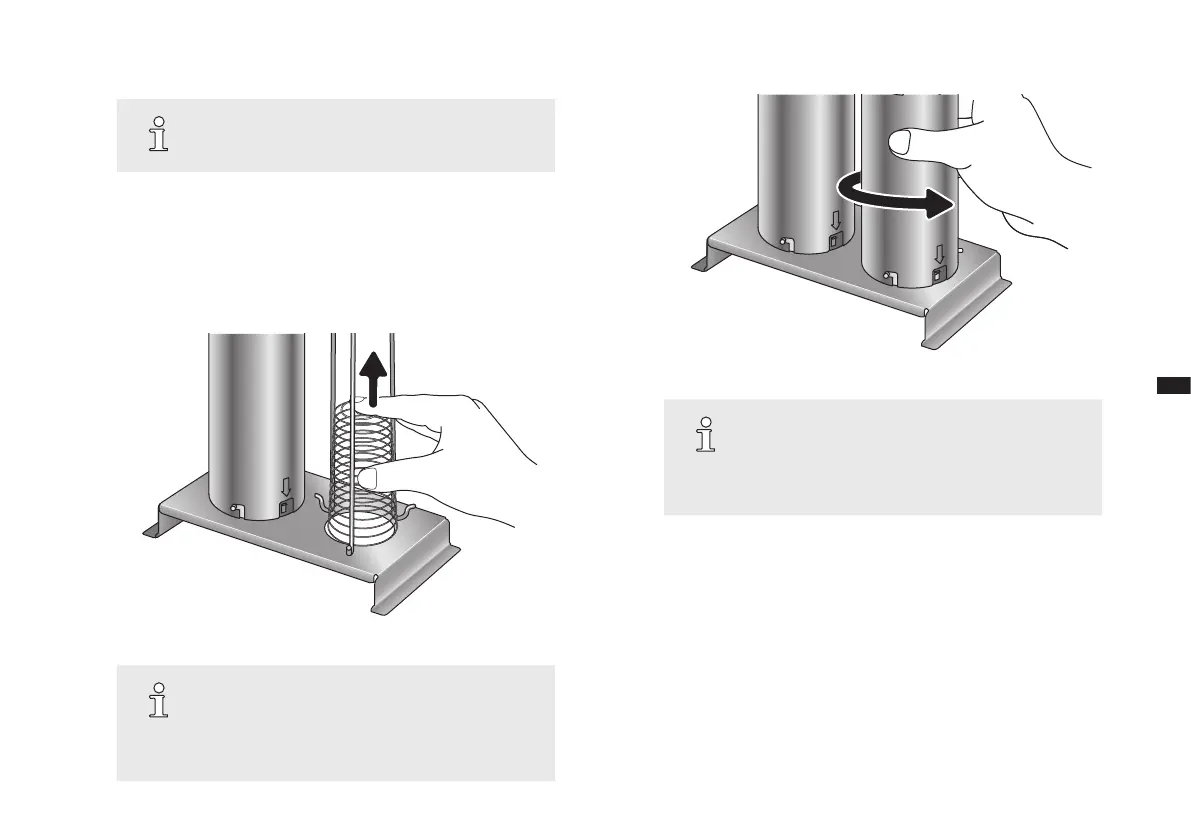
5. Remove the second reector and spring by following the same steps.
HINT:
If there is excessive dirt, we recommend using a
special grill cleaning agent.
6. Clean all ve parts (1 grill insert + 2 reectors + 2 springs) by rinsing
them thoroughly, or in the dishwasher.
7. Ensure that all components are properly dried afterwards.
8. If you have removed the springs for cleaning, compress them again and
thread them inside the 3 retaining rods of the grill insert (g. 7).
 The springs will expand to their full size.
Fig. 7: Re-inserting the springs
HINT:
When the spring is put back, ensure that its wider
end faces the threaded hole of the grill insert
(g. 7). Otherwise, the spring will not be able to
expand fully.
9. Re-install the reectors, following the position markings ‚arrow‘ (g. 8).
Fig. 8: Installing the reectors
HINT:
Fit the reector in such a way that the arrow mark
on the reector faces the corresponding recess on
the grill insert (g. 8). Otherwise you will not be able
to install the grill insert correctly.