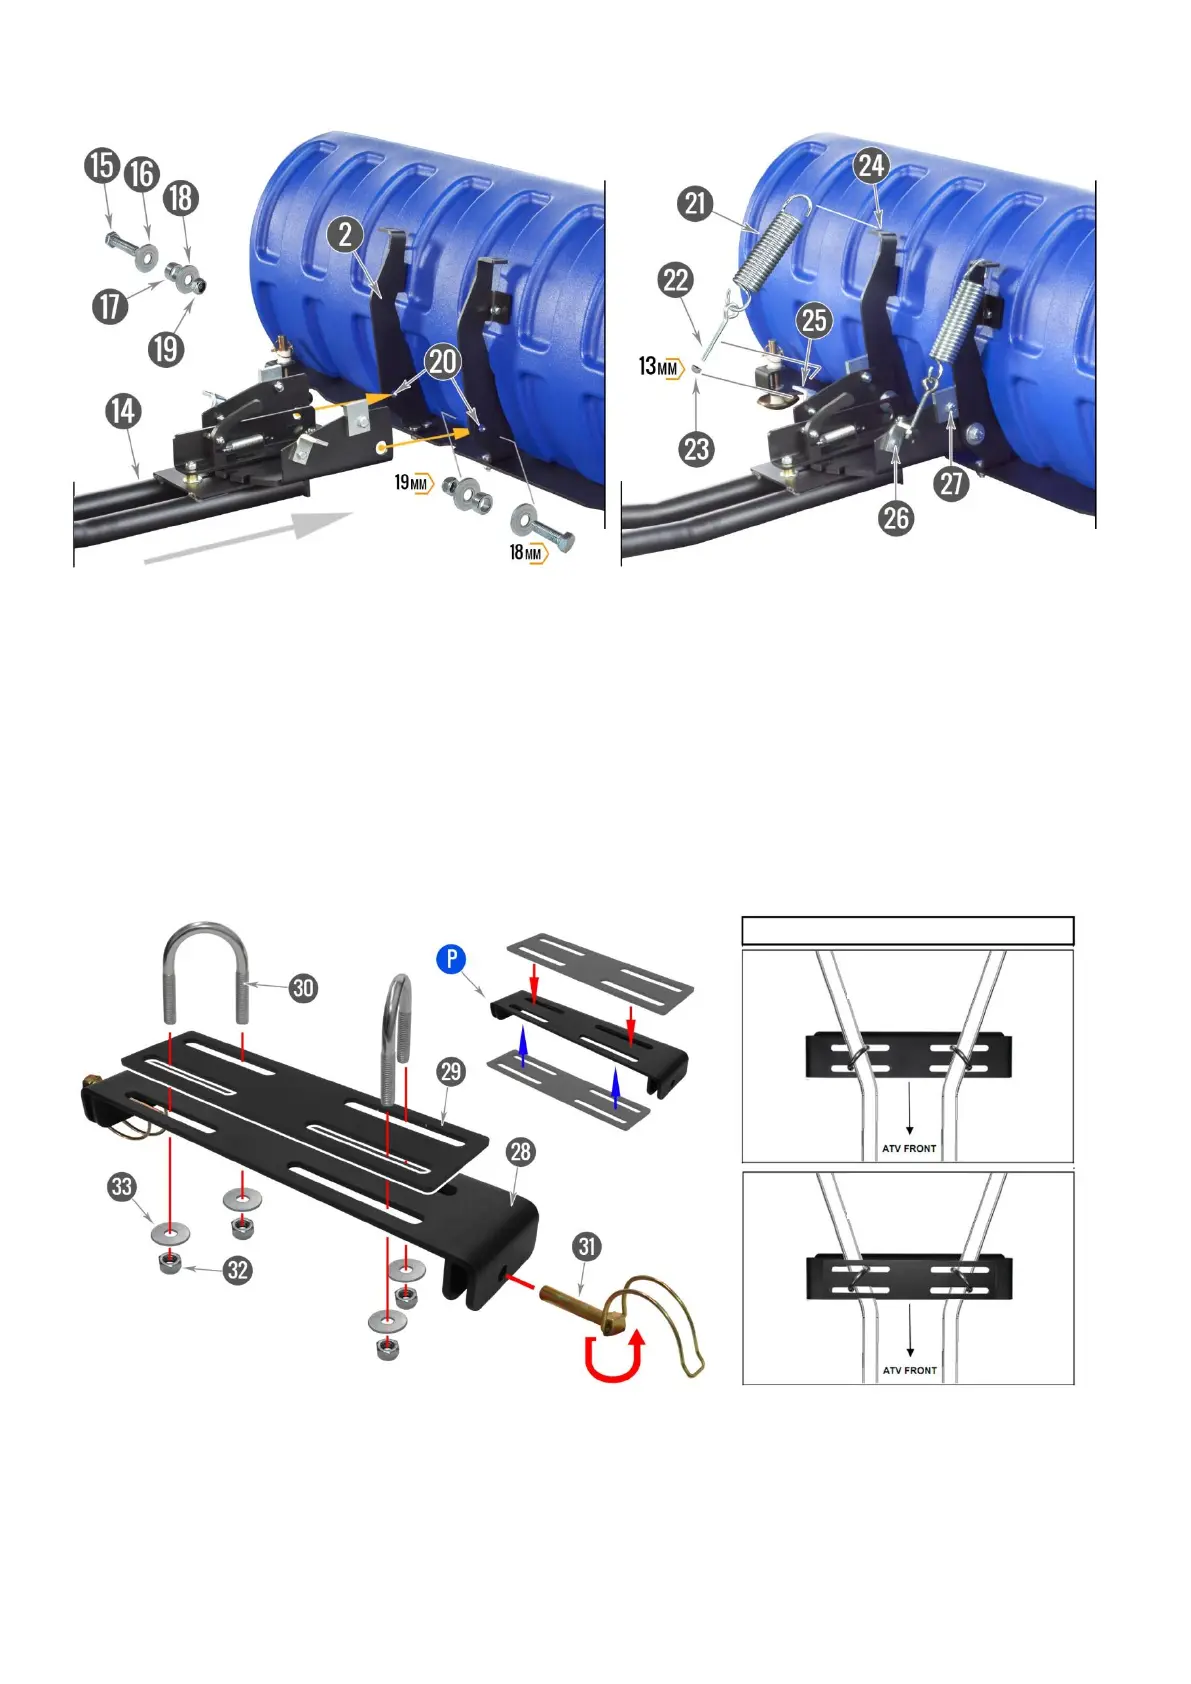
ATTACHING ADAPTER TO THE BLADE
Unpack adapter (14) and plow springs (21). Loosen and remove bolts (15), washers (16) and (18), locknuts (19), spacers
(17), eyebolts (22) and locknuts (23) from adapter. Attach adapter to the holes (20) as shown. Insert bolt (15) and
washer (16) from the outside, insert spacer (17) and washer (18) from the inside and tighten locknut (19). The same also
on the other side. Tighten the screws (26) and (27) on both sides, leave them loose by 1 - 2 threads. Insert upper spring eye (21)
into upper hole (24) of gusset (2). Attach eyebolt (22) into the lower spring eye and thread eyebolt through the hole
(25). Screw locknut (23) onto eyebolt from below. Repeat process on the other gusset. Tighten eyebolt locknuts (23) so
that springs are just slightly tensioned. Tighten the screws (26) and (27) fully on both sides.
MOUNTING KIT ASSEMBLY
Remove bracket (26) from adapter by sliding the pipe linch pins with spring lock (31). Remove locknuts (32), washers (33) and
U-bolts (30), which you will later use to attach the bracket (28). If necessary - depending on the frame type of your ATV - use
plate (29), see fig. “ADAPTER ATTACHMENT OPTIONS”.
Note: Depending on your ATV nodel, some plastic covers or guards may need to be modified before installing the adapter.
(P) If you attach adapter on a tubular frame not using plate (29), we recommend placing this plate under the bracket (26) to
strengthen the construction. In this case place plate (29) from bottom of the bracket (28) using washers (33) and locknuts (32).
ADAPTER ATTACHMENT OPTIONS
 Loading...