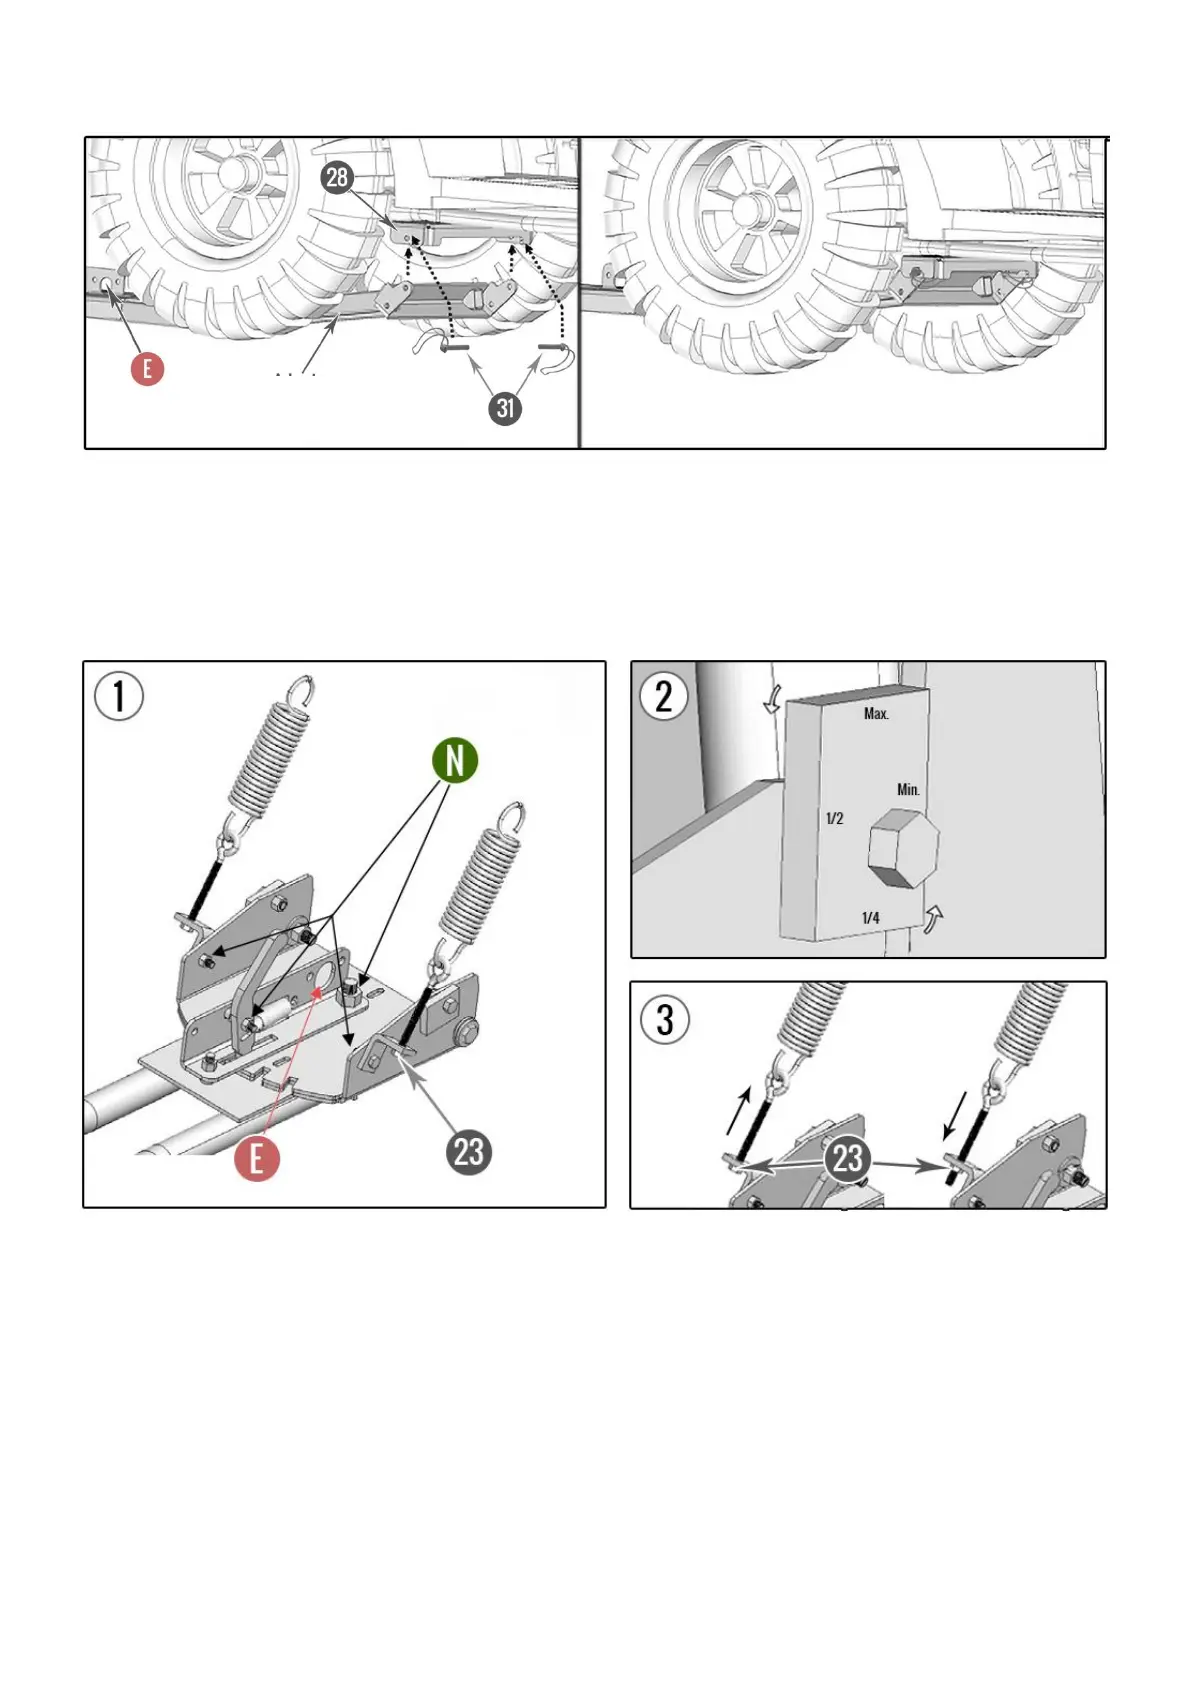
ATTACHING THE PLOW
Place push tube (adapter) under the ATV as shown and insert it into the mount plate (28). Attach the push tube to the
mount plate by supplied pipe linch pins (31). Be sure to secure linch pins spring locks! Finally, insert winch hook into the
hook attaching point (E), lift the plow off the ground using the winch and check if everything works fine.
PLOW ADJUSTMENT
Fig. ①: Loosen (N) marked nuts by approx. 1-1/4 turn to allow smooth operation and longer service life.
Fig. ②: Blade stop adjustment. Blade should be positioned vertically for the best performance. As each ATV/UTV has
different ground clearance, blade pitch angle can change too. Therefore it may be necessary to adjust blade pitch angle
using adjustable blade stops as shown in Fig. 2. Adjust pitch angle only with blade in the down position. You can rotate
the blade stop easier if you loosen locknuts (23). After adjusting correct blade pitch angle adjust plow spring tension.
Fig. ③: Plow springs pension adjustment. Initial blade spring tension: To adjust the initial spring tension, tighten nuts
(23) so that both springs are under slight tension. Spring tension can be further adjusted depending on quality of surface
you want to plow. For rough surface set less spring tension so that blade can easily trip forward when it hits a solid
object to avoid damage to the blade/adapter or frame. On smooth surfaces, the spring tension can be set stiffer to
ensure smooth, efficient and quality plowing as the blade bounces less. For desired tension, tighten or loosen eyebolt
nuts (23). CAUTION: Incorrect plow spring tension can damage adapter, blade or frame, or can shorten the life of
blade / adapter.
 Loading...