04
IMPORTANT NOTE:
It is preferable to use very Įne sand that is easily compacted.
Be careful not to spill sand on the bo
om rails.
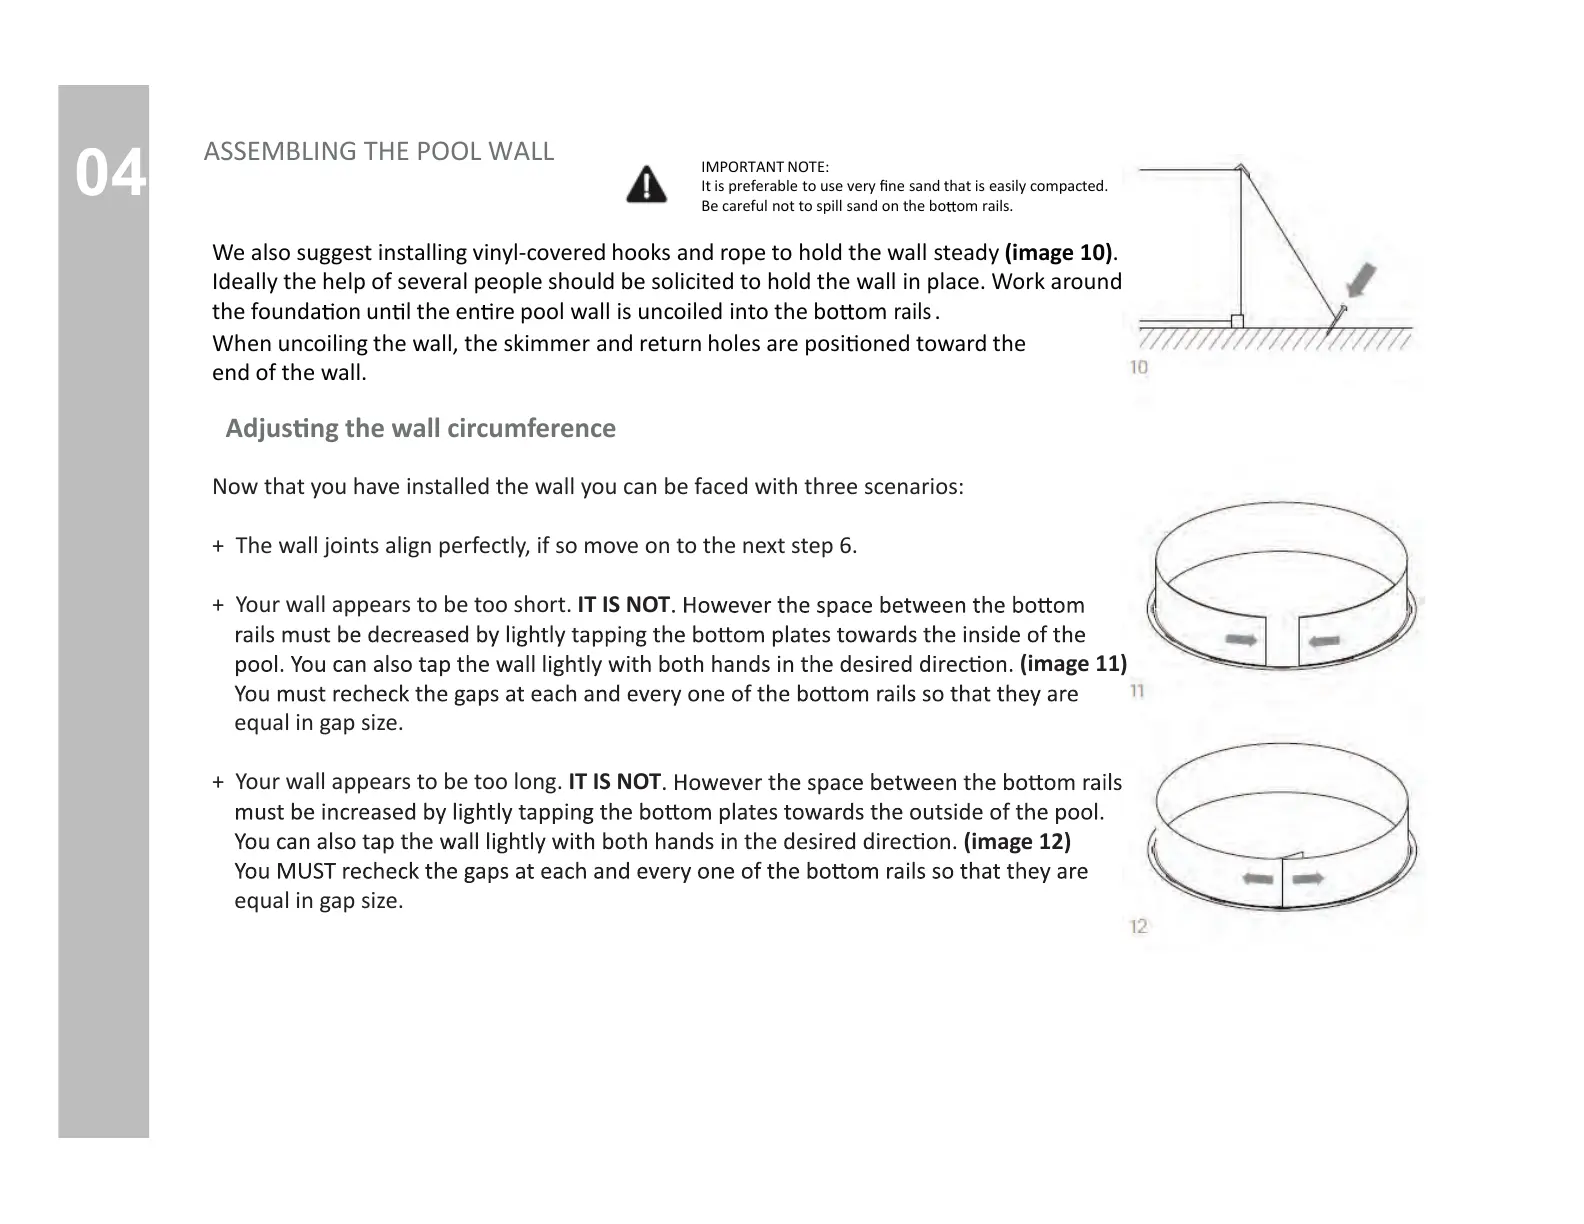
We also suggest installing vinyl-covered hooks and rope to hold the wall steady (image 10).
Ideally the help of several people should be solicited to hold the wall in place. Work around
the founda on un l the en re pool wall is uncoiled into the bo om
rails
.
When uncoiling the wall, the skimmer and return holes are posi
oned toward the
end of the wall.
Adjus ng the wall circumference
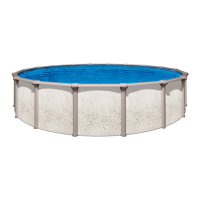
Now that you have installed the wall you can be faced with three scenarios:
+ The wall joints align perfectly, if so move on to the next step 6.
+ Your wall appears to be too short. IT IS NOT
(image 11)
equal in gap size.
+ Your wall appears to be too long. IT IS NOT
(image 12)
equal in gap size.
ASSEMBLING THE POOL WALL