04
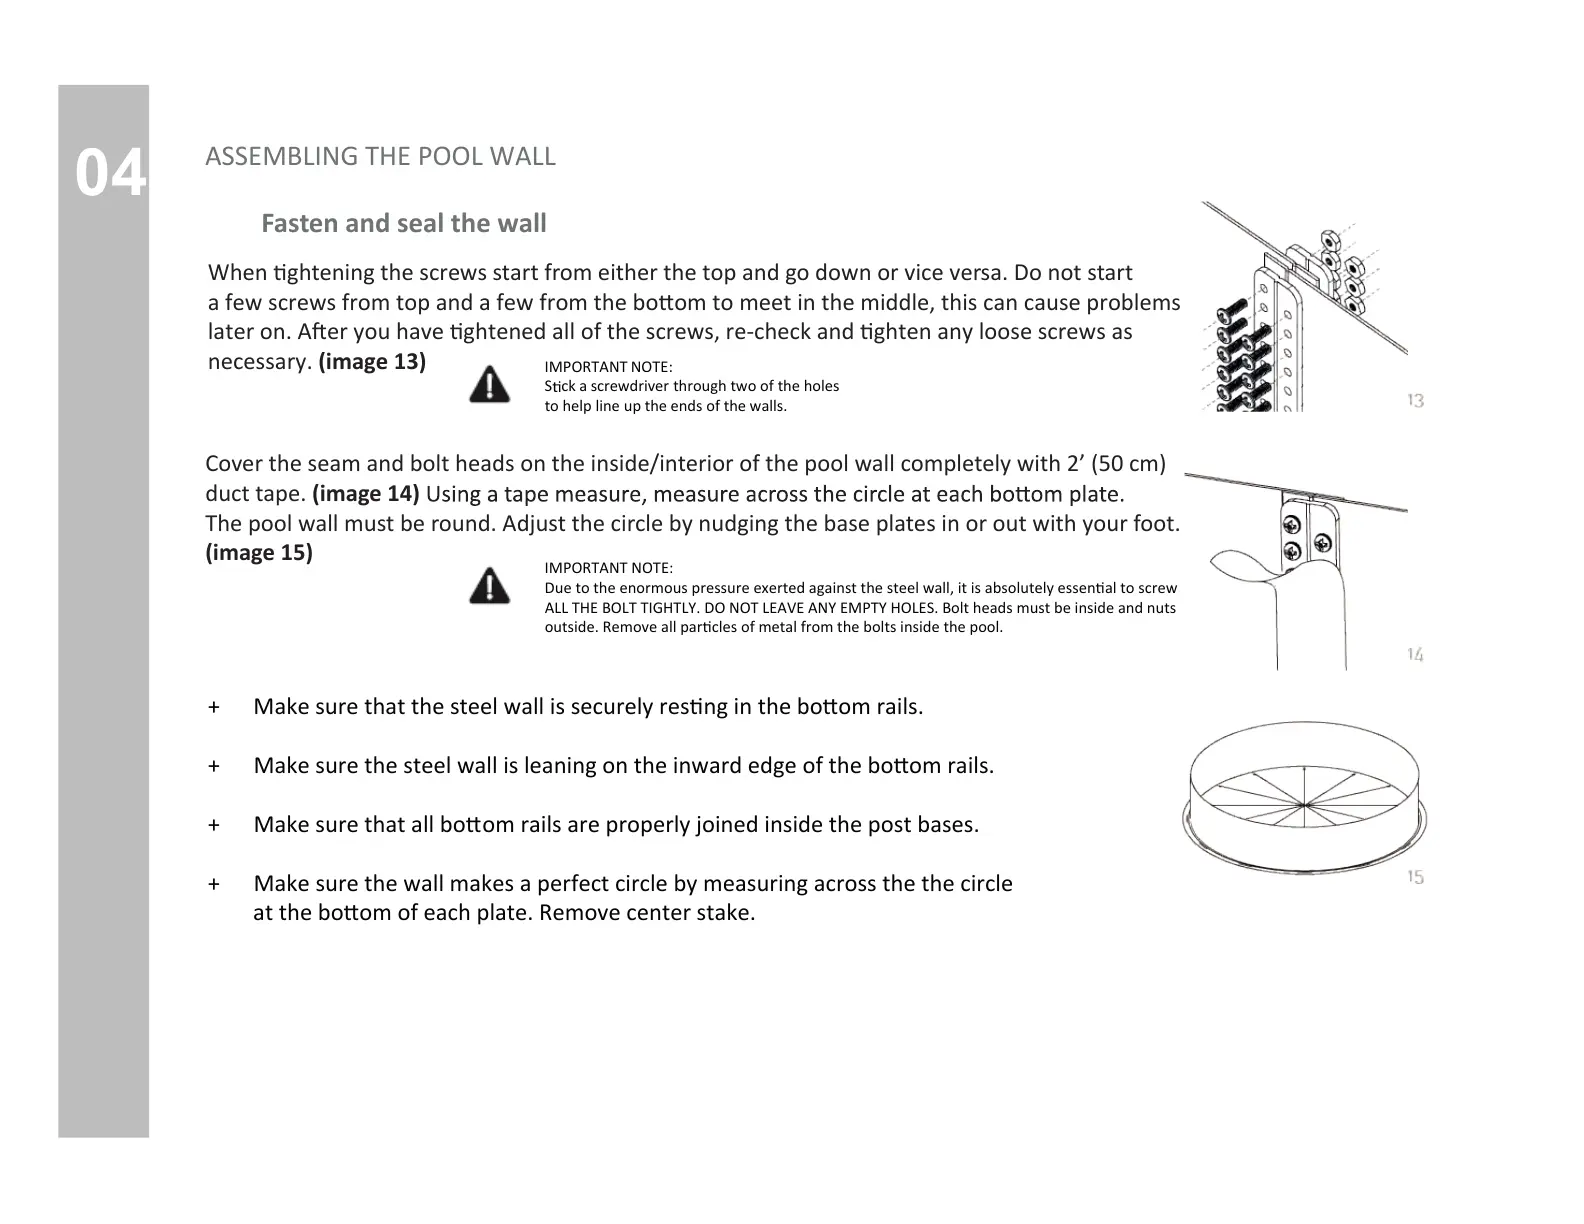
IMPORTANT NOTE:
S
ck a screwdriver through two of the holes
to help line up the ends of the walls.
Cover the seam and bolt heads on the inside/interior of the pool wall completely with 2’ (50 cm)
duct tape. (image 14)
The pool wall must be round. Adjust the circle by nudging the base plates in or out with your foot.
(image 15)
ASSEMBLING THE POOL WALL
Fasten and seal the wall
tŚĞŶƟŐŚtening the screws start from either the top and go down or vice versa. Do not start
ĂĨĞǁƐĐƌĞǁƐĨƌŽŵƚŽƉĂŶĚĂĨĞǁĨƌŽŵƚŚĞďŽƩŽŵƚŽŵĞĞƚŝŶƚŚĞŵŝĚĚůĞƚŚŝƐĐĂŶĐĂƵƐĞƉƌŽďůĞŵƐ
ůĂƚĞƌŽŶŌĞƌLJŽƵŚĂǀĞƟŐŚƚĞŶĞĚĂůůŽĨƚŚĞƐĐƌĞǁƐƌĞͲĐŚĞĐŬĂŶĚƟŐŚƚĞŶĂŶLJůŽŽƐĞƐĐƌĞǁƐĂƐ
necessary. (image 13)
IMPORTANT NOTE:
Due to the enormous pressure exerted against the steel wall, it is absolutely essenƟal to screw
ALL THE BOLT TIGHTLY. DO NOT LEAVE ANY EMPTY HOLES. Bolt heads must be inside and nuts
outside. Remove all parƟcles of metal from the bolts inside the pool.
+ Make sure that the steel wall is securely resƟng ŝŶƚŚĞďŽƩŽŵƌĂŝůƐ
+ Make sure the steel wall is leaning on the inward edge of the ďŽƩŽŵƌĂŝůƐ
+ Make sure that all boƩom rails are properly joined inside the post bases.
+ Make sure the wall makes a perfect circle by measuring across the the circle
ĂƚƚŚĞďŽƩŽŵŽĨĞĂĐŚƉůĂƚĞZĞŵŽǀĞĐĞŶƚĞƌƐƚĂŬĞ
 Loading...