04
A vacuum cleaner can later be used to remove the air from between the liner
and the wall (image 17). This technique enables you to remove folds on the
liner. However do not use an industrial vacuum cleaner which could be too powerful.
The following steps should be taken:
+ Tape the end of the vacuum hose before inser
ng it into the wall so as not to damage the liner.
+ Insert the nozzle un
l it is about 4” (10cm) above the cove (insert through the water return outlet or the
skimmer depending on the diameter of your hose.) Make sure you w
ill be able to remove the hose later on.
+ Tape the hose to the wall.
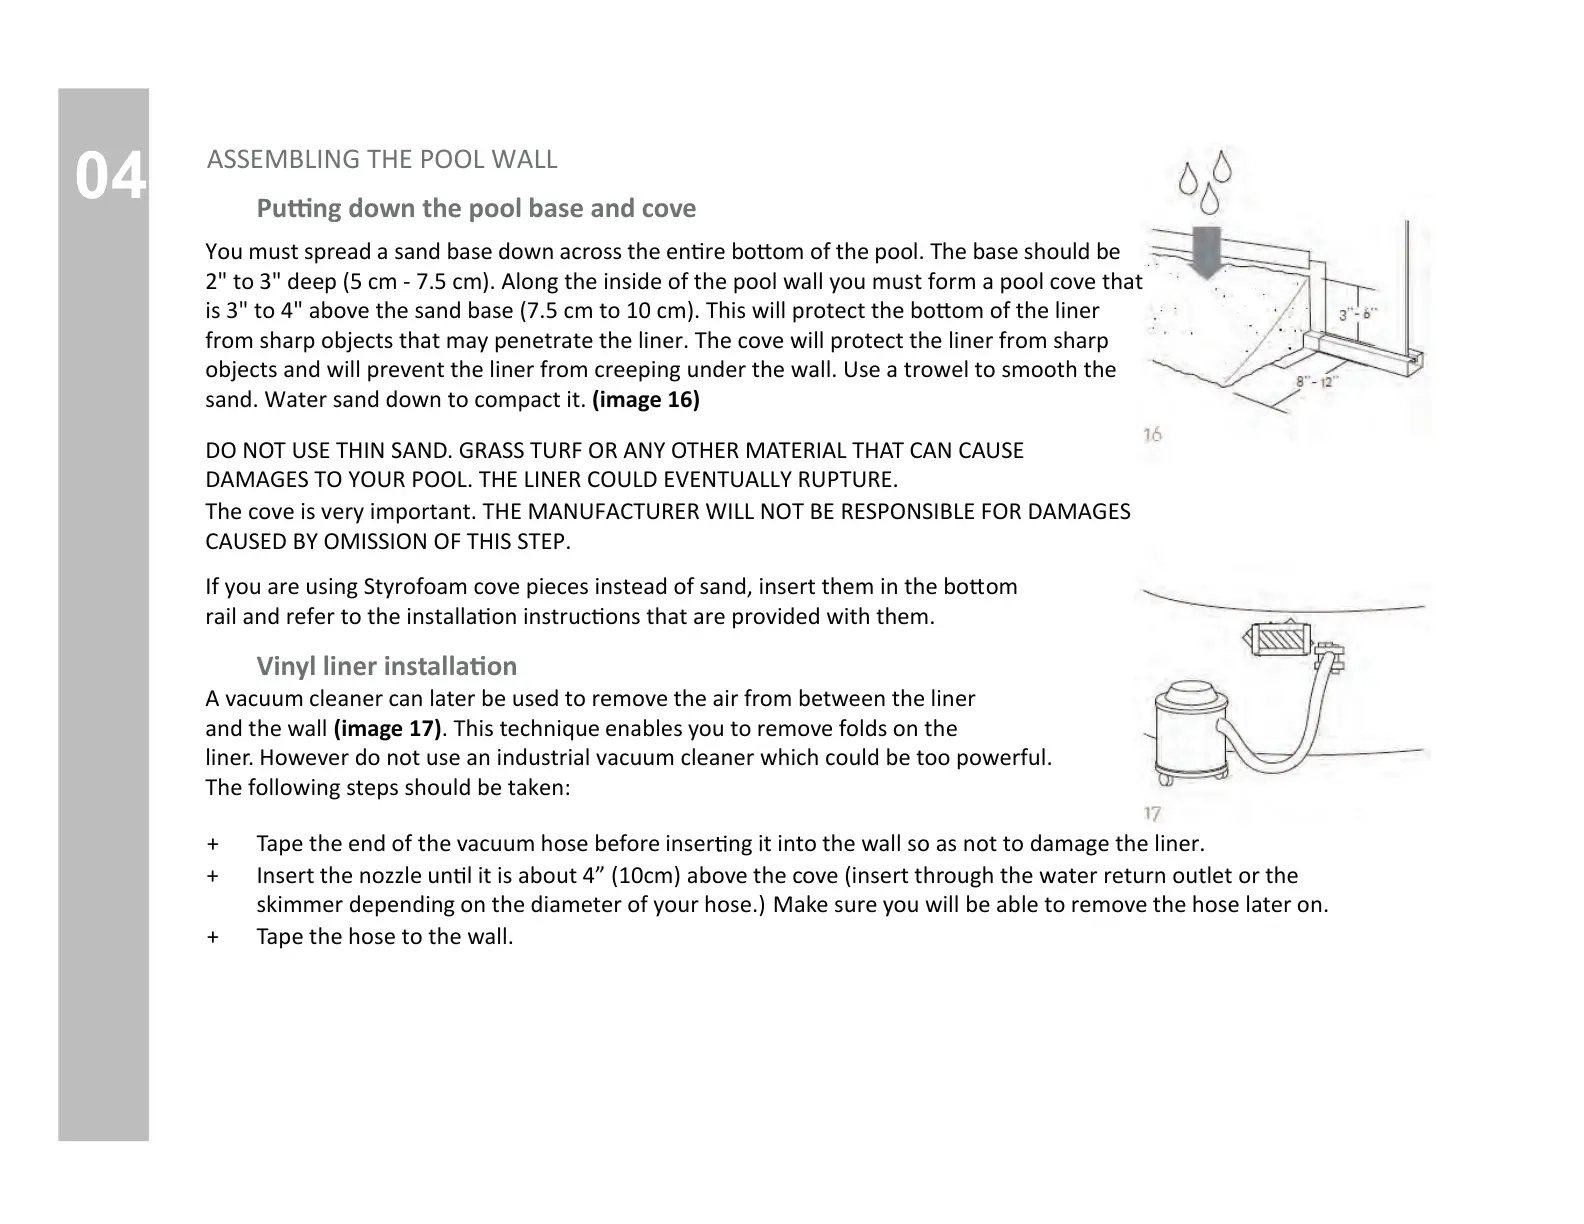
ASSEMBLING THE POOL WALL
Puƫng down the pool base and cove
You must spread a sand base down across the ĞŶƟre bŽƩom of the pool. The base should be
2" to 3" deep (5 cm - 7.5 cm). Along the inside of the pool wall you must form a pool cove that
is 3" to 4"ĂďŽǀĞƚŚĞƐĂŶĚďĂƐĞ;ϳϱĐŵƚŽϭϬĐŵͿdŚŝƐǁŝůůƉƌŽƚĞĐƚƚŚĞďŽƩŽŵŽĨƚŚĞůŝŶĞƌ
from sharp objects that may penetrate the liner. The cove will protect the liner from sharp
objects and will prevent the liner from creeping under the wall. Use a trowel to smooth the
sand. Water sand down to compact it. (image 16)
DO NOT USE THIN SAND. GRASS TURF OR ANY OTHER MATERIAL THAT CAN CAUSE
DAMAGES TO YOUR POOL. THE LINER COULD EVENTUALLY RUPTURE.
The cove is very important. THE MANUFACTURER WILL NOT BE RESPONSIBLE FOR DAMAGES
CAUSED BY OMISSION OF THIS STEP.
If you are using Styrofoam cove pieces instead of sand, insert them in the boƩom
rail and refer to the installaƟon instrucƟons that are provided with them.
Vinyl liner instĂůůĂƟon
 Loading...