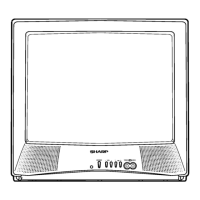
19SV111
INSTALLATION AND SERVICE INSTRUCTIONS
(Continued)
FIELD ADJUSTMENT
•
RF-AGCADJUSTMENT
1.
Select a local channel.
2.
Turn RF-AGC control
(R214)
fully
ciO<kwise.
As
a
result
noise appears
on
picture,
then
slowly
turn
the
RF-AGC
control
(R214)
counterclockwise
until
noise disappears.
3.
Check
that
no noise appears
on
other
channels.
• SUB-BRIGHTNESS CONTROL
1.
Select a local channel.
2.
Turn
Picture
control
(a
part
of
R462)
fully
clockwise and set Brightness control
(a
part
of
R462)
at
the
center position.
3.
Turn Sub-Brightness control
(a
part
of
R462)
to
obtain normal brightness
of
the
picture.
•
HORIZONTAL
CENTERING
1.
Select a local channel.
2.
Adjust
the
Horizontal
Centering
Switch
(SW7
51
) on
PWB-C
to
best picture position.
• VERTICAL
SIZE
ADJUSTMENT
1.
Select a local channel.
2.
Turn
fully
counterclockwise
the
Brightness and
Picture
controls
to
dim
screen (in
the
state
where
the top
and
bottom
of
picture
cam
be
recognized.}
3.
Adjust Vertical Size control
{a
part
of
R462)
for
approximately 1/8
to
1/4 inch over-scan
at
top
and
bottom
of
picture screen.
• FOCUS ADJUSTMENT
1 . Select a I ocal channel.
2.
Set Brightness and Picture controls
at
a normal
viewing
level.
3.
Adjust focus control (part
of
T652)
for
sharp
scanning lines and/or sharp picture.
9
NOTE
1:
All
field
adj-Ustments
mentioned
can be
performed
without
test equipment.
NOTE
2:
As this model
has
"Built
in
AFT", AFT is
always in
"ON"
position.
If
AFT
should
be "OFF",
short
between
TP1003
and
TP1004.
NOTE
3:
After
servicing the
set
check
that
the
aging
switch
SW1801 is
set
at
"OFF"
position.
This
aging switch is
to
be used
only
for
the factory inspection;
at
"ONH
position,
it
won't
allow
the
set
to
be
turned
off.