EN
-
7
EN
-
8
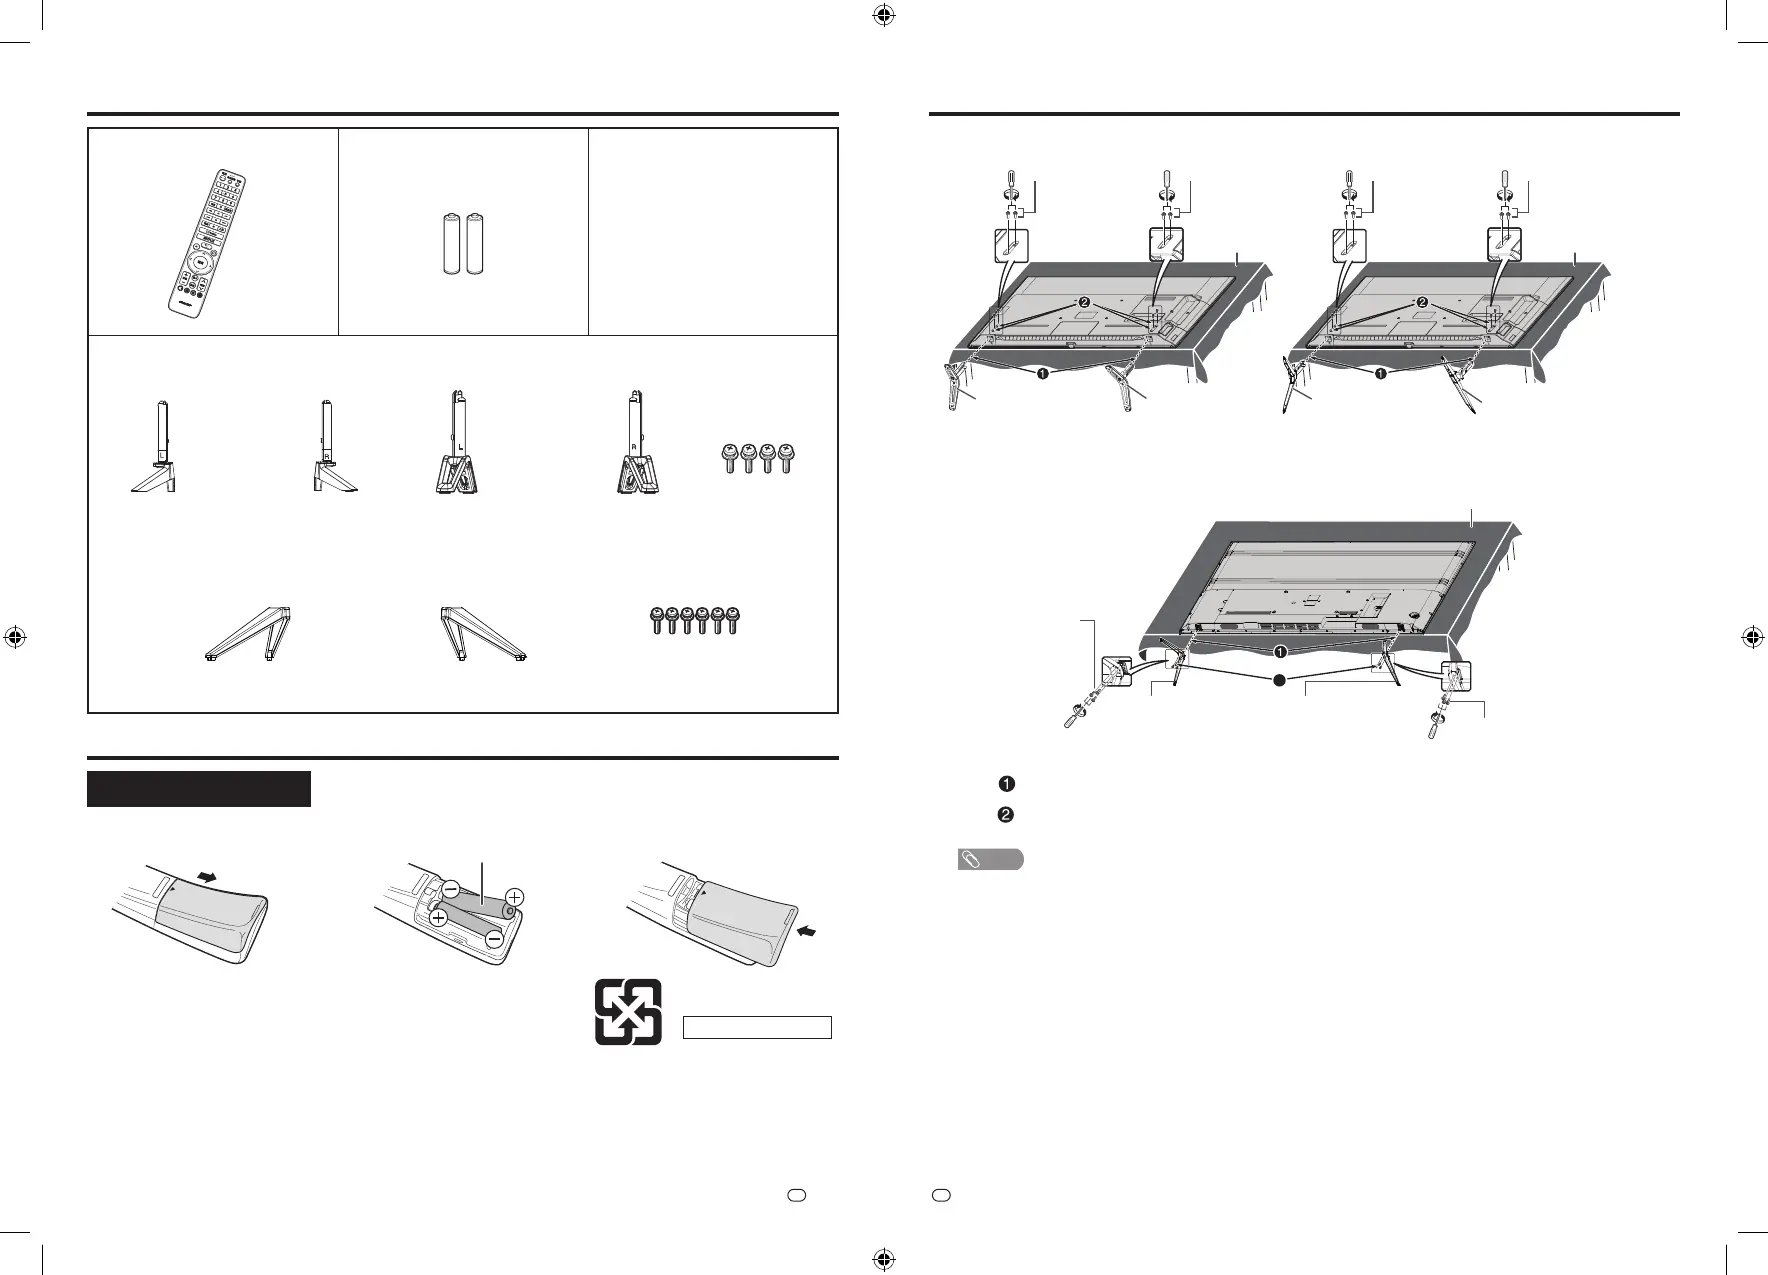
1 Remote control unit (m 1) 2 “AAA” size battery (m 2)
3 Initial setup guide
4 Warranty certifi cate
B. Inserting the batteries
Remote control unit
1 2 3
2 “AAA” size battery
• Place batteries with their terminals
corresponding to the (k) and
(l) indications in the battery
compartment.
Recycle the battery
A. Supplied accessories C. Attaching the stand unit
4T-C60DL1X
4T-C70DL1X
5 Stand base
5 Stand base 5 Stand base
6 Screws
Screws
6
L L R R
L R
4T-C60DK1X
■
4T-C70DL1X
■■
4T-C60DL1X
4T-C60DK1X
Insert the stand assembly into the openings on the bottom of the Monitor.
Insert and tighten the screws into the holes on the bottom / rear of the Monitor.Step
Step
Soft cushion
5 Stand base R 5 Stand base L
6 Screws 6 Screws
Soft cushion
5 Stand base R 5 Stand base L
6 Screws 6 Screws
Soft cushion
Stand base R 55 Stand base L
6 Screws
■
2
6 Screws
NOTE
• This drawings used throughout this manual are based on the 4T-C60DL1X.