-
10
On-Screen Display Menu
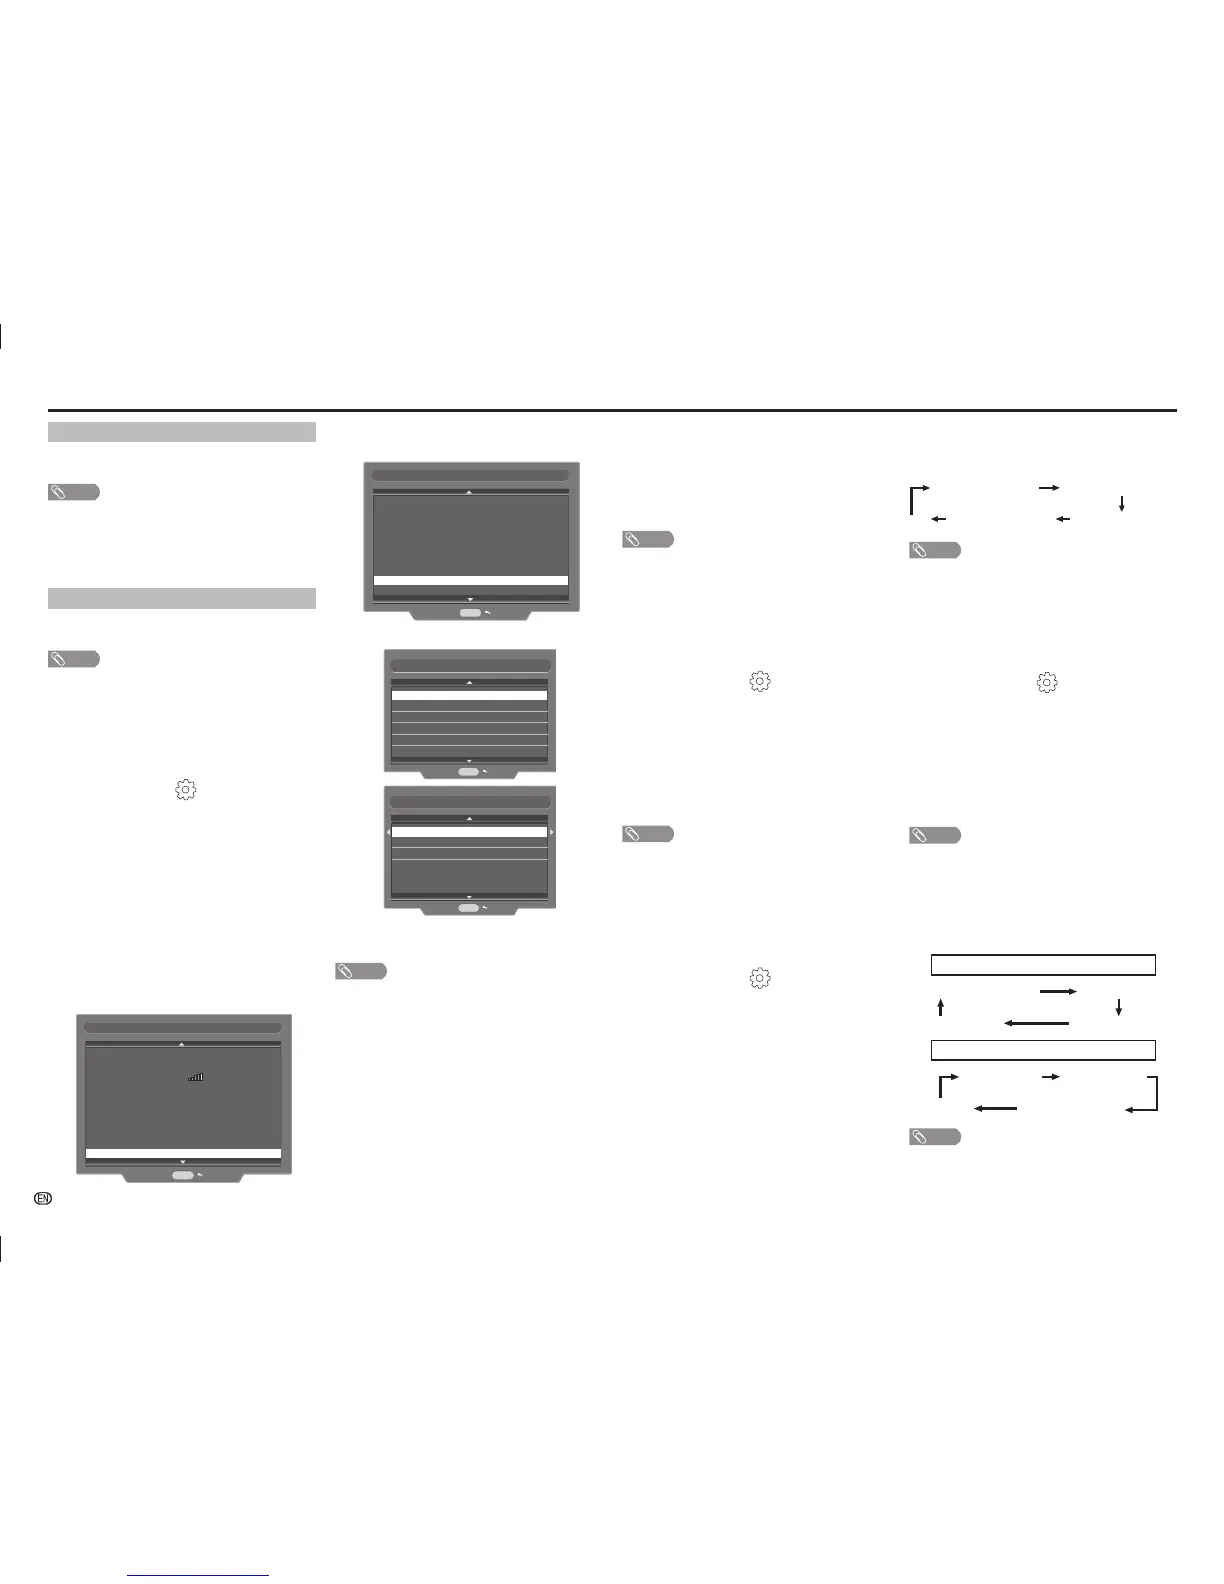
If “Connection type” is “Wired”, the screen will
appear.
Connection type
IP setup type
IP
Netmask
Gateway
DNS
DNS2
MAC Address
: Wired
: Auto (DHCP)
: 192.168.1.1
: 255.255.255.0
: 192.168.1.2
: 0.0.0.0
: 0.0.0.0
: 68:79:ed:e3:fa:4d
IP setup
RETURN
Change
Connect
The IP setup address can be changed.
DNS
DNS 2
RETURN
Connect
IP setup
Gateway
Netmask 255:255:0:0
3:48:255:45
192:168:0:1
192:168:1:1
169.254.141.72
IP
RETURN
IP
254
141
72
169
• Press
c/d
or 0 – 9 on the remote control unit to select the
IP address.
• Press
a
/b
to change the selection.
NOTE
• If the TV connected to the internet, the screen will display
“Disconnect” to allow user to disconnect from the internet.
• If the TV disconnected from internet, the screen will display
“Connect” to allow user to connect back to internet.
• If the previous selection is “Auto”, the details are auto
scanned and displayed.
Auto
You may select your “Wireless name (SSID)” that
appear in the screen.
NOTE
• “Wireless name (SSID)” consist 5 SSID list in one page.
Press “Next” allows you to go to the next page. (Maximum
20 SSID list, 4 pages)
• “Wireless name (SSID)” and “Security type” cannot be
editable.
• You can entered “Security key” by virtual keyboard.
Manual
You may type to search your “Wireless name (SSID)”
in “Manual”.
NOTE
• You can entered “Wireless name (SSID)” and “Security key”
by virtual keyboard.
• You can choose “Security type” by pressing
c/d
.
IP setup
You can set up your router by auto or manual
assignment of IP setup.
1
Press MENU and the MENU screen displays.
2
Press
c
/
d
to select “ ” (Setup).
3
Press
a
/
b
to select “Network setup”, and then
press ENTER.
4
Press
a
/
b
to select “IP setup”, and then press
ENTER.
5
If IP setup is correct, press “Connect” to connect
internet.
6
Select “Change” to change IP setup by auto or
manual.
7
Please input according to direction of a screen,
and fi nally “Success” screen will appear.
If “Connection type” is “Wireless”, the screen will
appear.
Connection type
SSID
Type
Signal
IP setup type
IP
Netmask
Gateway
DNS
DNS2
MAC Address
: Wireless
: dlink
: WEP
: Auto (DHCP)
: 192.168.1.1
: 255.255.255.0
: 192.168.1.2
: 0.0.0.0
: 0.0.0.0
: 68:79:ed:e3:fa:4d
Connect
IP setup
RETURN
Change
H
Language
Select from among 10 languages: English, Simplifi ed
Chinese, Arabic, French, Portuguese, Russian,
Persian, Thai, Vietnamese and Indonesia.
H
Text language
Select from among 5 kinds of language: West
Europe, East Europe, Cyrillic, Arabic and Farsi.
NOTE
• Teletext can display only when it is sent by a network. Not
used to convert between languages.
H
Digital setup
Selecting the language
Set up to two preferred multi audio languages to
display if the audio languages are available.
1
Press MENU and the MENU screen displays.
2
Press
c
/
d
to select “ ” (Setup).
3
Press
a
/
b
to select “Digital setup”, and then
press ENTER.
4
Press
a
/
b
to select “Digital audio language”, and
then press ENTER.
5
Press
a
/
b
to select “1st language” or “2nd
language”.
6
Press
c
/
d
to select the desired language.
NOTE
• If audio for the selected languages is not included in
a received broadcast, audio will not be output for that
language.
Audio description (DTV input mode only)
This function allows you to adjust volume output of
audio description if the TV receives a signal including
audio description.
1
Press MENU and the MENU screen displays.
2
Press
c
/
d
to select “ ” (Setup).
3
Press
a
/
b
to select “Digital setup”, and then
press ENTER.
4
Press
a
/
b
to select “Audio description”, and
then press ENTER.
5
Press
c
/
d
to select the volume.
Switching the multi audio languages
Each time you press MPX on the remote control, the
audio language switches.
1st audio language
1st audio language
+AD (if available)
2nd audio language
+AD (if available)
2nd audio language
••••
NOTE
• This function is valid only if broadcaster is transmitting audio
description.
Displaying subtitles for the hearing impaired
You can display subtitles for the hearing impaired in
the Teletext broadcast if the subtitle languages are
available.
1
Press MENU and the MENU screen displays.
2
Press
c
/
d
to select “ ” (Setup).
3
Press
a
/
b
to select “Digital setup”, and then
press ENTER.
4
Press
a
/
b
to select “Subtitle”, and then press
ENTER.
5
Press
a
/
b
to select “1st language” or “2nd
language”.
6
Press
c
/
d
to select the desired language.
NOTE
• If subtitles for the selected language are not included in
a received broadcast, subtitles will not be shown for that
language.
Switching subtitle languages (DVB Subtitle)
Each time you press
[
on the remote control,
the subtitle switches when the broadcast contains
subtitle information.
Set “Hearing impaired” to “On”
(Hearing impaired) 1st language
2nd language
Off
••••••••
Set “Hearing impaired” to “Off”
1st language 2nd language
(Hearing impaired)
Off
••••
NOTE
• This function is valid only if broadcaster is transmitting
multilingual subtitles.
02_LC-6070LE660X_EN_G301.indd 1002_LC-6070LE660X_EN_G301.indd 10 10/23/2014 11:44:56 AM10/23/2014 11:44:56 AM