4
Printed in Malaysia
J2H00707A SH
X
Preparation:
•Turn ON the TV and switch the TV to it's AV channel (this may be labelled EXT / AUX etc.)
• Load a source DVD and a video tape for recording.
• Confirm that there is enough tape space remaining before you start the recording.
CONFIRM DUBBING FROM DVD TO VCR
YES NO
1. Press DVD/VCR and select VCR mode.
2. Press REC MODE/SPEED and select the recording mode.
3. Press DVD/VCR and select DVD mode.
4. Press DUBBING. The
screen below will appear.
5. Select “YES” and press
ENTER. Dubbing starts.
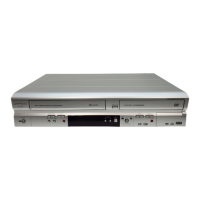
Dubbing a disc onto a tape
CONFIRM DUBBING FROM VCR TO DVD
YES NO
Preparation:
•Turn ON the TV and switch the TV to it's AV channel (this may be labelled EXT / AUX etc.)
• Load a source video tape and a disc for recording.
• Confirm that there is enough disc space remaining before you start the recording.
1. Press DVD/VCR and select DVD mode.
2. Press REC MODE/SPEED and select the recording mode.
3. Press DVD/VCR and select VCR mode.
4. Press DUBBING. The
screen below will appear.
5. Select “YES” and press
ENTER. Dubbing starts.
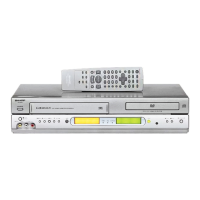
Dubbing a tape onto a disc
REFORMAT
START CANCEL
You can format a recorded DVD-RW disc. Check the contents of the disc before formatting. When you format a disc, any
previously recorded contents of the disc will be erased.
Preparation:
•Turn ON the TV and switch the TV to it's AV channel
(this may be labelled EXT / AUX etc.)
• The video tape and DVD should be stopped.
1. Press SETUP.
2. Select “SYSTEM SETUP” and press ENTER. Then select
“DISC SETUP” and press ENTER.
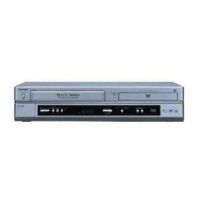
Format a recorded disc
TIMER REC SET
SYSTEM SETUP
AV SETUP
REC SETUP
CHANNEL SETUP
OTHER
DISC SETUP
REFORMAT AS DVD VIDEO
REFORMAT AS DVD VR
NEW DISC FORMAT
FINALISE
PROTECT DISC (VR ONLY)
UNDO FINALISE
PROCEED
VR
PROCEED
OFF
PROCEED
PROCEED
SETUP MENU
RETURN SETUPENTER BACK END
SELECT
ENTER
3. To format a DVD in Video
mode, select “REFORMAT
AS DVD VIDEO”, and to
format it in the VR mode,
select “REFORMAT AS
DVD VR”, then press
ENTER.
4. Select “START” and press
ENTER. The formatting will
start.
5. When formatting is complete, “REFORMATTING
COMPLETED PRESS ENTER” will appear. Press
ENTER, to finish formatting process.
Only DVD-RW discs need to be formatted.
1. When you insert an unused
disc, the following mes-
sage screen will appear.
(Only DVD-RW discs need
to be formatted.)
2. Select START and press
ENTER. Formatting will
start.
INITIALIZING DISC
VIDEO MODE
START CANCEL
NEW DISC FORMAT
VIDEO MODE
3. When formatting is complete, “FORMATTING COMPLETED
PRESS ENTER” will appear. Press ENTER to finish
formatting process.
• On DVD-RW discs (DVD-RW Ver.1.1, Ver.1.1 CPRM support
and Ver.1.2 CPRM support) there are two recording formats
available: the VR mode and the Video mode. You can select
either of them at “Selecting automatic format mode” as shown
on the previous DISC FORMAT column (VR mode is the
factory default setting).
• On DVD-RW discs (Ver.1.0) there is only recording format of
VR mode available.
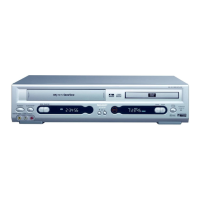
Starting with an unused disc (automatic formatting)
2H00707A QS 5/14/05, 9:17 AM4
 Loading...