10
BEFORE USING THE MACHINE
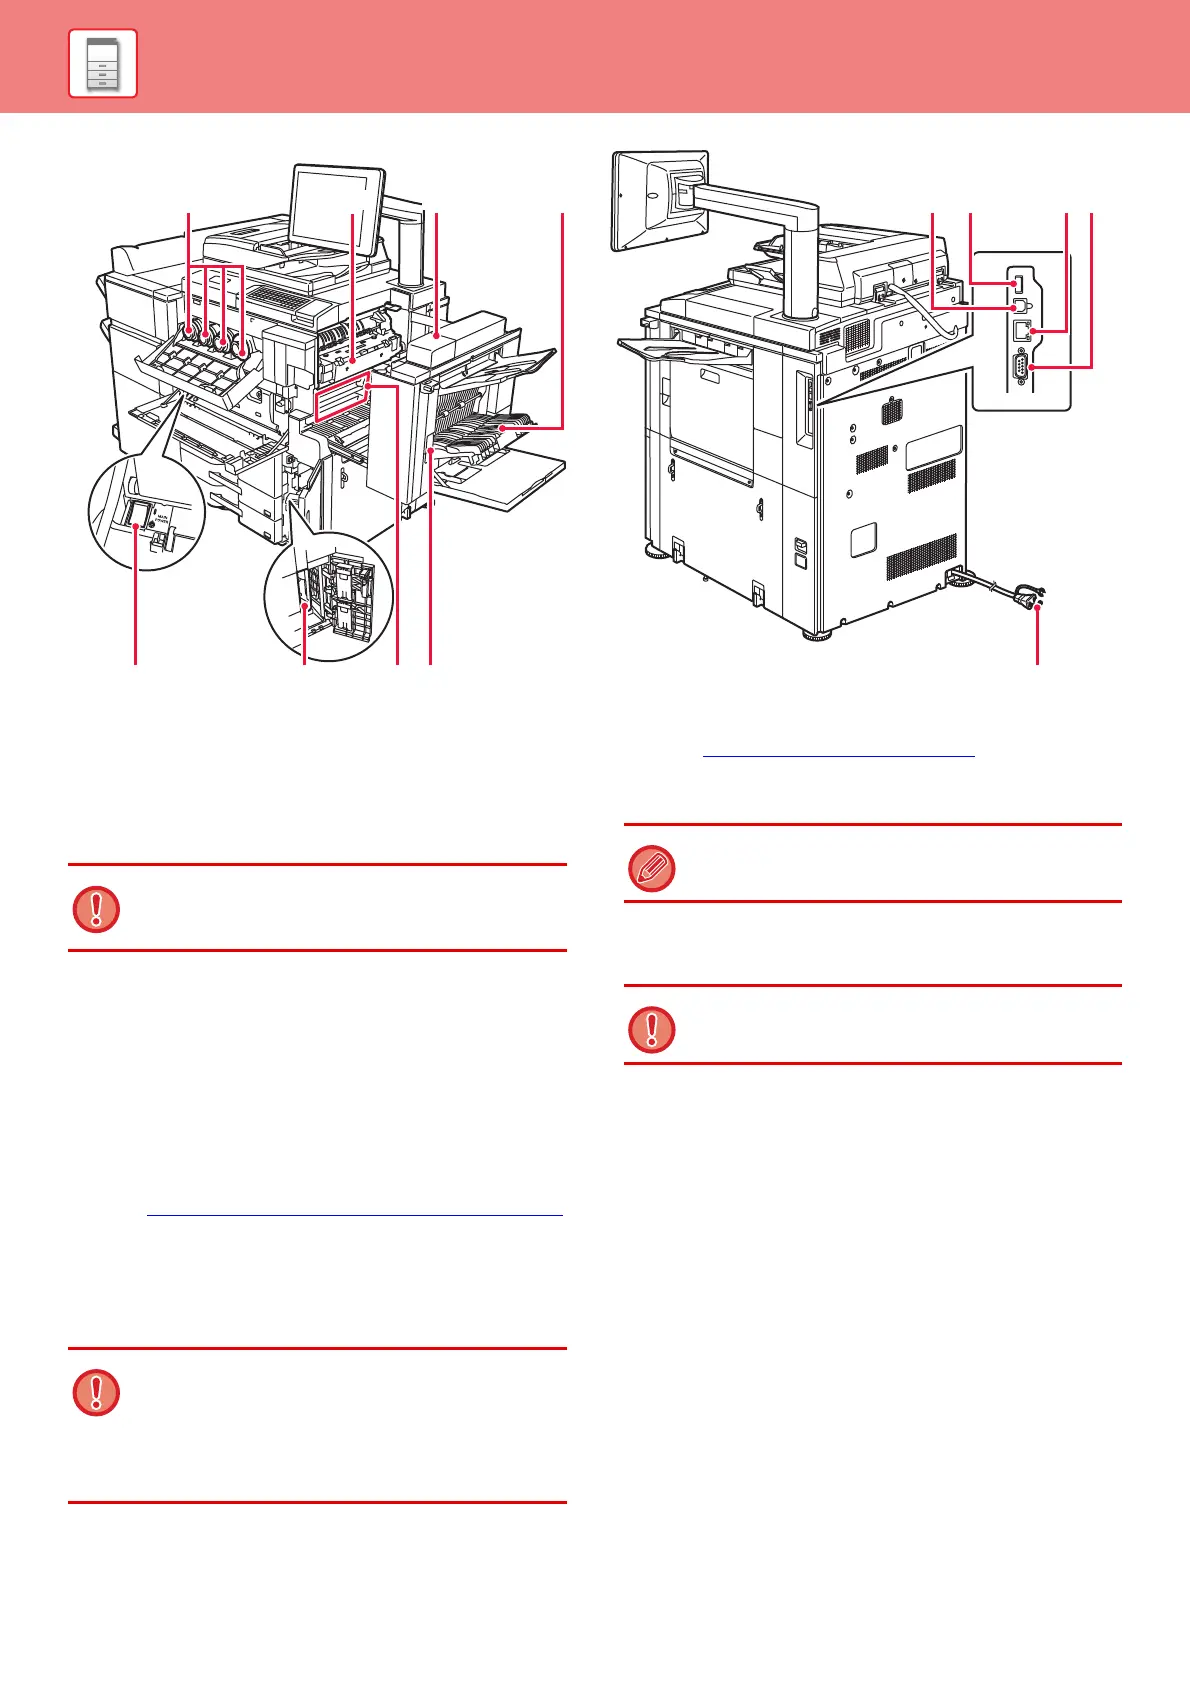
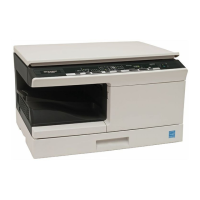
(1) Toner cartridge
This cartridge contains toner.
When the toner in a cartridge runs out, the cartridge of the color
that ran out must be replaced.
(2) Fusing unit
Heat is applied here to fuse the transferred image onto the
paper.
(3) Right side cover
Open this cover to remove a misfeed.
(4) Paper reversing section cover
This unit is used for reversing paper when 2-sided printing is
performed. Open this cover to remove a paper misfeed.
(5) USB connector (B type)
Cannot be used.
(6) USB connector (A type)
This is used to connect a USB device such as a USB memory
device to the machine.
Supports USB 2.0 (Hi-Speed).
►
DIRECTLY PRINTING A FILE IN USB MEMORY (page 42)
(7) LAN connector
Connect the LAN cable to this connector when the machine is
used on a network.
Use a shielded LAN cable.
(8) Service-only connector
(9) Main power switch
Use this switch to turn on the power for the machine.
►
TURNING ON THE POWER (page 11)
(10) Waste toner bottle
This bottle collects excess toner that is produced during printing.
(11) Transfer belt
This belt takes the image formed with toner off the
photoconductive unit and transfers the image onto paper.
(12) Right side cover release lever
To remove a paper misfeed, pull and hold this lever up to open
the right side cover.
(13) Power plug
(1)
(2)
(3)
(9) (12) (13)(10) (11)
(4) (8)(7)(5) (6)
The fusing unit is hot. Take care not to burn yourself when
removing a misfeed.
This connector is for use only by service technicians.
Connecting a cable to this connector may cause the machine
to malfunction.
Important note for service technicians:
The cable connected to the service connector must be less
than 118" (3 m) in length.
A service technician collects replaced waste toner bottles.
Do not touch or damage the transfer belt.
This may cause a defective image.