R-6280
LATCH SWITCH, COOK (LATCH) SWITCH AND
MONlTOR SWITCH ADJUSTMENT
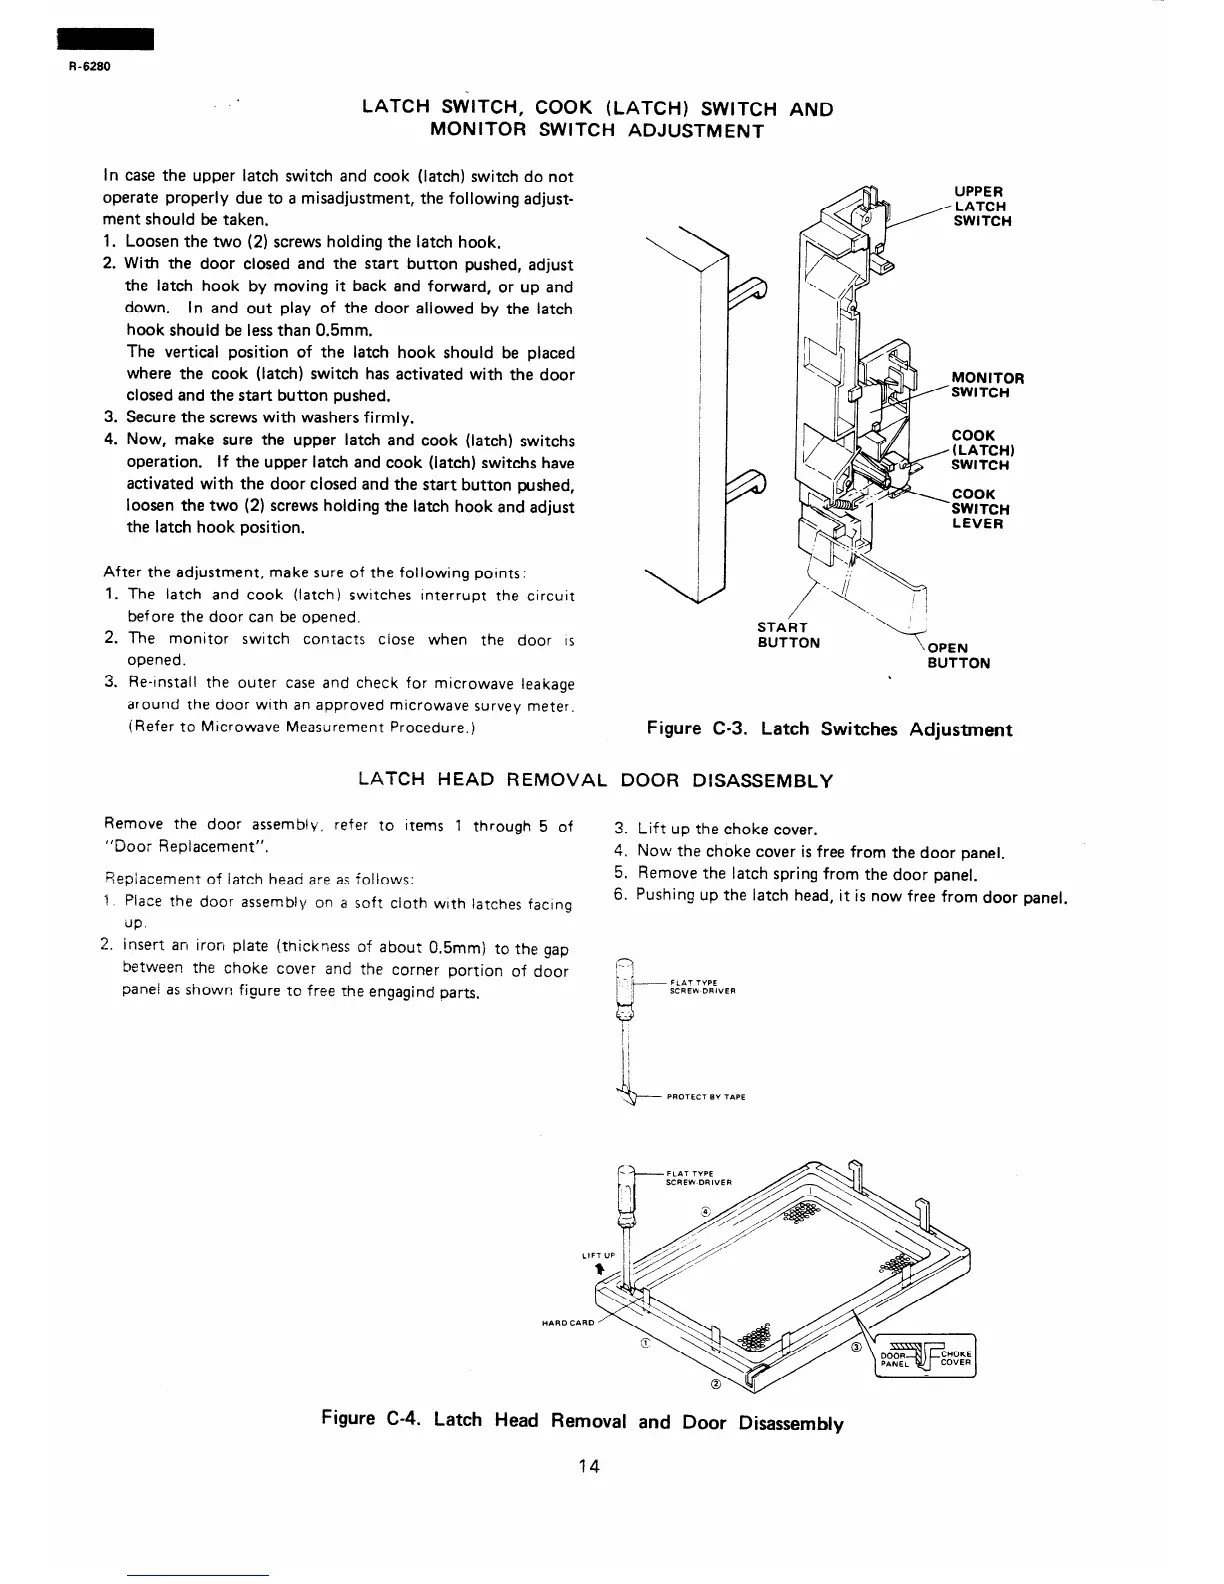
in case the upper latch switch and cook (latch) switch do not
operate properly due to a misadjustment, the following adjust-
ment should be taken.
1. Loosen the two (2) screws holding the latch hook.
2. With the door closed and the start button pushed, adjust
the latch hook by moving it back and forward, or up and
down.
in and out play of the door allowed by the latch
hook should be less than 0.5mm.
The vertical position of the latch hook should be placed
where the cook (latch) switch has activated with the door
closed and the start button pushed.
3. Secure the screws with washers firmly.
4. Now, make sure the upper latch and cook (latch) switchs
operation.
if the upper latch and cook (latch) switchs have
activated with the door ciosed and the start button pushed,
loosen the two (2) screws holding the latch hook and adjust
the latch hook position.
UPPER
LATCH
SWITCH
After the adjustment, make sure of the following points:
1. The latch and cook (latch) swatches Interrupt the circuit
before the door can be opened.
2. The monitor switch contacts close when the door IS
opened.
3. Re-install the outer case and check for microwave leakage
around the door wrth an approved microwave survey meter.
(Refer to MIcrowave Measurement Procedure.)
BUTTON
BUTTON
.
Figure C-3. Latch Switches Adjustment
LATCH HEAD REMOVAL DOOR DISASSEMBLY
Remove the door assemb!y, refer to items 1 through 5 of
“‘Door Replacement”.
8eplacement of latch head a:e as ioliows:
f Place the door assembly on a soft cloth with latches facing
3. Lift up the choke cover.
4. Now the choke cover is free from the door panel.
5. Remove the latch spring from the door panel.
6. Pushing up the latch head, it is now free from door panel.
2. insert an iron plate (thickrress of about 0.5mm) to the gap
between the choke cover and the corner portion of door
panei as shown figure to free the engagind parts.
,Q
’
1 - ‘r FLAT TYPE
SCREK DRIVER
i4
PROTECT BY TAPE
Figure C-4. Latch Head Removal and Door Disassembly
14
 Loading...