R-9380
TURNTABLE COUPLING REMOV&L
I, Remove turntable
Motor Removal”.
2. Remove turntable
illustration.
motor and refer to “Turntable
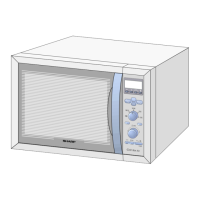
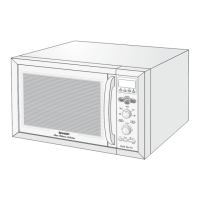
TURN TABLE
COUPLING
coupling following in order on
BOTTOM
OVEN CAVITY
T.T. MOTOR
ANGLE
COOLING
FAN MOTOR REMOVAL
1. Remove wire leads from cooling fan duct.
2. Remove two (2) screws and tab on fan duct
ing to top oven cavity.
3. Pull fan blade out of cooling fan motor.
‘O-RING
Turntable Coupling
hold-
4. Remove two (2) screws and two (2) nuts holding
fan motor.
5. Now cooling fan motor is free.
CONTROL PANEL ASSEMBLY AND COMPONENTS REMOVAL
The complete control panel should be removed for re-
CONTROL UNIT AND/OR PANEL FRAME
1,
placement of the components. To remove the control
panel, proceed as follows:
1. Disconnect oven from power supply and remove
outer case.
2
2. Discharge high voltage capacitor.
3. Disconnect (A) and (B) connectors from the con-
3.
trol unit.
Push the holder of 12-pin connector (D) inward
and then pull it.
Remove the flat cable of key from the 12-pin con-
nector (D).
Remove the five (5) screws holding the control unit
to the panel frame.
Panel frame and control unit are now free, separate
them.
4. Remove one (1) screw holding the control panel
frame to the oven cavity front flange.
5. Lift up the control panel frame to free the panel
hooks from the bottom opening of back plate.
6. Pull the control panel forward.
4
Replacement of individual component is as follows:
UPPER LATCH SWITCH AND MONITOR SWITCH REMOVAL
1. Disconnect oven from power supply and remove
outer case.
2. Discharge high voltage capacitor.
3. Disconnect wire leads from switches.
4. Remove one (1) screw holding the upper latch
hook to the oven caity flange.
5. Remove upper latch hook from flange by moving it
downward.
6. To remove the switch from upper latch hook, push
outward two (2) retaining tabs holding individual
switch in place.
LOWER LATCH SWITCH AND STOP SWITCH REMOVAL
1. Disconnect oven from power supply and remove
outer case.
2. Discharge high voltage capacitor.
3. Disconnect wire leads from switches.
4. Remove one (1) screw holding the lower latch
hook to the oven caity flange.
5. Remove lower latch hook from flange by moving it
downward.
6. Push outward two (2) retaining tabs holding indi-
vidual switch in place.
7. Switches are now free.
23
 Loading...