This document is a service manual for the SHARP Electric Water Heater, covering models WH-A55, WH-A57, WH-A58P, and WH-HOT HOT. It provides detailed information for servicing and maintaining these units, emphasizing user safety and the use of identical replacement parts as specified by safety regulations.
Function Description:
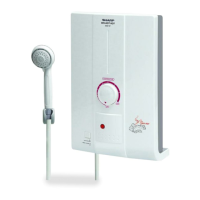
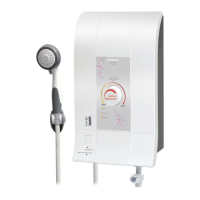
The SHARP Electric Water Heater is designed to provide warm water for showering. It operates by heating water as it flows through the unit, offering on-demand hot water. The device includes a main heater, a temperature control system, and safety features such as an ELB (Earth Leakage Breaker) checker button and a thermal cut-out. Water flow is managed through a main water valve and, on some models, a water volume knob. The shower head itself offers adjustable spray patterns.
Important Technical Specifications:
The manual outlines several key technical specifications for the different models:
- Rated Voltage: All models operate at 220V.
- Rated Frequency: All models operate at 50Hz.
- Power Consumption:
- WH-A55, WH-A57, WH-A58P: 3,500 W
- WH-HOT HOT: 4,500 W
- Water Supply System: Single point.
- Water Temperature Control: Approximately 50°C (Maximum).
- Minimum Pressure: 0.02 MPa (0.21 Bar).
- Maximum Pressure: 0.34 MPa (3.39 Bar).
- Product Dimensions (W x H x D): 218 x 339 x 98 mm.
- IP Number: IPX4, indicating protection against splashing water from any direction.
- Weight:
- WH-A55: 1.8 kg
- WH-A57, WH-A58P: 1.9 kg
- WH-HOT HOT: 1.85 kg
- Note on Temperature and Flow Rate: Temperature of inlet water is approximately 25°C and flow rate is 2.3 liters/min.
- Pressure Conversion: 1 MPa (Megapascal) = 10.2 kg/cm² (Kilograms/Square centimeter).
Usage Features:
The electric water heater is designed for straightforward operation with several user-friendly features:
- Pre-use Setup: Installation must be performed by an Authorized "SHARP" Dealer and the unit must be earthed. Users are instructed to open the main water valve, turn on the main breaker switch, and push the breaker angle support to activate the heater system.
- Temperature Adjustment: The temperature knob allows users to adjust the desired water temperature. Turning it clockwise increases the temperature, while "OFF" turns the heater off, allowing water to flow at normal temperature. The maximum temperature is approximately 50°C.
- Water Volume Adjustment (WH-A57, WH-A58P only): These models feature a water volume knob. Turning it counterclockwise increases water volume and simultaneously decreases temperature. Turning it clockwise decreases volume and increases temperature.
- Safety Precautions during Use:
- Users are advised not to install a water valve or faucet at the hot water outlet.
- Avoid spraying water directly on the unit or placing wet towels on it.
- Do not cover the shower head or fold the shower hose during use.
- In case of electricity or tap water outage, the temperature knob should be turned to "OFF" and the water volume knob clockwise to shut off water flow to prevent automatic flow when service resumes.
- Close supervision is necessary when children, elderly, patients, or disabled persons use the device to monitor water temperature.
- If the light in the house flashes during showering due to electricity irregularity, or if water pressure/flow is reduced when other faucets are used simultaneously, it may affect water temperature, requiring adjustment of water volume or temperature.
- During thunder and lightning storms, the main breaker should be turned off to prevent damage.
- If the product stops working, users should contact the SHARP service center for repair.
- Shower Set: The shower head offers three adjustable spray types: JET TYPE, COMFORT TYPE, and SPRAY TYPE, which can be selected by twisting the shower head cover.
Maintenance Features (Replacing Main Parts):
The manual provides detailed instructions for replacing various components, emphasizing safety by always turning off the main breaker before any repairs.
- Removing Shower Hose: The joint body between the unit and the shower hose can be turned out manually.
- Removing Body: The unit cover is removed by turning the temperature knob to "OFF," removing a screw underneath, and lifting the cover from the bottom.
- Removing Triac: Involves removing the body, disconnecting lead wires, and unscrewing the triac from the heater tank assembly.
- Removing Reed Switch: Requires removing the body, disconnecting lead wires from the PCB control assembly, and unscrewing the reed switch from the body valve. A specific torque of 3-4 kgf.cm is noted for tightening mounting screws.
- Removing Body Valve Assembly and Water Outlet: Involves removing the body and reed switch, detaching clamping springs, and unscrewing the body valve assembly and water outlet.
- Removing Heater Tank Assembly: Requires removing the triac, body valve assembly, and water outlet. Then, screws connecting L-Wire Earth, cable tie, triac lead wire, thermostat lead wire, and thermostat to the heater tank assembly are removed.
- Removing PCB Control Assembly: Involves removing the body, disconnecting reed SW. lead wire, removing the screw holding the PCB control assembly, cutting off the volume SW. lead wire, and disconnecting other lead wires from the triac, breaker, and heater tank.
- Removing Volume SW. Assembly: Requires removing the body, the nut holding the volume SW. to the fitting plate, screws holding the fitting plate to the back cover, and cutting off the volume SW. lead wire at the PCB control assembly.
- Removing Breaker: Involves removing the body, split pin, screws holding breaker lead wires, and screws holding the breaker to the back cover.
- Removing Neon Lamp Assembly: Requires removing the body, the screw holding the neon lamp assembly to the back cover, and cutting the neon lamp lead wire to the PCB control assembly.
Troubleshooting:
A troubleshooting guide is included to help diagnose common issues:
- Water is not hot: Possible causes include heater tank assembly shock, low pressure water, thermostat trip, defected volume SW., defected reed SW., or defected PCB control assembly. Corrective actions range from replacing parts to checking water pressure or resetting the thermostat.
- Water temperature cannot be set: Possible causes are a defected PCB control assembly or defected volume SW., requiring replacement or checking of these components.
- Water flow out from shower assembly is too low: Possible causes include a clogged O-ring, clogged shower assembly, or main water valve open too low. Corrective actions involve checking and cleaning, or opening the main water valve further.
- Water is not flow out from shower assembly: Possible causes are a closed main water valve or closed water volume, requiring opening these valves.
The manual also includes detailed wiring diagrams and installation advice, covering aspects like water pressure checks, unit mounting (vertical position, minimum height, clearance from walls), shower assembly connection, piping installation, and electric wire connections, including grounding procedures with specific requirements for ground rod diameter, length, depth, and resistance.