4
8
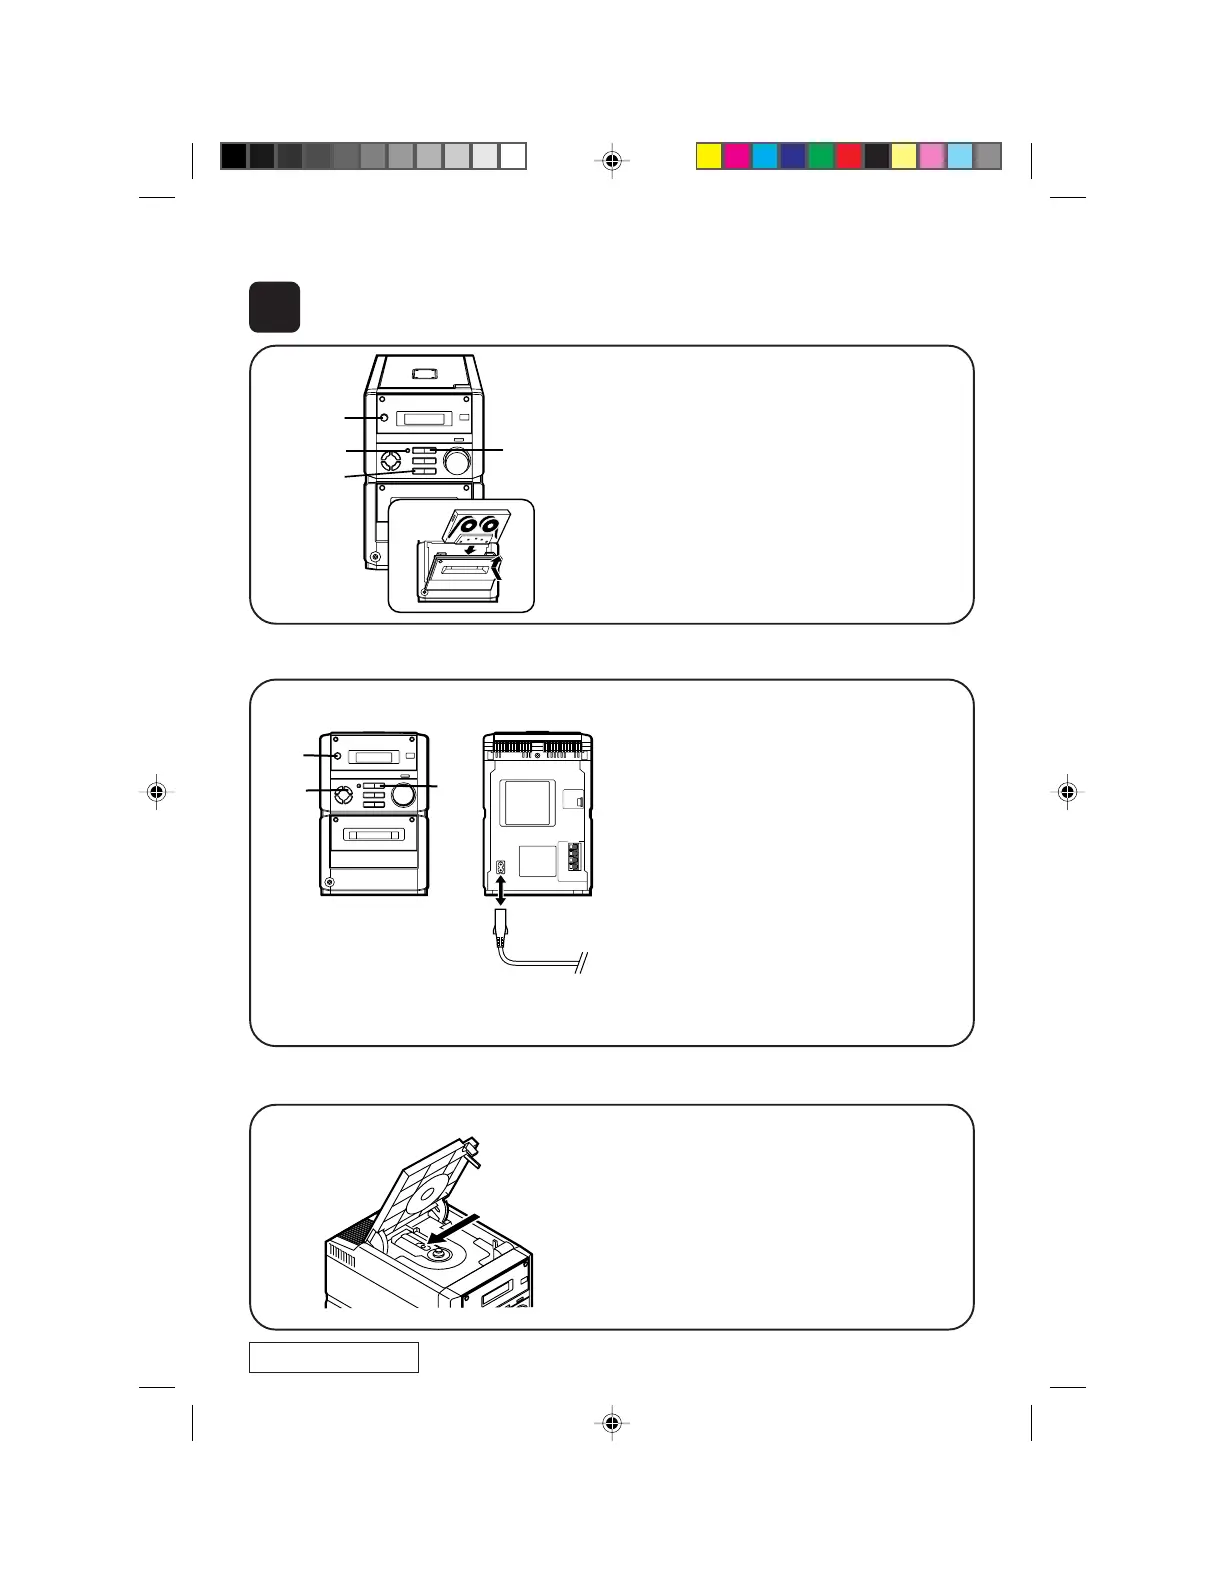
Recording from a CD (P. 17)
1 Press the ON/STAND-BY button to turn
the power on.
2 Press the FUNCTION button until “Cd” or
“no dISC” appears.
3 Load a CD and a recordable cassette.
4 Press the REC PAUSE button.
5 Press the 0 button.
1
3
3
2,3
AC INPUT
● Do not touch the laser pickup lens. If fingerprints
or dust accumulate on the pickup, clean it gently
with a dry cotton swab.
● CD pickup cleaning
If this product is subjected to strong external inter-
ference (mechanical shock, excessive static elec-
tricity, abnormal supply voltage due to lightning,
etc.) or if it is operated incorrectly, it may malfunc-
tion or the display may not function correctly. If such
a problem occurs, do the following:
1 Press the ON/STAND-BY button to enter the
stand-by mode.
2 Unplug the AC power lead from the AC INPUT
socket on this unit.
3 Whilst pressing down the MEMORY/SET but-
ton and the 0 button, plug the AC power lead
into the AC INPUT socket on this unit.
Caution:
● The operation explained above will erase all data
stored in memory, such as clock and timer set-
tings, and tuner and CD presets.
● Resetting the micro computer
TINSE0041SJZZ
A0002.YT
1
2
5
3
4
**XL-30H(SUK).QG 00.2.4, 4:43 PM4
Downloaded from: http://www.usersmanualguide.com/
 Loading...