Printed in China
1-800-374-2744
Sharper Image® name and logo (including the 77 logo) are trademarks or
registered trademarks. Distributed by and © 2022 MerchSource, LLC. Irvine,
CA 92618. All rights reserved.
Model Number: 1015441
The buggy includes a built-in rechargeable battery (included). The remote
control requires 2 AAA 1.5V batteries (not included).
1. Use a Phillips-head or cross screwdriver to loosen the screw securing the
battery cover on the bottom of the remote.
2. Insert the batteries, ensuring the correct polarity as per the diagram on
the battery compartment.
3. Replace battery cover and tighten the screws after installation.
CONTENTS
BATTERY INSTALLATION
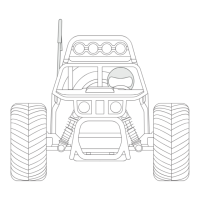
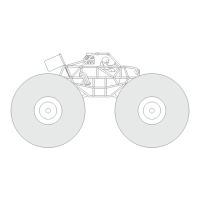
1 Bulldog Buggy
1 Remote Control
1 USB-C Cable
Power Indication LED
Left/Right Joystick
Forward/Backward
Joystick
Car Demo Light On/O
Power Knob
REMOTE OPERATION
1. The left joystick controls forward and backward direction. The right
joystick controls left and right direction.
2. While the buggy is moving forward, the headlights light up. If the buggy is
in backward the headlights will stay o.
3. Press the “Light On/O” button to turn the Top LED lights of buggy on or
o.
CHARGING THE BATTERY
The BULLDOG BUGGY uses an internal rechargeable battery and is not
replaceable. If the battery no longer stays charged, dispose of it properly
according to local disposal requirements.
CAUTION: If the rechargeable battery leaks fluid, dispose of the vehicle
immediately. Do not allow fluid to come in contact with skin or eyes.
1. Make sure the power switch located at the bottom of the buggy is turned
to the o position.
2. Insert the USB-C cable into the port located at the bottom of the buggy.
IMPORTANT: Do not use excessive force when connecting the USB-C
cable. If there is resistance, check alignment and try again.
3. Connect the other end of the USB-C cable into your charging source. The
LED indicator turns on while the buggy is charging and is green when the
buggy is fully charged.
Note: The average charging time is approximately 1.5 hours (via 5.0V/1A
USB wall charger).
4. The LED indicator on the remote will begin to flash when the buggy’s
battery needs to be recharged. The buggy will run for up to 15 minutes on
a full charge.
Insert the USB
connector into a USB
power source
Insert the USB
connector into a USB
power source
Connect the battery
charger to the car
Connect the battery
charger to the car
LED
Indicator
LED
Indicator
BULLDOG BUGGY
6+