AFTER SALES SUPPORT
Email: service@prolinkbrands.co.nz
Phone: 0508 776 546 - Mon-Fri 8:30am – 4.30pm Page 7
Installation and Clearance
This appliance is designed to be free standing only, and should not be recessed or
built-in.
Position your Cooler so that the plug is accessible.
Keep your Cooler out of direct sunlight.
Do not place next to heat generating appliance.
Place the Cooler on a levelled surface that is strong enough to support the unit
when it is fully loaded. To level your Cooler, adjust the front feet located at the
bottom of the unit.
Before connecting the unit to a power source, allow it stand upright for
approximately 3 hours. This will reduce the possibility of any system malfunctions
which may have occurred from handing during transportation.
When positioning the cooler, 15cm of space at the back and 25cm of space both
sides are suggested. Do not put any objects on top of the unit which may block
the air circulation.
Do not remove the feet of the Cooler. Keep at least 50mm of ground clearance.
WARNING! DO NOT COVER THE APPLIANCE
WARNING! DO NOT BUILD THE APPLIANCE INTO CABINETRY
INSTRUCTIONS
Power
1. Connect the supply plug to a suitable 220-240V AC 50Hz power outlet and switch
on.
2. After plugging the appliance, allow the unit to cool down for 2-3 hours before
placing beverage into the cooler compartment.
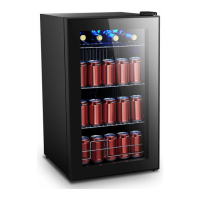
Setting the Temperature.
Your unit has only one control for regulating the temperature in the compartment.
The temperature control is located at the bottom right-hand side of the
compartment.
The first time you turn the unit on, set the temperature control to"5”.
The range of the temperature control is from position "0" to"5". After 24 to 28
hours, adjust the temperature control to the setting that best suits your need。
The setting of "3" or "4" should be appropriate for home or office use.