824120 11
Pump Service
6. Lightly grease the retaining screw and the outer
end of the plunger. Place the washer, O-ring, and
backup ring around the screw, and install the
screw through the plunger. Torque to 14.4 ft-lb
(19.5 NSm).
NOTE: If you plan to replace the packings, see Serv-
icing the V-Packings.
7. Lubricate the outside of each plunger. Slide the
manifold onto the crankcase, being careful not to
damage the seals.
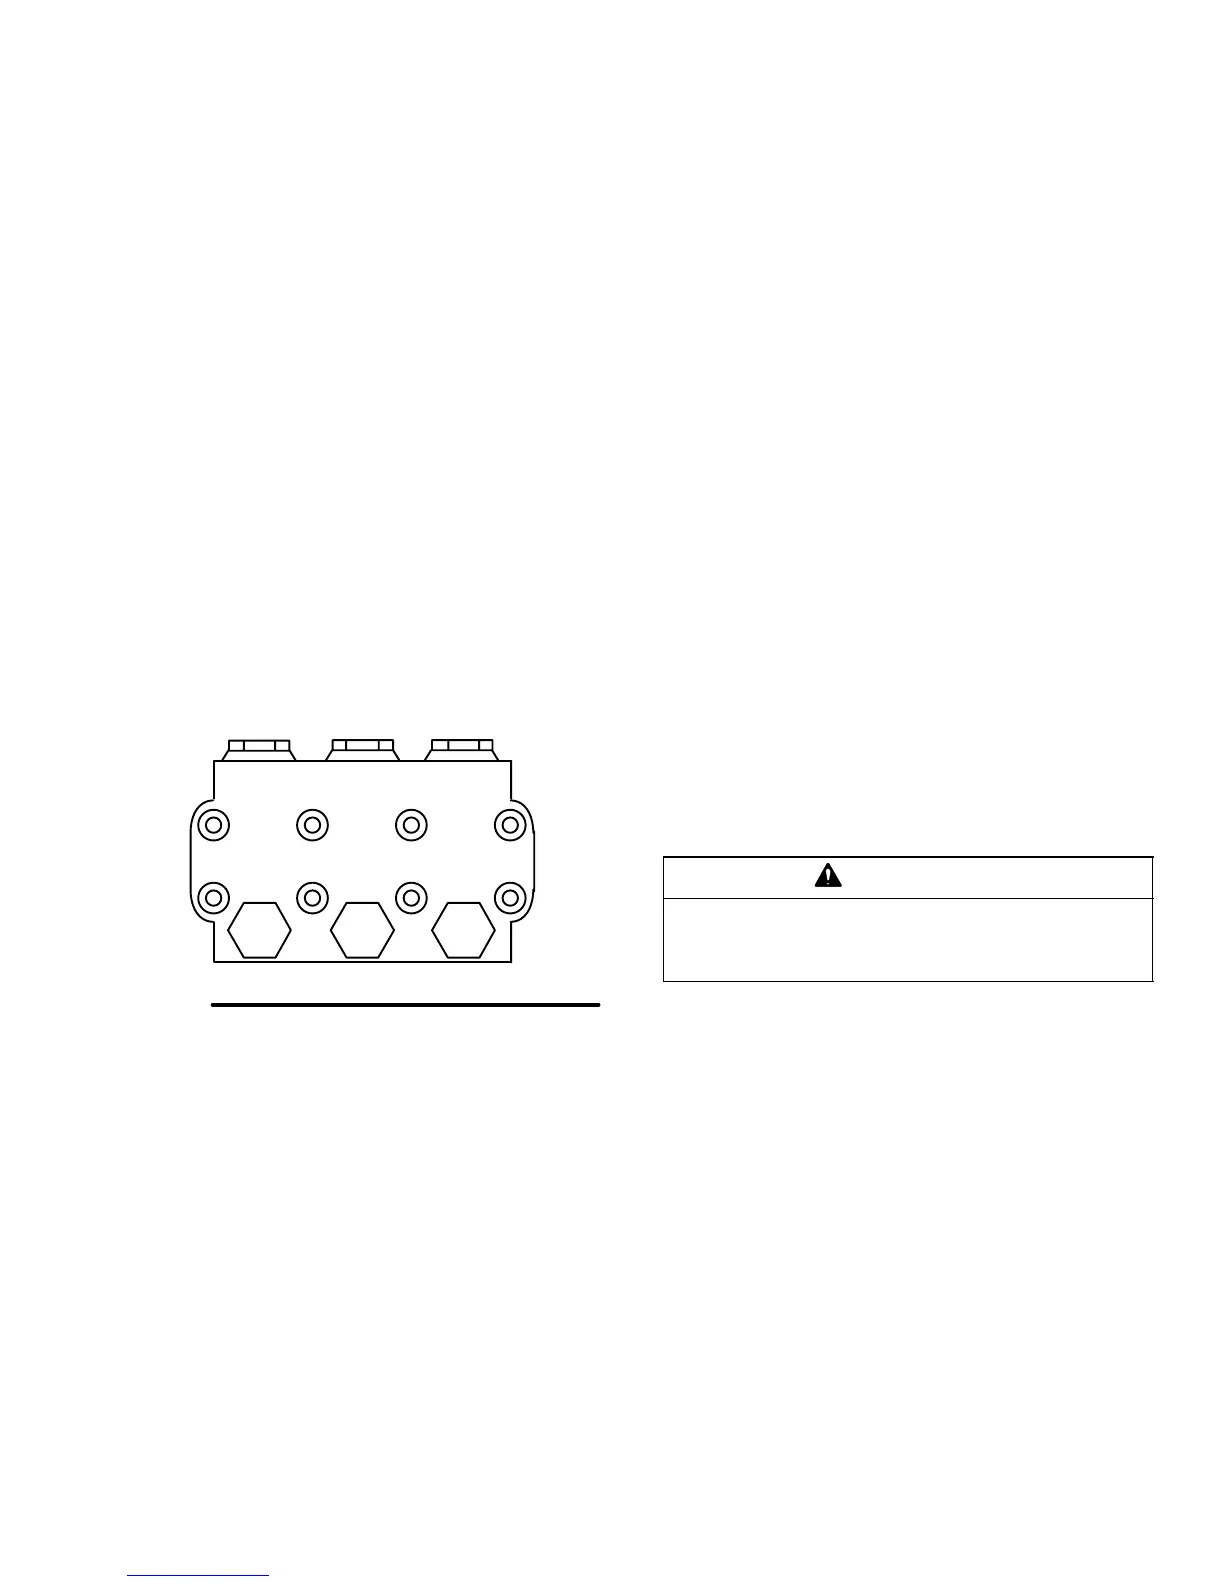
8. Install the capscrews and washers finger tight.
Torque the screws to 21.7 ft-lb (29 NSm) following
the tightening pattern shown in Fig. 3. Uneven
tightening might cause the manifold to bind or jam.
14
2
3
5
8
7
6
Fig. 3
Servicing the V-Packings
NOTE: There are two types of packing kits for each
pressure washer:
For 3040 and 3235:
801486 contains packings only.
801487 contains packings, rings, and retainers.
For 3540 and 4043:
803511 contains packings only.
803512 contains packings, rings, and retainers.
1. Remove the manifold as outlined in the Pumping
Section.
2. Carefully pull the packing retainer from the mani-
fold. Examine the O-ring, and replace if cut or
damaged.
3. Remove the V-packing and head ring. Pull out the
intermediate retainer ring. Remove the second
V-packing and second head ring.
4. Inspect all parts and replace as necessary.
5. Thoroughly clean the packing cavities, and exam-
ine for debris or damage.
6. Lightly grease the packing cavities, and replace
the packings in the following order: head ring,
V-packing, intermediate ring, head ring, V-packing,
packing retainer. Install the O-ring in the retainer
groove.
CAUTION
Install the parts in the proper order and facing the
proper direction. Improperly installed parts will
cause a malfunction.
7. Reassemble the manifold as instructed in Servic-
ing the Plungers.