re, follow
the
Pressure
on page
11
to reduce
.-
ry.
inw
from moving
..
. .
.,
..
.. .
,.
.
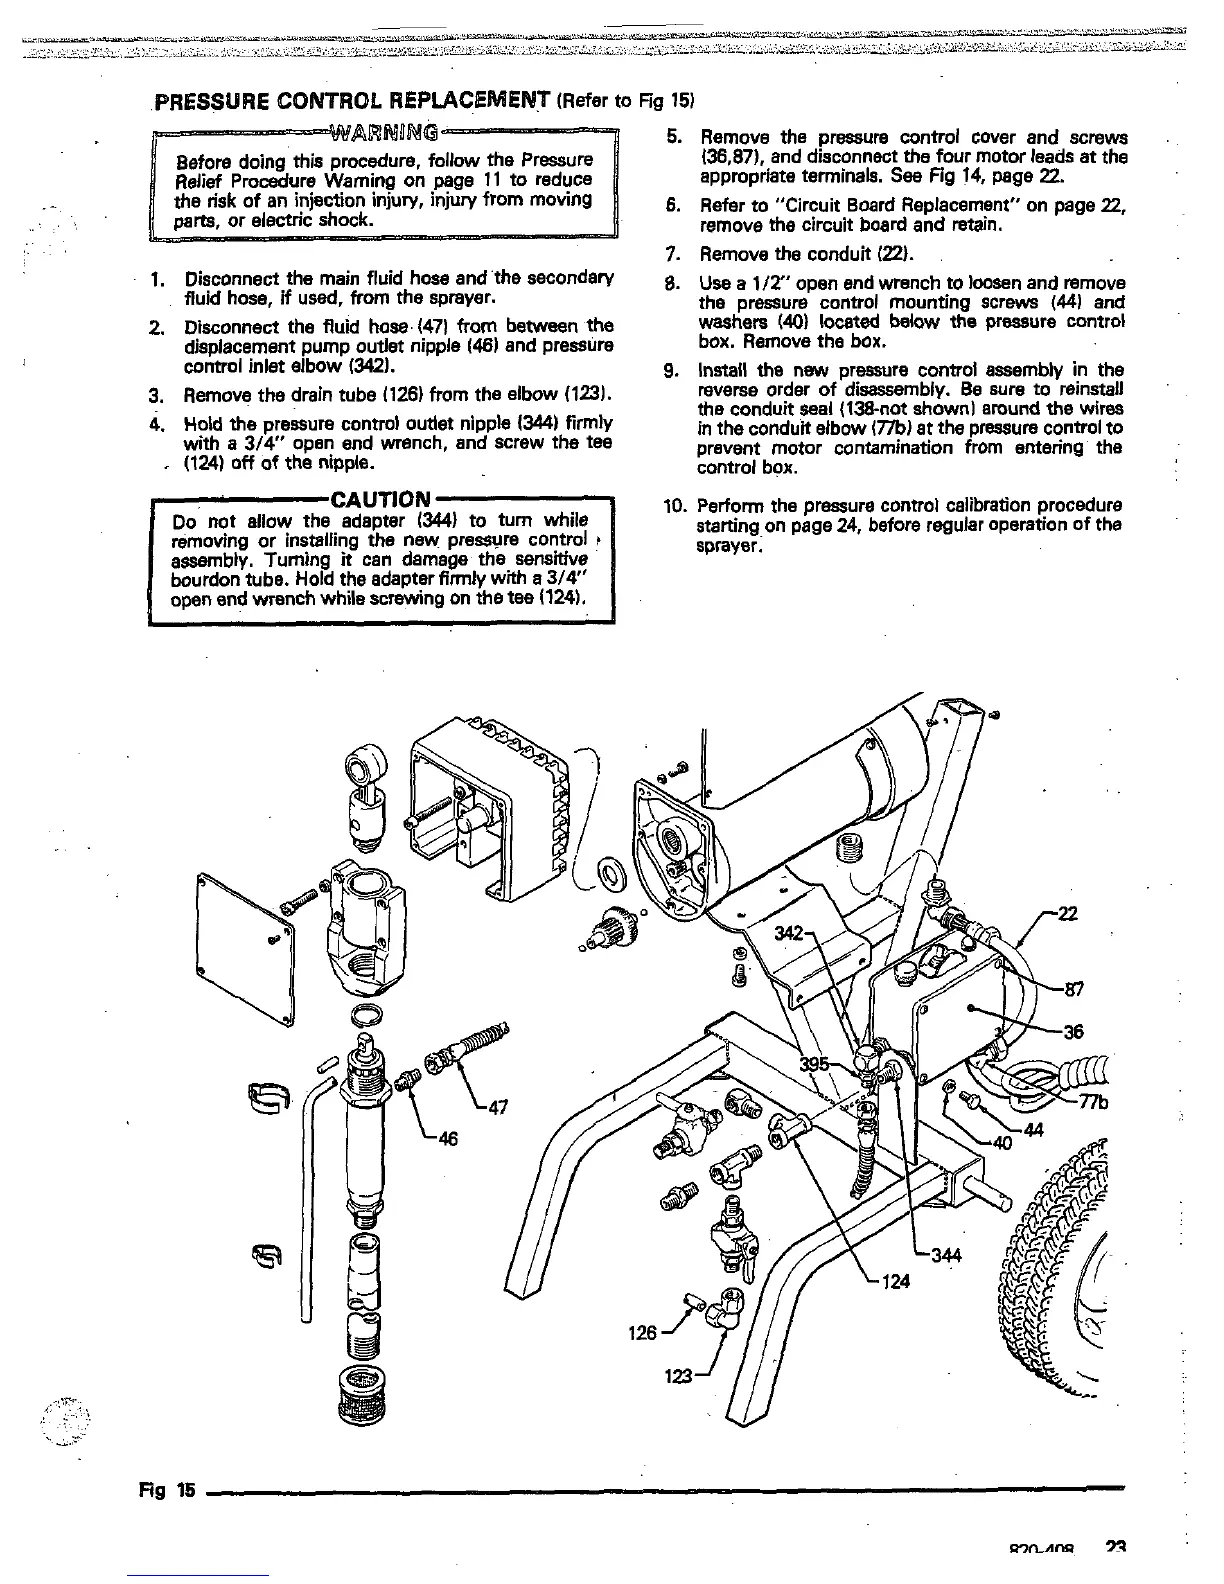
1.
Disconnect the main fluid hose and'the secondary
fluid hose,
if
used,
from the sprayer.
2.
Disconnect the fluid hose
(471
from between the
control inlet elbow
(342).
displacement pump outlet nipple
146)
and pressure
3.
Remove the drain tube
(126)
from the elbow
(123).
4.
Hold
the
pressure control oudet nipple
(344)
firmly
with
a
3/4"
open end wrench, end screw the tee
I
(124)
off
of
the nipple.
5.
Remove the pressure control cover and screws
136.87).
and disconnect
the
four motor leads at the
appropriate terminals.
See
Fig
14,
page
22.
6.
Refer
to
"Circuit Board Replacement" on page
22,
remove
the
circuit board and retain.
7.
Remove
the
conduit
1221.
8.
Use
a
llr'
open end wrench to loosen and remove
the
pressure control mounting screws
(44)
and
washers
(40)
located below the pressure control
box. Remove the box.
9.
Install
the
new pressure control assembly in the
the conduit seal (Isnot
shown1
around
the
wires
reverse order
of
disassembly.
Be
sure to reinstall
prevent motor contamination from entering'
the
in the conduit elbow
177bl
at
the pressure control to
control box.
10.
Perform the pressure control calibration procedure
or installing the new. pressure control
starting-on page
24,
before regular operation
of
the
Turning
it
can damage the sensitive
sprayer.
ube. Hold the adapter firmly with
a
3/4"
wrench while screwing on
the
tee
(124).
Fig
15
 Loading...