This procedure
sets
the sprayer to
3ooo
psi (210 bar1 NEVER attempt to increase the fluid outlet pressure
MAXIMUM
WORKING PRESSURE. This procedure
by performing this calibration in any other, way.
must be performed whenever
a
new or used circuit NEVER EXCEED
3000
psi (210 bar)
MAXIMUM
board, or pressure control assembly is removed
and
WORKING PRESSURE.
Normal
operation of the
reinstalled or replaced, to
be
sure the sprayer is pro-
sprayer
at
higher pressures could result
in
compo-
pedy calibrated.
nent rupture, fire or explosion.
pressurize
and
result
in
component
rupture, fire
or
Improper
calibration can cause the
sprayer to over- AVOID touching the wires in the pressure control
assembly with your fingers or
tools
when the control
explosion.4t may also prevent the sprayer from ob-
taining the maximum working pressure which would
box cover
is
removed to reduce
the
risk of electric
shock.
result
in poor sprbyer performance.
1
10.Remove the test gauge assembly. Flush out water
with mineral spirits.
Caiibratlon Setup
1See
Fig 15)
1.
Follow the Pressure Relief Procedure Warning on
0.015 spray tip in the gun. Connect the gun to the
page
11.
Remove the spray hose and gun. Install
a
outlet.
new
test hose and connect the hose
to
the sprayer
2.
Remove the pressure contml screws and cover.
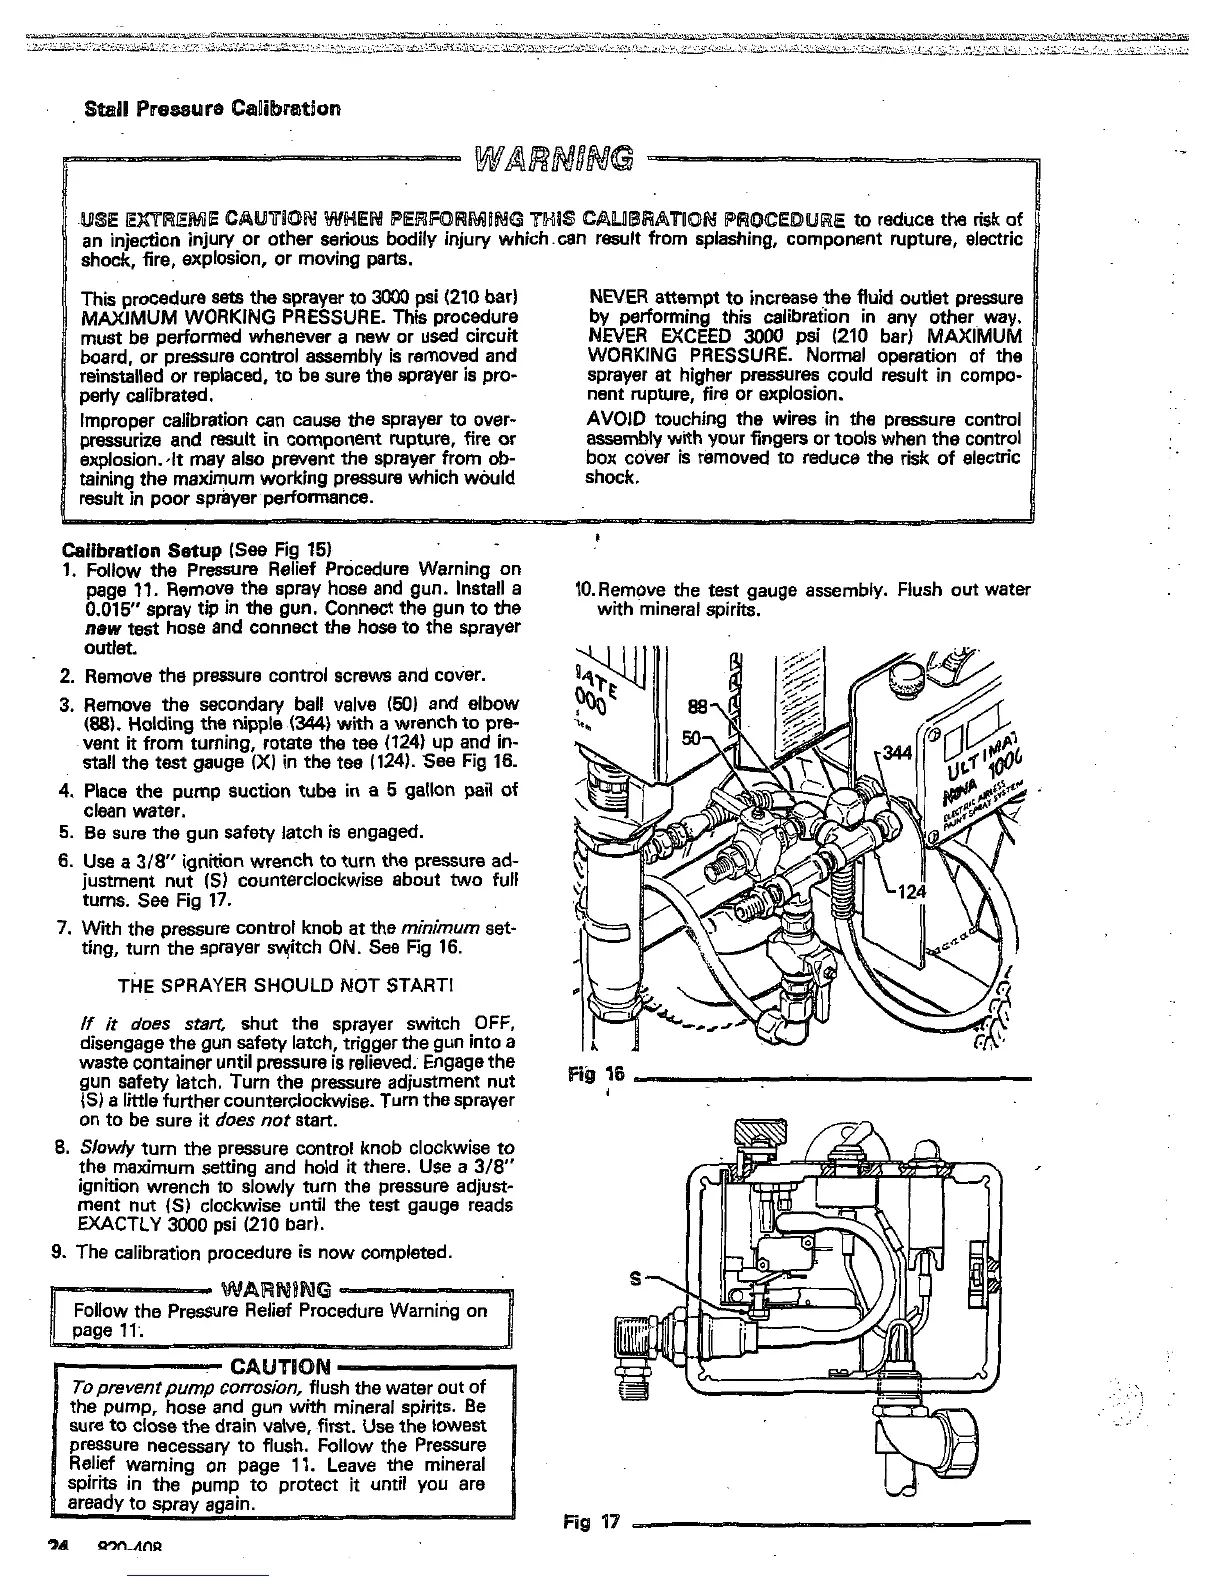
3.
Remove the secondary ball velve
150)
and elbow
188).
Holding the nipple
(344)
with
a
wrench to pre-
vent
it
from turning, rotate the tee (124) up and
in-
stall
the test gauge
00
in the tee 1124). See Fig
16.
4.
Place the pump suction tube
in
a 5 gallon pail
of
clean water.
5.
Be sure the gun safety latch
is
engaged.
6.
Use
a
3/8
ignition wrench to turn the pressure
ad-
justment nut
1s)
counterclockwise about
two
full
turns. See Fig 17.
7. With the pressure control knob
at
the
minimum
set-
ting, turn the sprayer svyitch
ON.
See Fig 16.
THE
SPRAYER
SHOULD
NOT
STARTI
If
it
does
srart
shut
the
sprayer switch
OFF,
waste container until pressure is relieved; Engage the
disengage the gun safety latch, trigger the gun into a
gun safety latch. Turn the pressure adjustment nut
(SI
a
little further counterclockwise. Turn the sprayer
on to be sure
it
does
not
start.
8.
Slowly
turn
the pressure control knob clockwise to
the maximum setting and hold
it
there. Use
a
3/8"
ignition wrench
to
slowly turn the Dressure adiust-
ment nut
(S)
clockwise until the test gauge reads
EXACTLY
3000
psi
(210 bar).
9.
The calibration procedure is now completed.
.i
..
.
.\
..
..
 Loading...