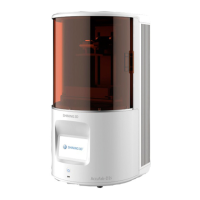
The AccuFab-L4D is a 3D printer designed for professional use, primarily for dental applications, utilizing photo-polymerized resin material. It is part of the AccuFab series of printers developed by SHINING 3D. The device is controlled by its operating software, FabWare, and integrates with AccuWare for data preparation.
Function Description
The AccuFab-L4D operates by curing liquid resin layer by layer using ultraviolet light to create three-dimensional models. The printing process begins with importing a print file, which can be done via a flash drive or through a network connection after slicing the model using AccuWare. Once the file is loaded, the printer initiates the build process, progressively forming the model in the resin tank. After printing, a post-processing workflow is required, including model removal, cleaning, and post-curing, to achieve the final hardened product.
The printer features a chamber door, a build platform bracket, a build platform, a resin tank, and a touch screen for user interaction. Connectivity options include a power port, network port, power button, and a B-type USB port.
Usage Features
Printer Setup and Operation:
- Unpacking and Installation: The printer comes with clear instructions for unpacking, including removing fixing foam and connecting power. During initialization, the build platform automatically moves to the top position.
- Material Handling: The AccuFab-L4D uses a specific resin material that requires proper handling. Users are instructed to shake the resin bottle well before adding it to the resin tank to prevent sediment formation. A scraper is provided to stir resin in the tank. Resin can be added during printing without pausing, and the resin level should be maintained between minimum and maximum indicators.
- FabWare Interface: The printer's operating software, FabWare, provides a user-friendly interface accessible via the touch screen.
- Home Page: Displays printer status (Idle, Printing, Finished), build environment information (cabin temperature, humidity), and resin tank settings (material type, layers printed).
- Queue Page: Shows pending print jobs and a history of completed jobs. Files can be imported from a flash drive.
- Settings Page: Allows configuration of software and hardware settings, including language, network settings, and manual axis control.
- Network Connectivity: The printer supports both LAN and wireless network connections for sending print files. Users can configure network settings through FabWare, choosing between auto or manual IP/DNS configuration.
- FabWare Updates: FabWare can be updated either online or offline. Online updates allow for software and material profile updates, while offline updates require a flash drive with downloaded software.
- Printing Workflow:
- Resin Tank Setting: FabWare displays the current material settings for the resin tank. Users can change these settings, including brand and material type, to match the sliced file.
- Platform Leveling (Optional): This crucial step ensures successful prints. It involves placing an A4 paper on the LCD screen, loosening screws on the build platform, moving the platform to the zero position via the "Motor Settings" in FabWare, and then tightening the screws once the paper can be pulled out with slight resistance.
- Choosing Printing File: Print files can be selected from local storage on the printer or from a flash drive. The printer recognizes FAT32 format for flash drives.
- Printing Status: During printing, the "Print Detail" screen shows progress, including printed layers, elapsed time, and a percentage bar. Users can pause or cancel prints from this screen.
Maintenance Features
Safety Instructions:
- Material Contact: The resin material, while tested for safety, can cause irritating reactions upon direct skin contact. Operators must wear nitrile disposable gloves and follow Material Safety Data Sheet (MSDS) instructions. In case of skin or eye contact, immediate washing or flushing with water is required, and medical attention should be sought if necessary. Ingestion requires inducing vomiting and seeking medical attention.
- Ultraviolet Light: The printer emits 405 nm UV light, which can damage eyes. Direct contact should be avoided. A safety interlock prevents printing when the cover is open.
- Ethanol: Used for cleaning, ethanol is flammable and explosive. It must be stored in a cool, ventilated area, away from children, with the bottle cap closed. Disposable gloves should be worn when handling ethanol.
- Sharp Tools: The accessory kit includes sharp tools (tweezers, shovels, utility knives) for model removal and cleaning. Personal safety protection is required when using them.
- Electromagnetic Interference: The printer complies with CE/FCC standards for electromagnetic emissions.
Cleaning and Post-Processing:
- Clean Resin Tank (Optional): After a print failure, the resin tank can be cleaned to remove residue. This involves placing a resin tank cleaner in the corner, accessing "Resin Tank Information" in FabWare, selecting "Cure Resin," choosing a curing time, and then removing the cured material with the cleaner. Sharp tools should not be used to avoid damaging the film.
- Remove Model: After printing, models should be left on the platform for a few minutes before removal. Tools from the accessory box are used, with caution to avoid damaging the platform surface or the resin tank film.
- Clean Model: Printed parts are cleaned in a bath of alcohol (75% or above) for about 30 seconds. A cleaning machine can also be used. Optional high-pressure air can be used to dry the model.
- Clean Build Platform: A putty knife is used to clean model residue from the build platform. A brush with wet alcohol cleans residual resin. The platform should then be dried with a paper towel and air-dried in a ventilated place before reuse.
- Model Post Cure: Green parts require post-curing to enhance performance and cure uncured surfaces. Models are placed in a curing box, and the knob is rotated to set the curing time. The chamber door should remain closed during this process. Recommended curing times vary by material. After post-curing, models can be handled without gloves.
- Remove Support: Supports are removed by hand or with tools. Caution is advised to prevent scratches. The build platform should be removed before replacing the resin tank to avoid resin dripping.