This document is the owner's manual for the Shoprider® 889SLBF scooter, a mobility product designed for individuals with limited mobility. It provides comprehensive information on the scooter's features, safe operation, adjustments, maintenance, and technical specifications.
Function Description
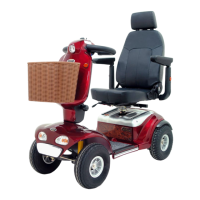
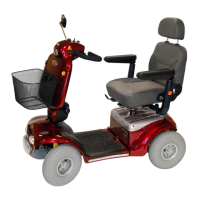
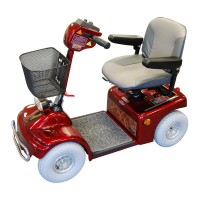
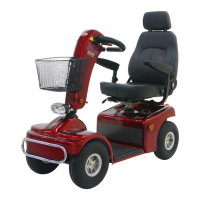
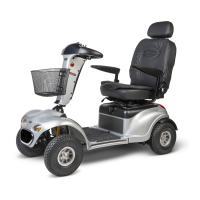
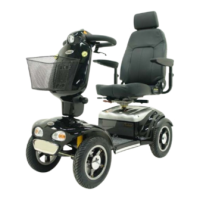
The Shoprider® 889SLBF scooter is an innovative mobility device designed for outdoor use in confined spaces. It features direct drive transaxles and electromagnetic brakes, ensuring a safe and efficient ride. The scooter is intended to assist individuals with mobility limitations.
Important Technical Specifications
- Model: 889SLBF
- Overall Dimensions (L x W x H): 51 x 24 x 44 inches
- Front Tire Diameter: 2 x 13 inches
- Rear Tire Diameter: 2 x 13 inches
- Suggested User Weight (on Level Road): 300 lbs
- Total Weight (w/ Battery Pack, Basket, Seat): 250 lbs
- Battery Capacity: 12V 50Ah x 2
- Charger: 5A
- Output Power of Motor (Reference Only): 1350 W
- Max. Speed: 9-9.4 mph
- Safe Climbing Angle: Refer to Fig. 7 (9° (15%) for 80kg/176lbs, 6° (10%) for 90kg/198lbs, 0° for 136kg/300lbs)
- Range (Per charge w/ standard battery): 20-22.5 miles
- Turning Radius: 59 inches
Usage Features
The scooter offers several adjustable features for user comfort and safety:
- Tiller Angle Adjustment: The tiller can be adjusted to five different positions by pulling a large black ball located at its base. Releasing the ball locks the tiller in place.
- Seat Slide & Swivel Adjustment: A lever on the left side of the seat allows for forward/backward adjustment. A spring-loaded red lever under the right side of the seat enables it to swivel and lock into one of four positions.
- Seat Removal and Height Adjustment: The seat can be removed by folding down the back and pulling up the swivel seat adjustable lever. Seat height can be adjusted to three different settings by loosening a tightening bolt, removing a locking pin, and repositioning the seat adaptor.
- Armrest Adjustment: Hand knobs on the underside of the seat allow for armrest width adjustment or removal for transportation. The vertical square tube connected to the armrest can be re-tightened for height adjustment. Armrest angle can be adjusted by unscrewing a lock-nut and bolt.
- Speed Controls: A dial knob allows setting speeds from 1 (minimum) to 10 (maximum). A "High / Low" switch provides extra speed, requiring caution in "High" mode. Higher settings are recommended for climbing slopes.
- Battery Level Indicator: LED bars display the remaining battery charge, most accurately when the scooter is in drive. Users are cautioned against complete discharge to prevent irreversible damage.
- Lights: A blue button at the rear of the tiller operates the lights.
- Horn: A yellow button at the rear of the tiller operates the horn.
- Thumb/Finger Lever Controls: The left lever controls reverse motion, and the right lever controls forward motion. The amount of pressure applied determines speed. Releasing the lever brings the scooter to a slow stop, engaging the electromagnetic brake.
- On/Off Key Switch: Inserting and turning the key illuminates LED bars. A slight delay occurs while the controller checks circuits before operation.
- Indicator Switch: Operates turn indicator lights.
- Hazard Warning Switch: A red button activates all indicator flashers.
- Electromagnetic Brake: Automatically engages when control levers are released, providing a smooth stop.
- Free Wheel Operation: A red handle (free wheel release lever) located inside the left rear wheel disengages the motor, allowing the scooter to be pushed. Pushing the lever down re-engages the motor. It is crucial to re-engage this device after use to prevent injury.
- Anti-tip Wheels: Located at the rear of the scooter frame, these wheels must be installed for safe operation.
Safety Advice
- Do not carry passengers.
- Read the owner's manual thoroughly before use.
- Do not exceed inclines over 9 degrees (15% grade).
- Reduce speed when turning, especially if driver weight exceeds unit weight.
- Ensure the brake is on and the scooter is switched off before getting on or off.
- Do not switch off the scooter while moving.
- Do not drive where you cannot safely or legally walk.
- Do not attempt to drive over curbs greater than 3 inches; approach curbs less than 3 inches at a 90-degree angle and low speed.
- Avoid drinking or using a mobile phone while driving.
- Do not exceed the suggested user weight limit.
- Keep feet on the scooter when moving.
- Ensure physical fitness to operate the unit; consult a doctor if unsure.
- Slow down on rough or uneven ground.
- Practice getting on with assistance if balance problems exist.
- Do not operate without anti-tip wheels.
- Do not use escalators.
- Avoid driving on inclines with oil, water, or ice.
- Do not lift the scooter by its seat, tiller, rear chassis cover, or removable parts.
- Use only manufacturer-authorized parts and accessories.
- Remove the key from the ignition when not in use or before sitting in/exiting.
- Do not connect foreign devices to the battery or charging port.
- Ensure the tiller is properly adjusted and locked.
- No passengers should be in the scooter when transported by a vehicle.
- Avoid using the scooter in rain, near showers, or in damp bathrooms.
- Do not lean or pull on the tiller when mounting/dismounting.
- Do not operate or turn the key on while charging.
- Replace loosened wheel assembly center bolts with specified new bolts from authorized dealers, secured with 240 ± 5 kg-cm torque and Loctite 271 adhesive.
- Charge batteries daily after use and remove the charging plug.
- Battery cables must be securely fastened.
- Batteries must be tied down correctly and securely.
- No loose cables when driving.
- Check battery charge before operating.
- Charge batteries in a well-ventilated area.
- If the unit sinks into deep water, switch off power and consult a dealer.
- Switch off power when not in use, before charging, removing, or installing batteries.
- Do not exceed product specifications.
- Do not use the thumb/finger lever before the key switch is turned on; if used, turn the key switch off and then on.
- EMI Warning: Shoprider® scooters are susceptible to electromagnetic interference (EMI). Avoid operating hand-held transceivers (CB radios, cellular phones) when the scooter is ON. Be aware of nearby transmitters (radio/TV stations). If unintended movement or brake release occurs, turn the scooter OFF. Adding accessories may increase EMI susceptibility. Report all incidents to your dealer. The manufacturer is not responsible for damage/injury due to improper use.
Maintenance Features
- Lubrication: At six-month intervals, lubricate the seat pivot post, seat release lever pinion, wheel bearings, and scooter axle with a light oil. CAUTION: Do not use WD40 or lubricate the transaxle/gear box. Consult a dealer for difficulties.
- Cleaning: Clean the scooter as needed using a soft damp cloth. WARNINGS: Do not use a hose or abrasive cleaning products. Mild detergents are acceptable.
- Wheels and Tires: The wheels have split rims for easy puncture repair. To change wheels, remove the center 13mm bolt and slide the wheel off. Be careful not to lose the drive key on rear wheels. When changing a tire, deflate it first. Remove four bolts to split the rim. Ensure a locking washer is fitted with the retaining bolt (and drive key for rear wheels) when refitting.
- Tire Pressure: Recommended tire pressure is 30 psi for rear tires and 25 psi for front tires. When refitting the tube, inflate it slightly to prevent pinching. CAUTION: The maximum tire pressure stated on the tire (50psi) should never be reached. Maintain correct pressure for even wear and ride comfort.
- Circuit Breaker: The scooter has electronic controls to protect against overloads and a circuit breaker for extra protection. If the scooter stops unexpectedly, check if the circuit breaker has popped out (located under the rear chassis cover, accessible via a port hole under the seat).
Troubleshooting Guide
If the scooter fails to operate, check the following:
- Unit is switched on.
- All plugs and connectors are firmly fixed.
- Battery level shows full charge.
- Freewheeling device is in the drive position.
If the freewheel device was operated while the scooter was switched on, the scooter will not operate until the ignition key is switched off and then on again. If issues persist after checking these points, consult your dealer.