Operations
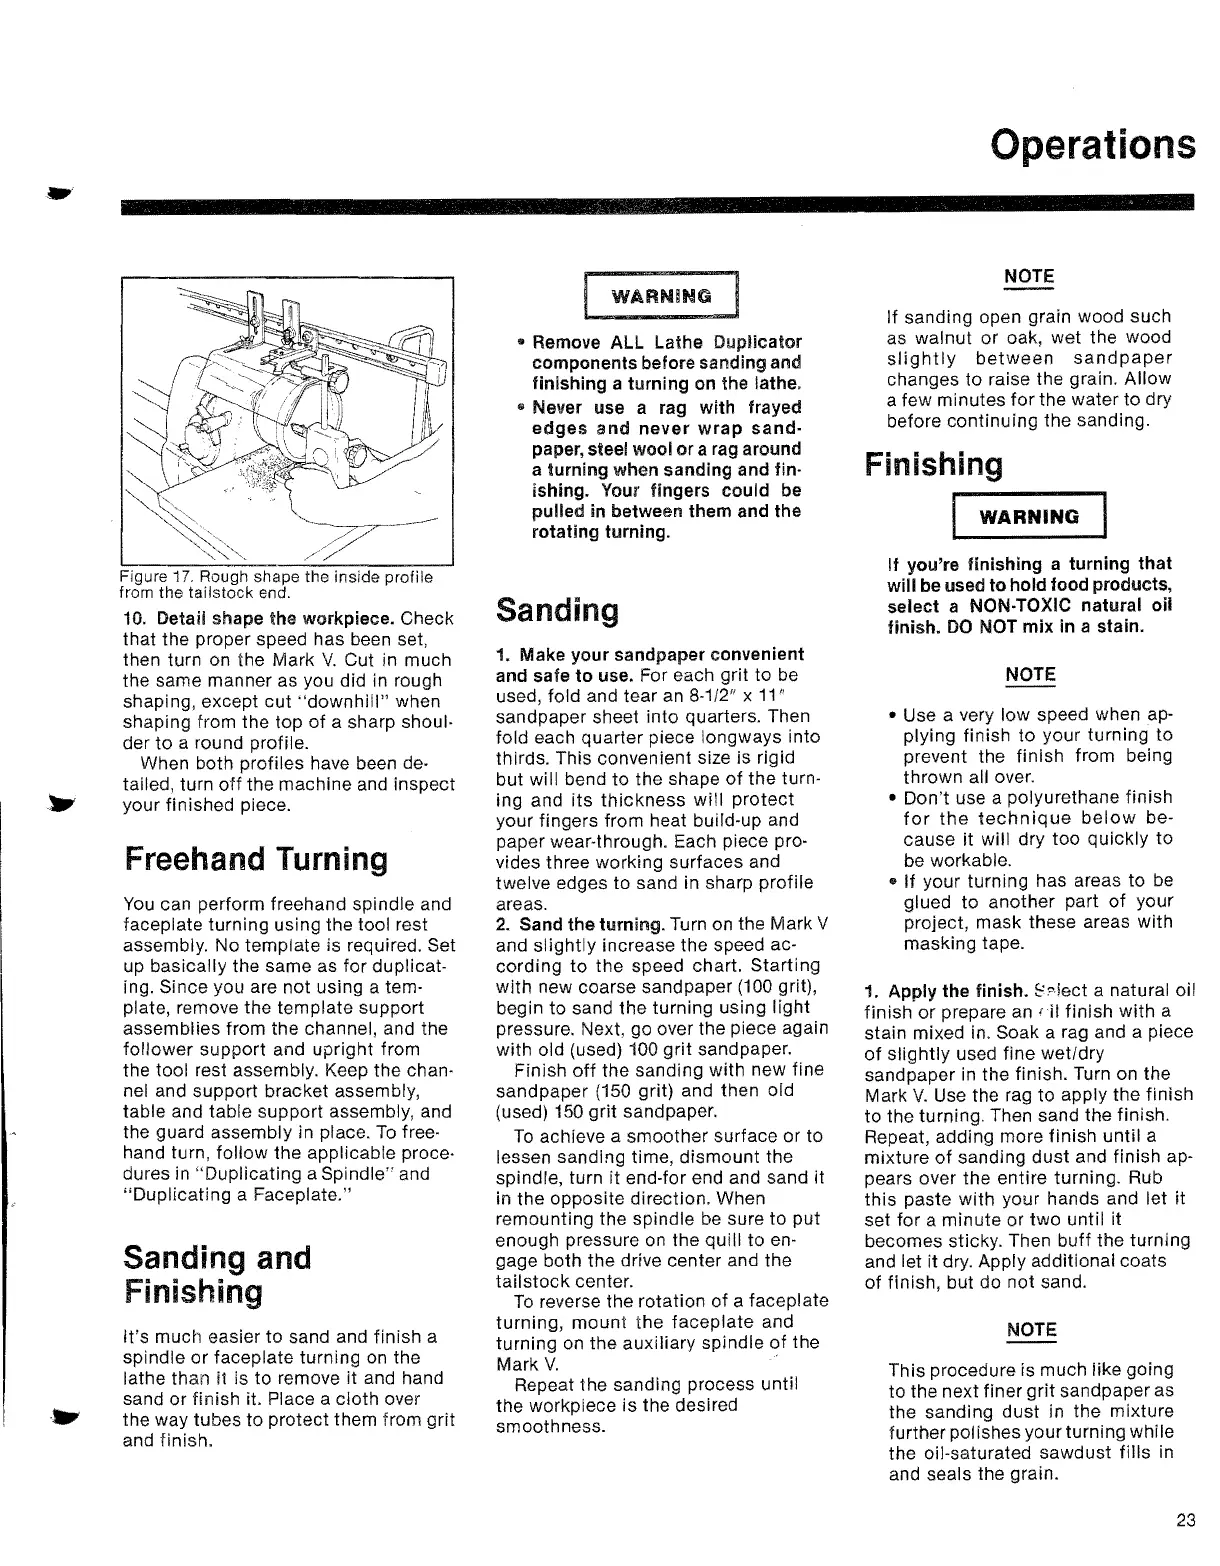
Figure
17.
Rough shape the inside profile
from the taiistock end.
10.
Detail shape the workpiece. Check
that the proper speed has been set,
then turn on the Mark
V.
Cut in much
the same manner as you did in rough
shaping, except cut
"downhill"
when
shaping from the top
of
a sharp shoul-
der
to
a round profile.
When both profiles have been
de-
tailed, turn
off
the machine and inspect
your finished piece.
Freehand Turning
You
can perform freehand spindle and
faceplate turning using the tool rest
assembly. No template is required.
Set
up
basically the same as for duplicat-
ing. Since you are not using a tem-
plate, remove the template support
assemblies from the channel, and the
follower
support and upright from
the tool rest assembly. Keep the chan-
nel and support bracket assembly,
table and table support assembly, and
the guard assembly in place.
To
free-
hand turn, follow the applicable proce-
dures
in
"Duplicating a Spindle" and
"Duplicating
a Faceplate."
Sanding and
Finishing
It's much easier to sand and finish a
spindle or faceplate turning
on
the
lathe than
it is to remove it and hand
sand
or
finish it. Place a cloth over
the way tubes to protect them from
grit
and finish.
WARNING
..
Remove ALL Lathe Duplicator
components before sanding and
finishing a turning on the lathe.
..
Never use a rag with frayed
edges
and
never
wrap
sand-
paper, steel wool
or
a rag around
a turning when sanding and fin·
ishing. Your fingers could be
pulled in between them and the
rotating turning.
Sanding
1. Make your sandpaper convenient
and safe
to
use. For each grit to
be
used, fold and tear
an
8-1/2f1
x 11"
sandpaper sheet into quarters. Then
fold each quarter piece longways into
thirds. This convenient size is rigid
but
will bend to the shape
of
the
turn-
ing and its
thickness
will
protect
your fingers from heat build-up and
paper wear-through. Each piece pro·
vides three working surfaces and
twelve edges to sand in sharp profile
areas.
2.
Sand
the
turning. Turn on the Mark V
and
slightly
increase the speed ac-
cording to the speed chart. Starting
with
new coarse sandpaper
(100
grit),
begin to sand
the
turning using light
pressure. Next, go over the piece again
with old (used) 100
grit
sandpaper.
Finish
off
the sanding with new fine
sandpaper
(150
grit) and then old
(used)
150
grit
sandpaper.
To
achieve a smoother surface or to
lessen sanding time, dismount the
spindle, turn it end-for end and sand it
in the opposite direction. When
remounting the spindle
be
sure to put
enough pressure
on
the quill to
en-
gage both the drive center and the
tailstock
center.
To
reverse the rotation of a faceplate
turning, mount the
faceplate
and
turning
on
the auxiliary spindle
of
the
Mark
V.
Repeat the sanding process until
the workpiece
is
the desired
smoothness.
NOTE
If sanding open grain wood such
as walnut
or
oak, wet the wood
slightly
between
sandpaper
changes to raise the grain. Allow
a few minutes
for
the water to dry
before continuing the sanding.
Finishing
I
.......
W-A-R-N-.-N-Q-,
If you're finishing a turning
that
will be used
to
hold food products,
select a NON·TOXIC natural oil
finish.
DO
NOT mix in a stain.
NOTE
• Use a very low speed when ap-
plying finish to your turning to
prevent the finish from being
thrown allover.
• Don't use a polyurethane finish
for
the
technique
below
be-
cause it will dry
too
quickly to
be workable.
..
If your turning has areas to
be
glued to another part
of
your
project, mask these areas with
masking tape.
1.
Apply the finish. S?lect a natural oil
finish
or
prepare
an
iii
finish with a
stain mixed in. Soak a rag and a piece
of
slightly
used fine wet/dry
sandpaper
in
the finish. Turn on the
Mark
V.
Use the
rag
to apply the finish
to the turning. Then sand the finish.
Repeat, adding more finish until a
mixture
of
sanding
dust
and finish ap-
pears over the entire turning. Rub
this paste with your hands and let it
set for a minute or two until it
becomes sticky. Then buff the turning
and let it dry. Apply additional coats
of finish, but do not sand.
NOTE
This procedure is much like going
to the next finer
grit
sandpaper as
the sanding
dust
in the mixture
further polishes your turning while
the oil-saturated sawdust fills in
and seals the grain.
23


 To Next Page
 Loading...