Operations
NOTE
When making extensive produc-
tion runs, three or four faceplates
work better than one.
Turn
each
piece, then sand and finish all to-
gether.
Or
you could use a spe-
cialty
chuck
that's
designed for
quick
mounting and release
of
the
stock.
3.
Set the Mark
Vat
the proper speed
and run it briefly.
4.
Mount
the faceplate (with the work-
piece attached) on the main spindle.
Extend the quill as needed to provide
better access to the back
of
the work-
piece. Lock the quill. Also set the
quill depth lock at the maximum depth
position for protection in case the
quill lock is accidentally loosened.
Mounting a Faceplate
Template
Accurate mounting
of
your faceplate
template is essential to prevent inac-
curate diameters
or
improper position,
ing
of
profiles
or
unwanted tapering.
To
properly mount a faceplate tem·
plate, follow
this
procedure:
1.
Mount
the template. Insert the
template between clamp
(5)
and
bracket
(9).
The end
of
the template
should butt
up
squarely against the
spacer
(6).
Align the template hole with
the centering hole in the template
clamp
(5).
Insert a 1/4" dowel through
both holes to align the template ex-
actly. Use the
5/32" Allen wrench to
tighten the two setscrews
(4),
clamp-
ing in the template securely.
2.
Adjust the left·hand template sup-
port assembly. Loosen screw
(11),
then move the assembly until the end
line marked on the template is directly
over the end
of
the workpiece. With
the
top
of
the template support bracket
parallel to the channel, tighten the
screw
(11)
securely.
Duplicating a
Faceplate Turning
Duplicate a faceplate turning accord-
ing to the following procedures:
WARNING
..
Keep the guard in place when·
ever you're performing turning
operations.
•
Do
not exceed recommended
speeds.
• Periodically turn
off
the Mark V
and check
that
the workpiece
remains securely mounted.
..
Do
not allow the cutter to come
in
contact
with
parts of the
duo
plicator
or
Mark
V.
1. Position the guard assembly. Attach
the right·hand bracket
(29)
to the
middle
slot
of
the guard. Place the tool
rest assembly on the table. Then
adjust the guard to be as close as
possible to the workpiece
without
in-
terfering with the rotation
of
the work-
piece
or
the movement
of
the tool
rest assembly underneath it.
2.
Make a five·point check. Headstock,
carriage, table height, quill, quill depth
locks must
be
secure.
3.
Adjust the height
of
the follower.
The follower should
be
positioned so
it's
at the center
of
the
template edge.
If adjustment is required, loosen the
follower adjusting knob
(44)
and lower
or raise the follower support. Retight·
en the knob securely. Wiggle the
follower as the knob is being tightened
to
properly seat it.
4.
Develop a firm
grip
on the tool rest
assembly. Depending on your hand
size, you may find it necessary to grip
each knob with
all five fingers or to
grip each knob with four fingers with
your
thumbs
wrapped around the
back
of
the tool rest.
WARNING
When gripping the tool rest as·
sembly,
do
not
extend your fingers
beyond the front face
of
the base.
5.
Round
off
the workpiece. Check
that
the proper speed has been set,
then turn on the Mark
V.
Roughly
round
off
the outside edges
of
the
workpiece by cutting small areas at a
time. When each small area becomes
round, you
will feel less vibration
and hear a change
in
the noise level.
After the outside edge is rounded,
straighten the face.
Increase the speed dial setting from
rounding to shaping, and then turn
off
the machine.
6.
Offset the carbide
cutter
according
to Step 7
of
"Duplicating
a Spindle."
7.
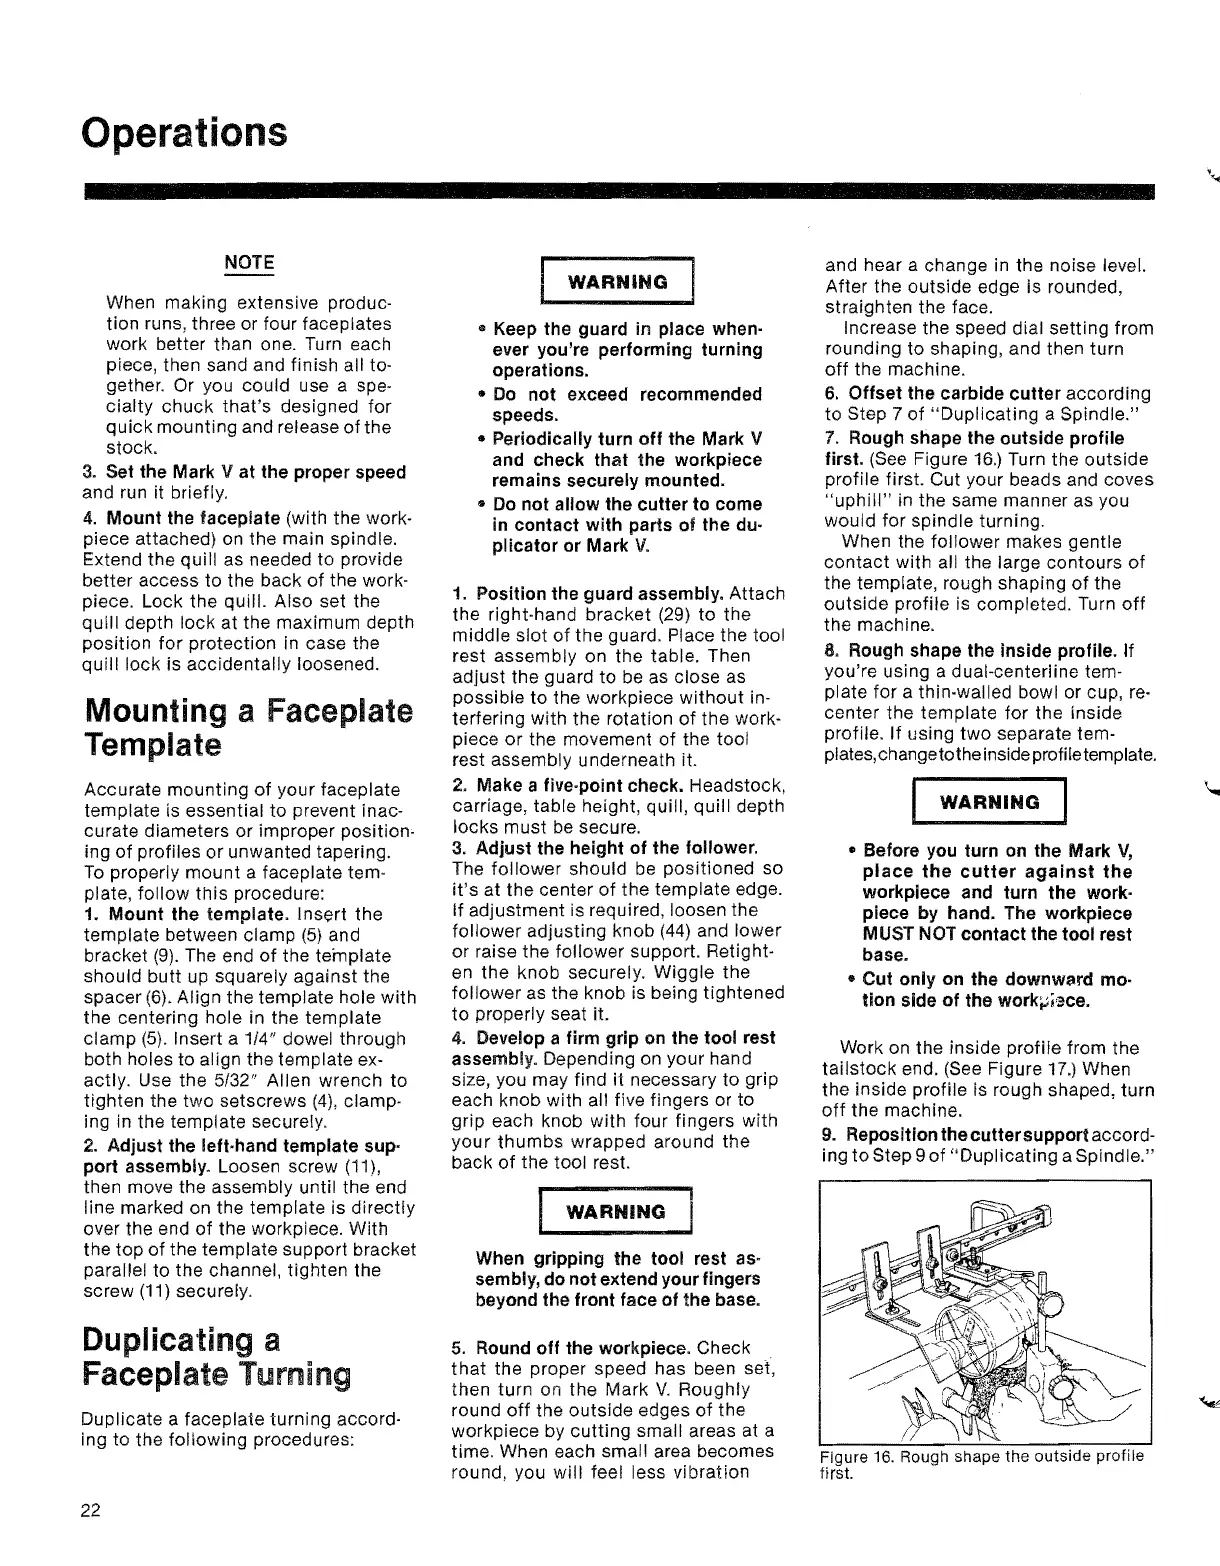
Rough shape the outside profile
first.
(See
Figure
16.)
Turn the outside
profile first. Cut your beads and coves
"uphill"
in the same manner as you
would for spindle turning.
When the follower makes gentle
contact
with all the large contours
of
the template, rough shaping
of
the
outside profile is completed. Turn
off
the machine.
8.
Rough shape the inside profile.
If
you're using a dual-centerline tem·
plate for a thin·walled bowl or cup,
reo
center the template for the inside
profile.
If
using two separate tem-
plates, change to the inside profiletemplate.
WARNING
• Before you turn on the Mark
V,
place
the
cutter
against
the
workpiece and turn the work·
piece by hand. The workpiece
MUST NOT
contact
the tool rest
base.
• Cut only on the downward mo-
tion side
of
the work;,;!'=ce.
Work on the inside profile from the
tailstock
end.
(See
Figure
17.)
When
the inside profile is rough shaped, turn
off
the machine.
9.
Reposition the
cutter
support accord-
ing to Step 9
of
"Duplicating
a Spindle."
Figure
16.
Rough shape the outside profile
first.
22


 To Next Page
 Loading...