Operations
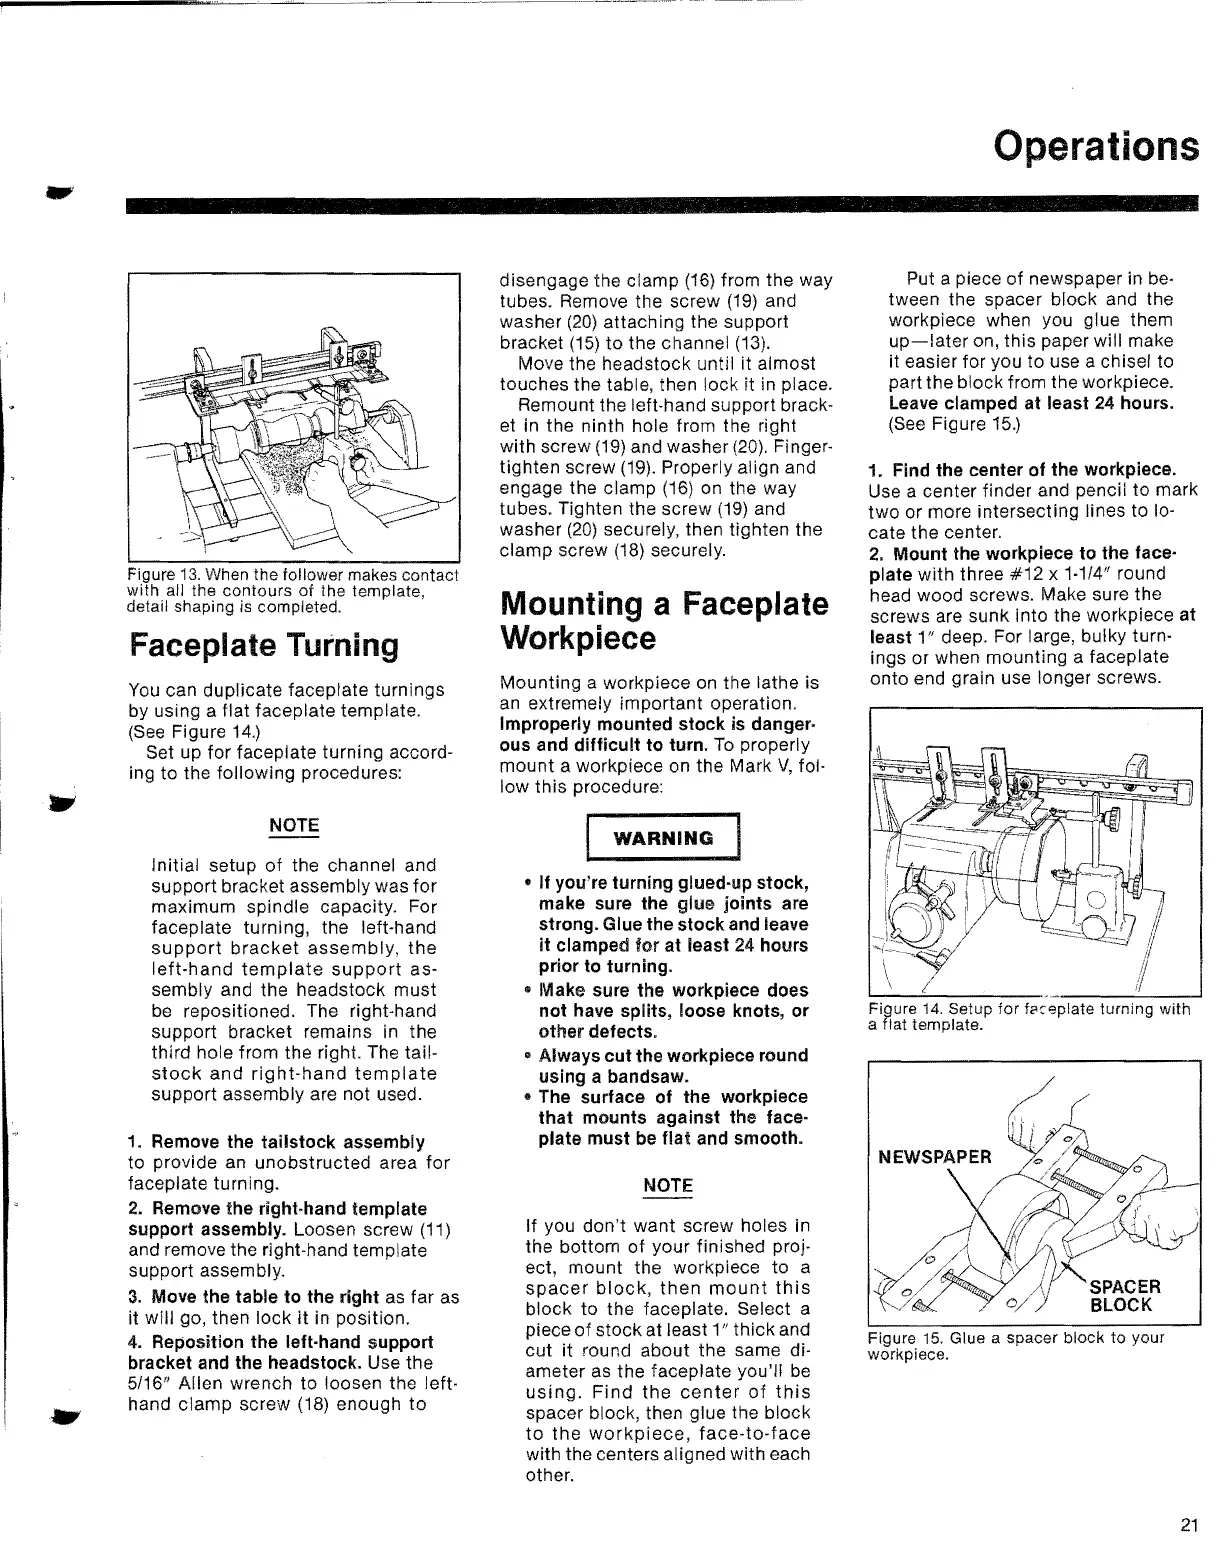
Figure
13.
When the follower makes contact
with all the contours
of
the template
detail shaping is completed. '
Faceplate Turning
You
can duplicate faceplate turnings
by using a flat faceplate template.
(See
Figure
14.)
Set
up
for faceplate turning accord-
ing
to
the following procedures:
NOTE
Initial setup
of
the channel and
support bracket assembly was for
maximum spindle capacity. For
faceplate turning, the left-hand
support
bracket
assembly,
the
left-hand
template
support
as-
sembly and the headstock must
be
repositioned. The right·hand
support bracket remains in the
third hole from the right. The tail-
stock
and
right-hand
template
support assembly are not used.
1. Remove the
tailstock
assembly
to provide an unobstructed area
for
faceplate turning.
2.
Remove the right.hand template
support assembly. Loosen screw
(11)
and remove the right·hand template
support assembly.
3.
Move the table
to
the right
as
far as
it will go, then lock
it
in position.
4.
Reposition the left-hand support
bracket and the headstock. Use the
5/16"
Allen wrench to loosen the left·
hand clamp screw
(18) enough
to
disengage the clamp (16) from the way
tubes. Remove the screw
(19) and
washer
(20) attaching the support
bracket
(15)
to
the channel (13).
Move the headstock until it almost
touches the table, then lock it in place.
Remount the left-hand support brack-
et
in the ninth hole from the right
with screw
(19) and washer (20). Finger-
tighten screw
(19). Properly align and
engage the clamp
(16) on the way
tubes. Tighten the screw
(19) and
washer
(20) securely, then tighten the
clamp screw
(18) securely.
Mounting a Faceplate
Workpiece
Mounting a workpiece on the lathe is
an
extremely important operation.
Improperly mounted
stock
is danger·
ous and
difficult
to
turn.
To
properly
mount a workpiece on the Mark
V,
fol-
low
this
procedure:
WARNING
•
If
you're turning glued-up stock,
make sure the glue
joints
are
strong. Glue the
stock
and leave
it
clamped for at least 24 hours
prior
to
turning.
s Make sure the workpiece does
not
have splits, loose knots, or
other
defects.
• Always
cut
the workpiece round
using a bandsaw.
• The surtace
of
the workpiece
that
mounts against the face·
plate must be
flat
and smooth.
NOTE
If you
don't
want screw holes in
the bottom
of
your finished proj-
ect, mount the workpiece
to
a
spacer
block,
then
mount
this
block to the faceplate. Select a
piece
of
stock at least 1" thick and
cut it round about the same di-
ameter as the faceplate you'll
be
using.
Find
the
center
of
this
spacer block, then glue the block
to
the
workpiece,
face-to-face
with the centers aligned with each
other.
Put a piece
of
newspaper in be·
tween the spacer block and the
workpiece when you glue them
up-later
on, this paper will make
it easier for you to use a chisel to
part the block from the workpiece.
Leave clamped at least
24
hours.
(See
Figure 15.)
1. Find the center
of
the workpiece.
Use a center finder and pencil
to
mark
two
or more intersecting lines to lo-
cate the center.
2.
Mount the workpiece
to
the face·
plate
with
three
#12
x 1·1/4
1f
round
head wood screws. Make sure the
screws are sunk into the workpiece at
least
1" deep. For large, bulky turn·
ings or when mounting a faceplate
onto end grain use longer screws.
Figure
14.
Setup for fC'ceplate turning with
a flat template.
!Ii
.'
i I
\
)~SPACER
0/
Y BLOCK
Figure
15.
Glue a spacer block
to
your
workpiece.
21


 To Next Page
 Loading...