Operations
Figure
10.
Keep
the
follower perpendicular
to
the
profile
area
of
the
template.
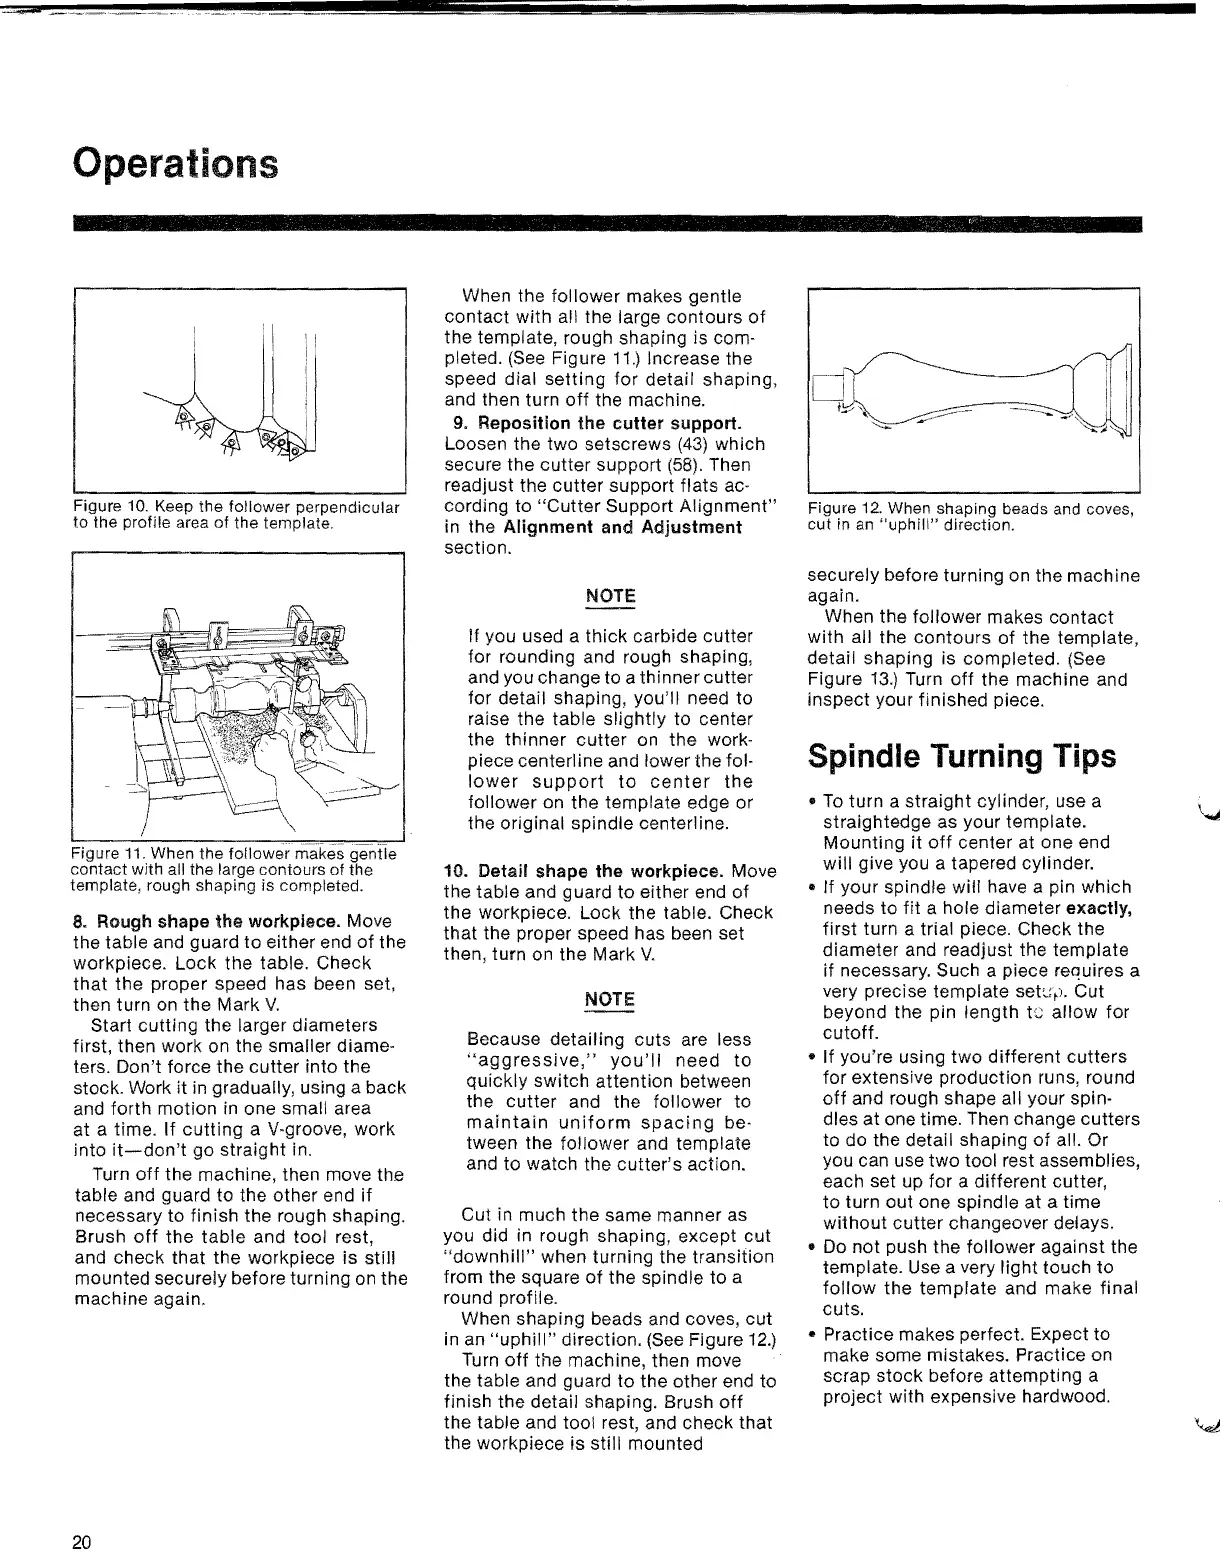
Figure
11.
When
the
follower
makes
gentle
contact with
all
the
large
contours
of
the
template,
rough
shaping
is
completed.
8.
Rough shape the workpiece. Move
the table and guard
to
either end
of
the
workpiece.
Lock
the table. Check
that
the proper speed has been set,
then turn
on
the Mark
V.
Start
cutting
the larger diameters
first, then work on the smaller diame-
ters. Don't force the
cutter
into the
stock. Work
it
in
gradually, using a back
and forth motion
in
one small area
at
a time.
If
cutting
a V-groove,
work
into
it-don't
go
straight
in.
Turn
off
the machine, then move the
table and guard to the other end
if
necessary to finish the rough shaping.
Brush
off
the
table
and too/ rest
and check that the workpiece is
~till
mounted securely before turning on the
machine again.
When the follower makes gentle
contact
with all the large
contours
of
the template, rough shaping is com·
pleted.
(See
Figure
11.)
Increase the
speed dial
setting
for
detail shaping,
and then turn
off
the machine.
9. Reposition
the
cutter
support.
Loosen the two setscrews
(43) which
secure the
cutter
support (58). Then
readjust the
cutter
support
flats
ac·
cording to
"Cutter
Support
Alignment"
in the
Alignment
and
Adjustment
section.
NOTE
If you used a
thick
carbide cutter
for rounding and rough shaping,
and you change to a thinner cutter
for detail shaping, you'll need to
raise the table
slightly
to center
the thinner
cutter
on the work·
piece centerline and lower the fol·
lower
support
to
center
the
follower on the template edge or
the original spindle centerline.
10. Detail shape the workpiece.
Move
the table and guard to either end
of
the workpiece. Lock the table. Check
that
the proper speed has been set
then, turn on the Mark
V.
NOTE
Because detailing cuts are less
"aggressive,"
you'll
need
to
quickly
switch
attention between
the
cutter
and the follower
to
maintain
uniform
spacing
be·
tween the follower and template
and
to
watch the
cutter's
action.
Cut in much the same manner as
you did in rough shaping,
except
cut
"downhill"
when turning the transition
from the square
of
the spindle to a
round profile.
. When shaping beads and
coves,
cut
In
an
"uphill"
direction. (See Figure 12.)
Turn
off
the machine, then move
the table and guard to the other end
to
finish the detail shaping. Brush
ott
the table and tool rest, and check
that
the workpiece is still mounted
Figure
12.
When
shaping
beads
and
coves
cut
in
an
"uphill" direction. '
securely before turning on the machine
again.
When the follower makes
contact
with
all the
contours
of
the template,
detail
shaping is completed. (See
Figure
13.)
Turn
off
the machine and
inspect your finished piece.
Spindle Turning Tips
•
To
turn a
straight
cylinder, use a
straightedge as your template.
Mounting
it
off
center at one end
will
give you a tapered cylinder.
• If your spindle
will
have a pin which
needs to
fit
a hole diameter exactly,
first
turn a trial piece. Check the
diameter and readjust the template
if
necessary. Such a piece requires a
very precise template
set~;~).
Cut
beyond the pin
length
te
allow
for
cutott.
e
If
you're using
two
different
cutters
for extensive production runs, round
off
and rough shape all your spin·
dies
at
one time. Then change cutters
to do the detail shaping
of
all. Or
you can use two tool rest assemblies,
each set up for a different cutter,
to
turn
out
one spindle
at
a time
without
cutter
changeover delays.
• Do
not
push the follower
against
the
template. Use a
very
light
touch
to
follow
the
template
and make final
cuts.
e Practice makes perfect. Expect to
make some mistakes. Practice on
scrap
stock
before attempting a
project with expensive hardwood.
20


 To Next Page
 Loading...