Operations
Duplicating a Spindle
Duplicate a spindle according to the
following procedures:
WARNING
• Keep the guard in place when·
ever you're performing turning
operations.
c
Do
not
exceed recommended
speeds.
• Periodically turn
off
the Mark V
and check
that
the workpiece
remains securely mounted.
•
Do
not
allow the
cutter
to
come
in
contact
with
parts
of
the du-
plicator
or
Mark
V.
1. Position the guard assembly. Place
the tool rest assembly on the table
in
a
cutting
position, then adjust the
guard to
be
as close as possible to
the workpiece
without
interfering with
the rotation of the workpiece or the
movement
of
the tool rest assembly
underneath it.
WARNING
Keep the guard in place during all
turning operations.
2.
Make a five·point check. All five
locks-headstock,
carriage, table
height, quill,
tailstock-must
be
secure.
S.
Move the table and guard. Move the
table and guard to the right-hand
end
of
the workpiece. Lock the table.
4.
Adjust the height
of
the follower
if
required. The follower should
be
posi-
tioned so
it's
at
the center
of
the
template edge or
at
the center
of
the
original spindle.
If
adjustment is
re-
quired, loosen the follower adjusting
knob
(44)
and lower or raise the fol-
lower support. Retighten the knob se·
curely. Wiggle the follower as the
knob is tightened
to
properly seat it.
.,
5.
Develop a firm grip on the tool
rest assembly. Before turning on the
lathe, determine
the
best method
of
gripping the tool rest assembly.
De·
pending
on
your hand you may
find it necessary to grip each knob with
all five fingers or to grip each knob
with four fingers with your thumbs
wrapped around the back of the tool
rest.
WARNING
When gripping the tool rest as·
sembly,
do
not
extend your fingers
beyond the front face
of
the tool
rest base.
6. Round
off
the workpiece. Check
that
the proper speed has been set,
then turn on the Mark
V.
Roughly
round
off
the corners
of
the workpiece
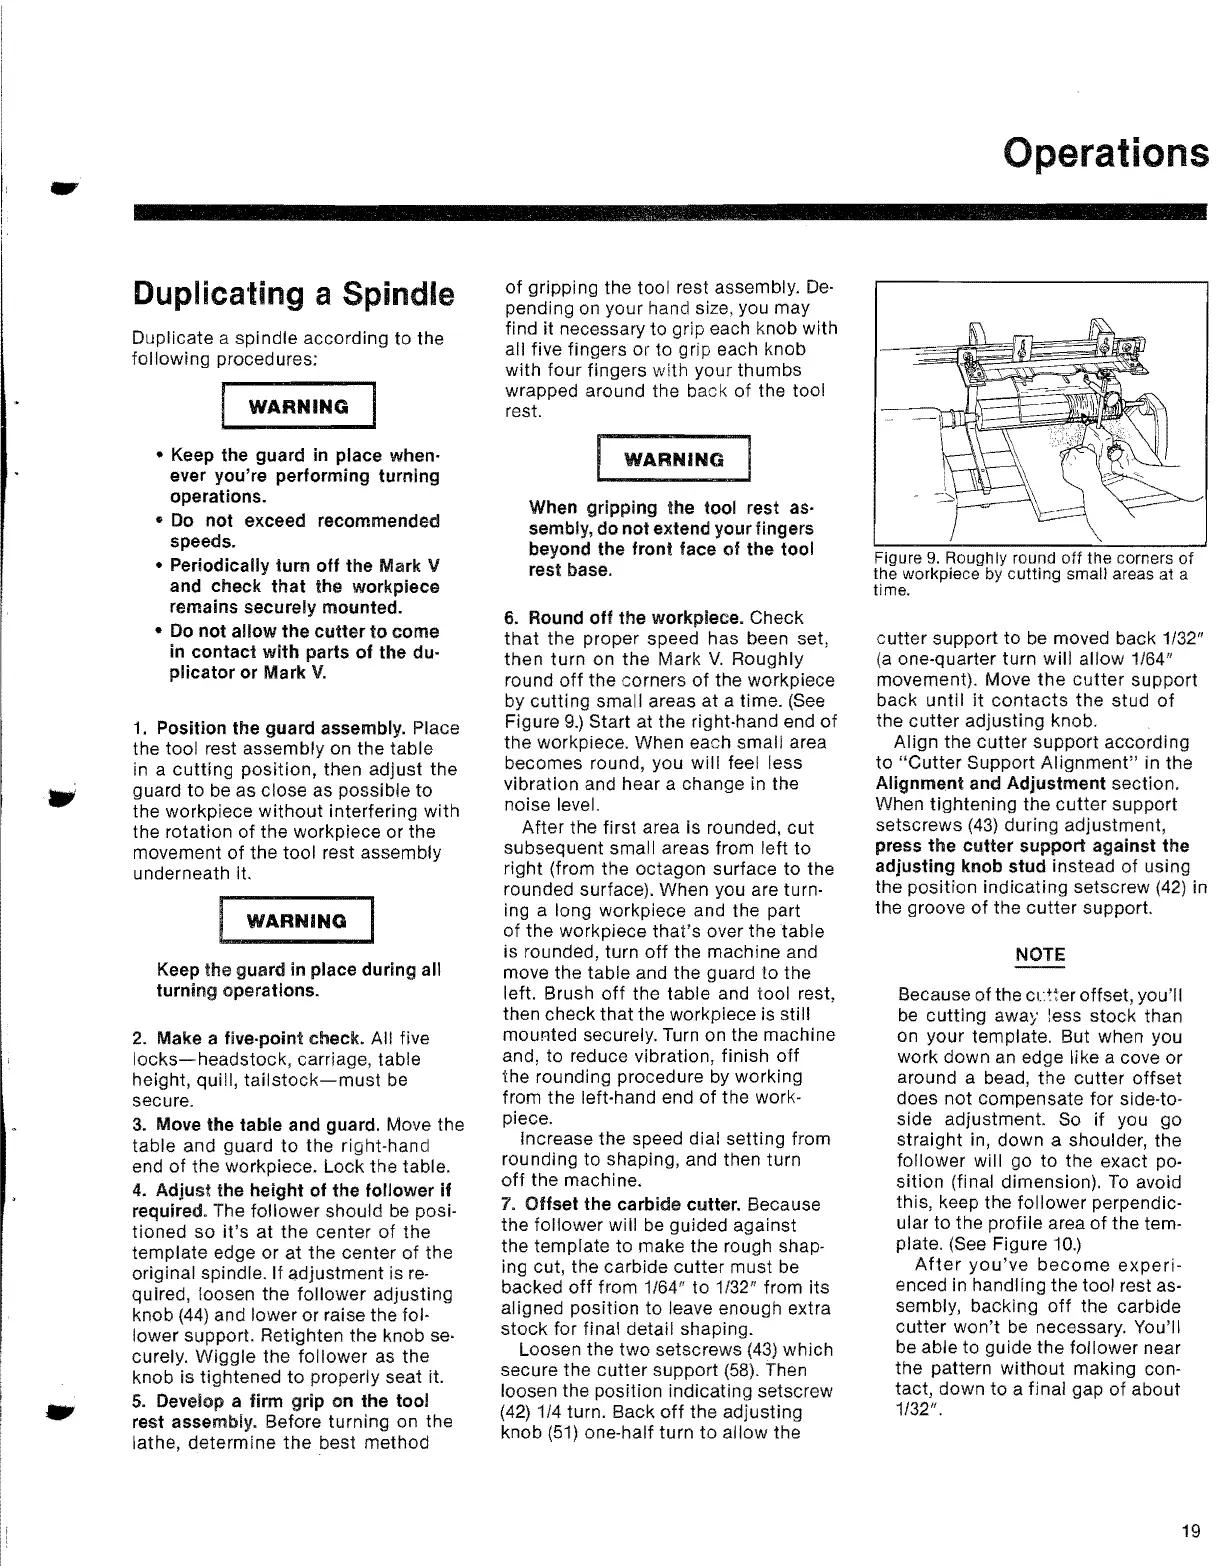
by cutting small areas
at
a time.
(See
Figure 9.) Start at the right-hand end
of
the workpiece. When each small area
becomes round, you will feel less
vibration and hear a change in the
noise
level.
After the first area is rounded,
cut
subsequent small areas from left to
right (from the octagon surface to the
rounded surface). When you are turn-
ing a long workpiece and the part
of the workpiece that's over the
table
is rounded, turn
off
the machine and
move the table and the guard to the
left. Brush
off
the table and tool rest,
then check that the workpiece is still
mounted securely.
Turn
on the machine
and, to reduce vibration, finish
off
the rounding procedure
by
working
from the left-hand end
of
the work-
piece.
Increase the speed dial setting from
rounding to shaping, and then turn
off
the machine.
7.
Offset the carbide cutter. Because
the follower will
be
guided against
the template to make the rough shap-
ing cut, the carbide
cutter
must be
backed
off
from 1/64" to 1/32" from its
aligned position to leave enough extra
stock
for final detail shaping.
Loosen the
two
setscrews
(43)
which
secure the
cutter
support
(58).
Then
loosen the position indicating setscrew
(42)
1/4 turn. Back
off
the adjusting
knob
(51)
one-half turn
to
allow the
Figure
9.
Roughly round
off
the corners
of
the workpiece by cutting small areas at a
time.
cutter
support to
be
moved back
1132"
(a
one-quarter turn will allow 1/64"
movement). Move
the
cutter
support
back until
it
contacts
the stud
of
the
cutter
adjusting knob.
Align the cutter support according
to
"Cutter
Support
Alignment"
in the
Alignment and Adjustment section.
When tightening the
cutter
support
setscrews
(43)
during adjustment,
press the
cutter
support against the
adjusting knob stud instead
of
using
the position indicating setscrew
(42) in
the groove
of
the
cutter
support.
NOTE
Because
of
the ct:+!er offset, you'll
be
cutting away less stock than
on your template. But when you
work down an edge like a cove or
around a bead, the cutter offset
does not compensate for
side-to-
side adjustment. So
if
you go
straight in, down a shoulder, the
follower will go to the exact po-
sition (final dimension).
To
avoid
this, keep the follower perpendic-
ular to the profile area
of
the tem-
plate. (See Figure
10.)
After
you've
become
experi-
enced in handling the tool rest as-
sembly, backing
off
the carbide
cutter won't
be
necessary. You'll
be able to guide the follower near
the pattern
without
making con-
tact, down to a final gap
of
about
1/32".
19


 To Next Page
 Loading...