SHOPSMITH MARK V 845180
Page 32
• If the Riving Knife is to the left
of the Saw Blade, back out the
Stop Screw (counterclock-
wise).
• If the Riving Knife is to the
right of the Saw Blade, screw
in the Stop Screw (clockwise).
ALIGN THE LATHE CENTERS
1. Remove the Saw Guards and the Saw
Blade, then loosen the Carriage and
Headstock Locks. Move the Headstock
and Carriage all the way to the right and
lock them in place.
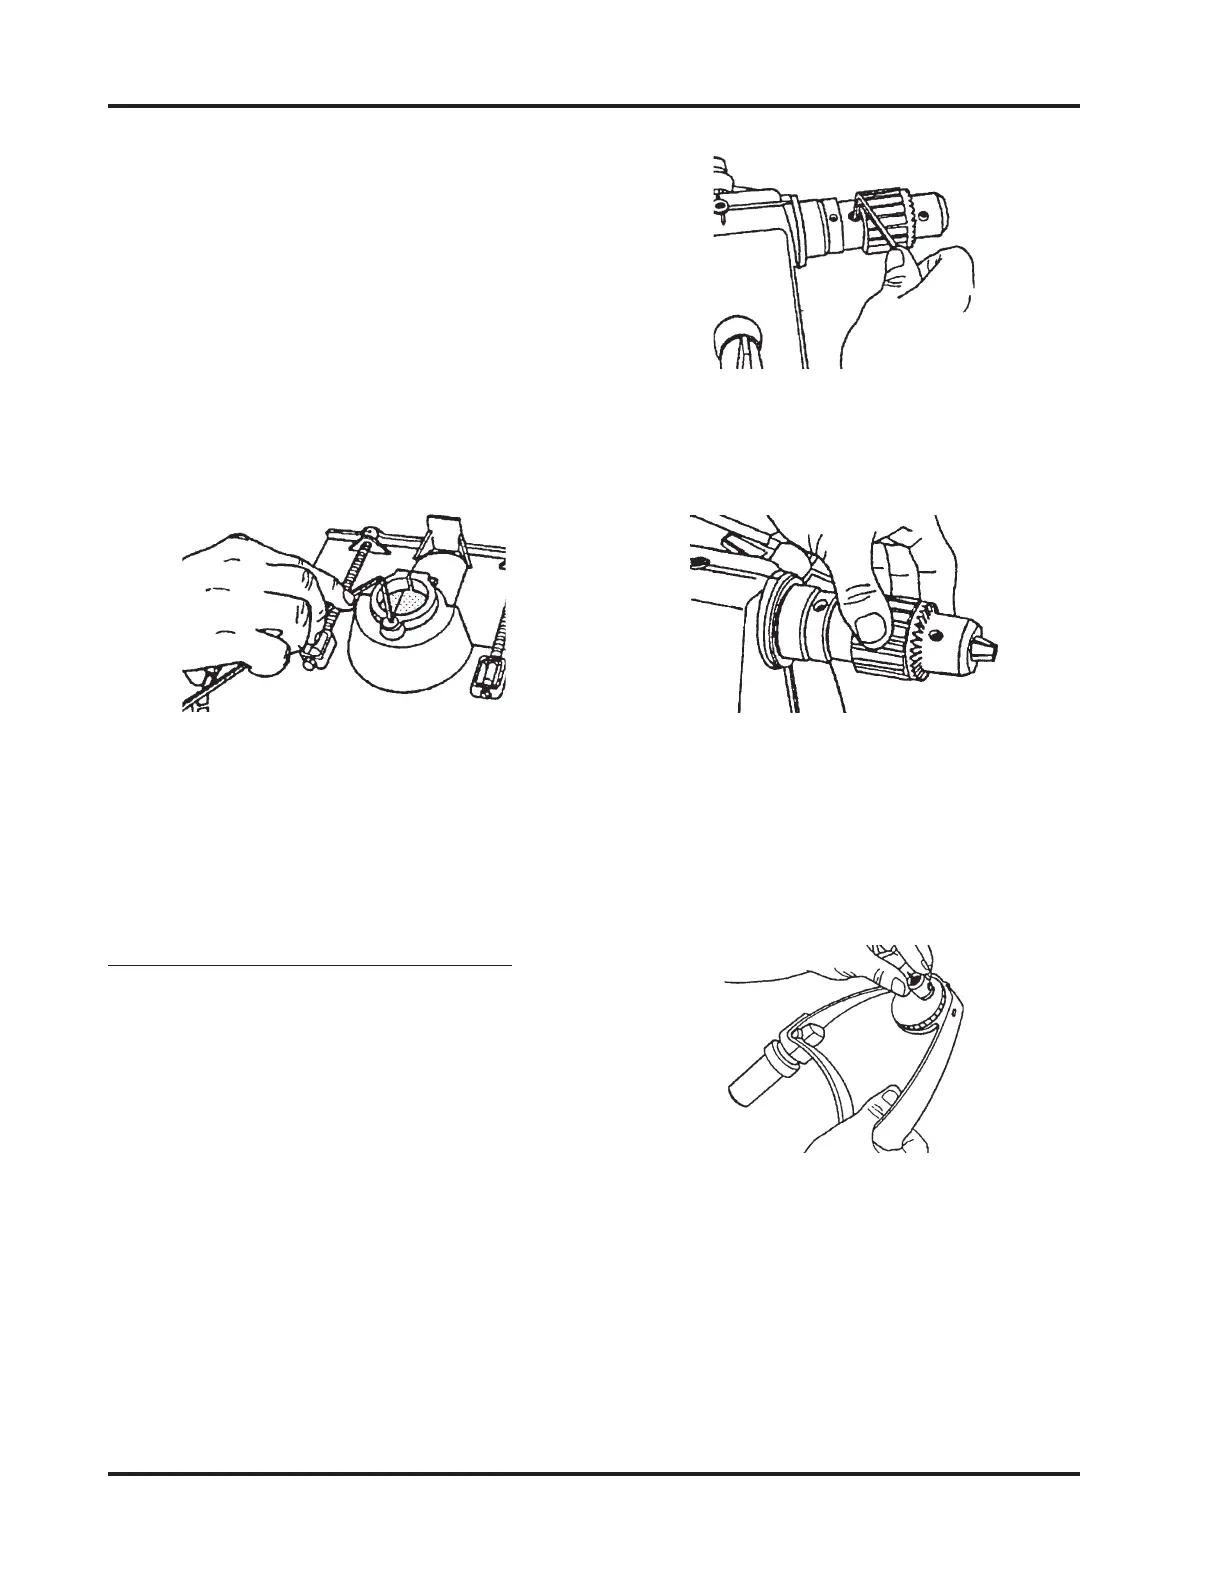
2. Mount the Drill Chuck on the Spindle, as
shown in Figure 106.
Figure 105
d. Reinstall the Saw Blade, Lower Saw
Guard and Riving Knife, according
to Steps 1 through 4. If the Riving
Knife is still not centered on the
Saw Blade, repeat this Step 5.
c. Use a 5/32" Allen Wrench to adjust
the Stop Screw located below the
Lower Saw Guard's Collar. Shown
in Figure 105.
Figure 106
3. Completely close the Chuck Jaws, as in
Figure 107.
Figure 107
4. Mount the Cup Center into the Tailstock's
Adjustable Center, as seen in Figure 108
then mount the Tailstock into the Base
Arm (right side). Tighten the Base Arm
Lock.
Figure 108
5. Loosen the Quill Lock. Extend the Quill
(shown in Figure 109), so the Drill Chuck
almost touches the Cup Center Point and
the Center Point could fit into the Chuck
Jaws.