© Arc Euro Trade Ltd, England 2012
- 15 -
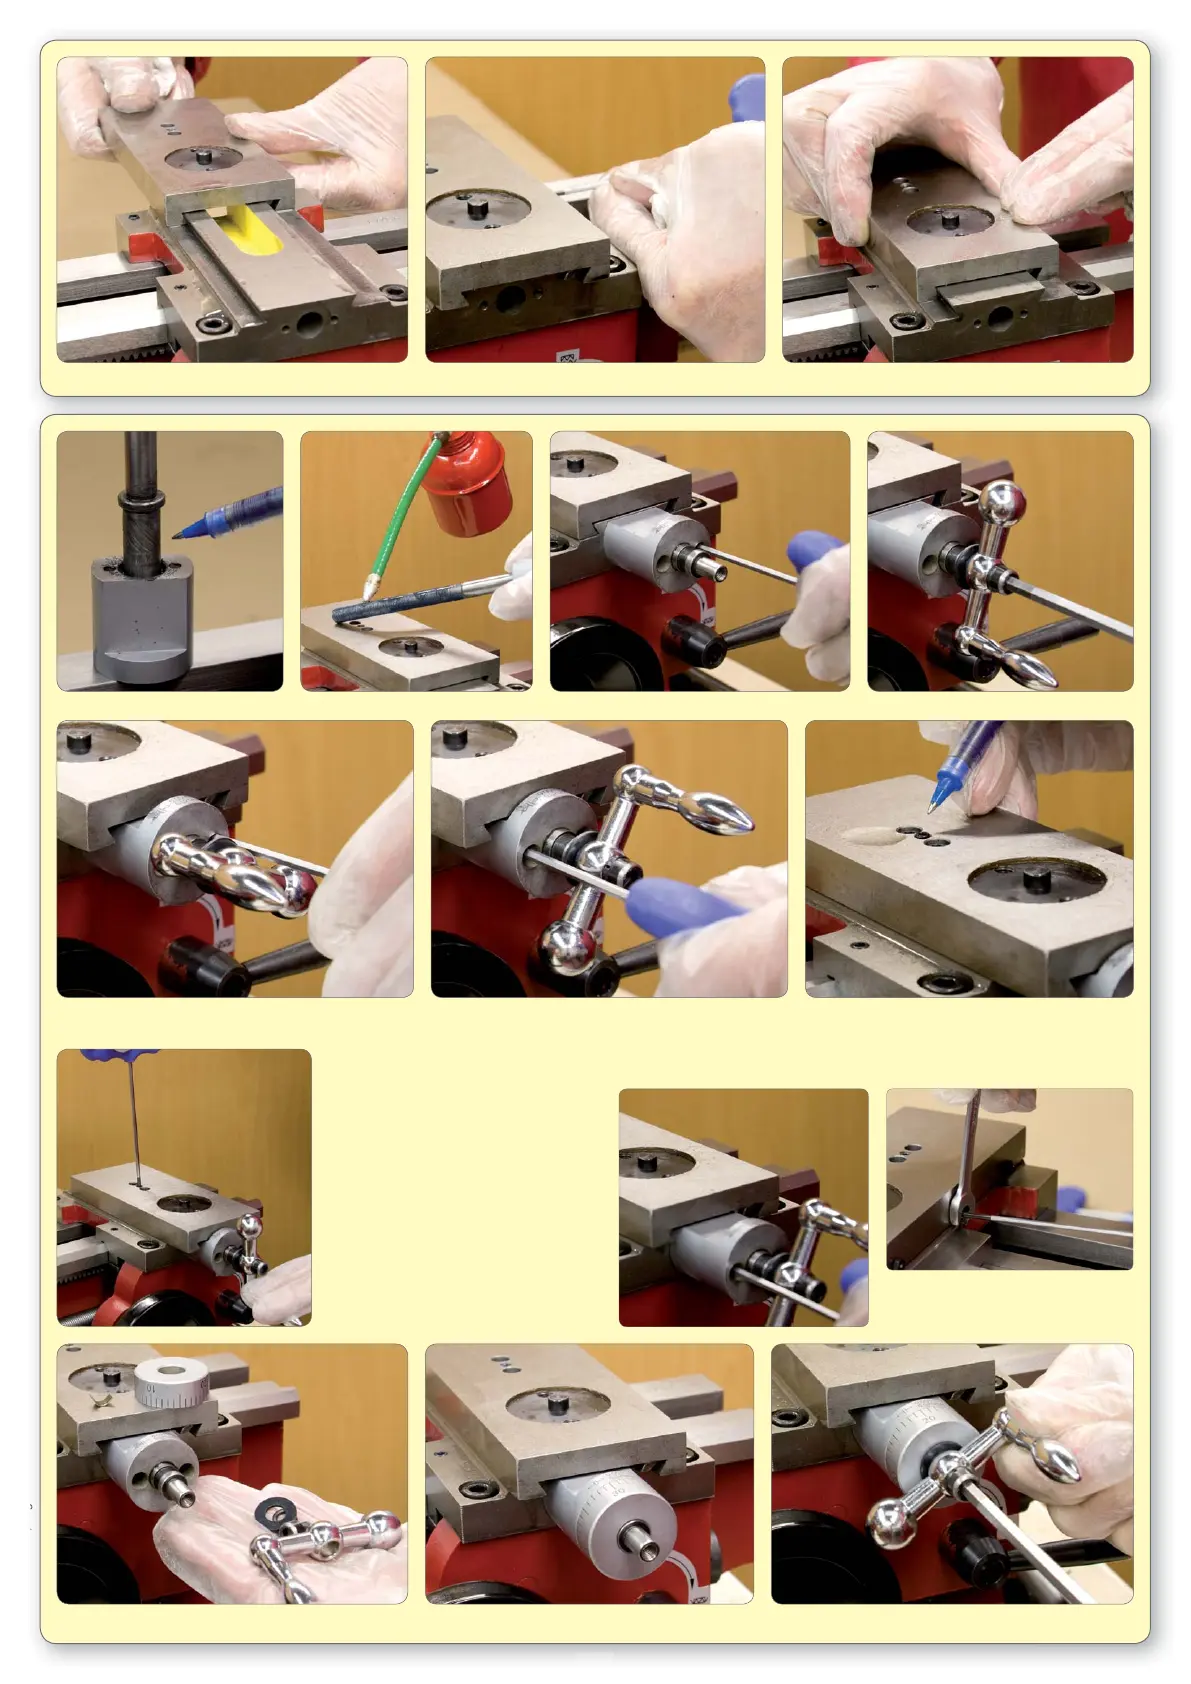
152. Assemble onto saddle. 153. Fit adjusting screws and adjust so slide can be moved back and forth easily by hand.
- 1
154. Grease / oil the feed screw and bracket. 155. Assemble onto the saddle. 156. Fit the handle.
164. Remove the handle again in order to fi t the micrometer dial and friction spring. 165. Refi t the handle assembly.
157. Slacken the bracket screws, wind the slide right back and tighten the screws.
158. Wind the cross slide in and out. If there is any tightness, the feed screw nut will need adjusting.
159. The centre screw is for adjusting the position
of the nut in an up/down direction and the
two outside screws are for locking. Slacken
all three screws for now.
163. Make fi nal adjustments to the
gib screws for free movement of
the handle with little drag.
160. Put fi nger pressure on handle and
screw-in the adjusting screw until
you can feel it just touching the nut
and then +¼ to ½ turn extra.
161. Pinch up the cap screws equally
while winding the slide in and out
until handwheel turns freely and
with minimum drag.
Continue adjusting all three screws
until the slide moves freely along it’s
full travel.
162. If required, slacken and reposition
bracket and return to adjusting the
nut.
 Loading...