© Arc Euro Trade Ltd, England 2012
- 5 --
-
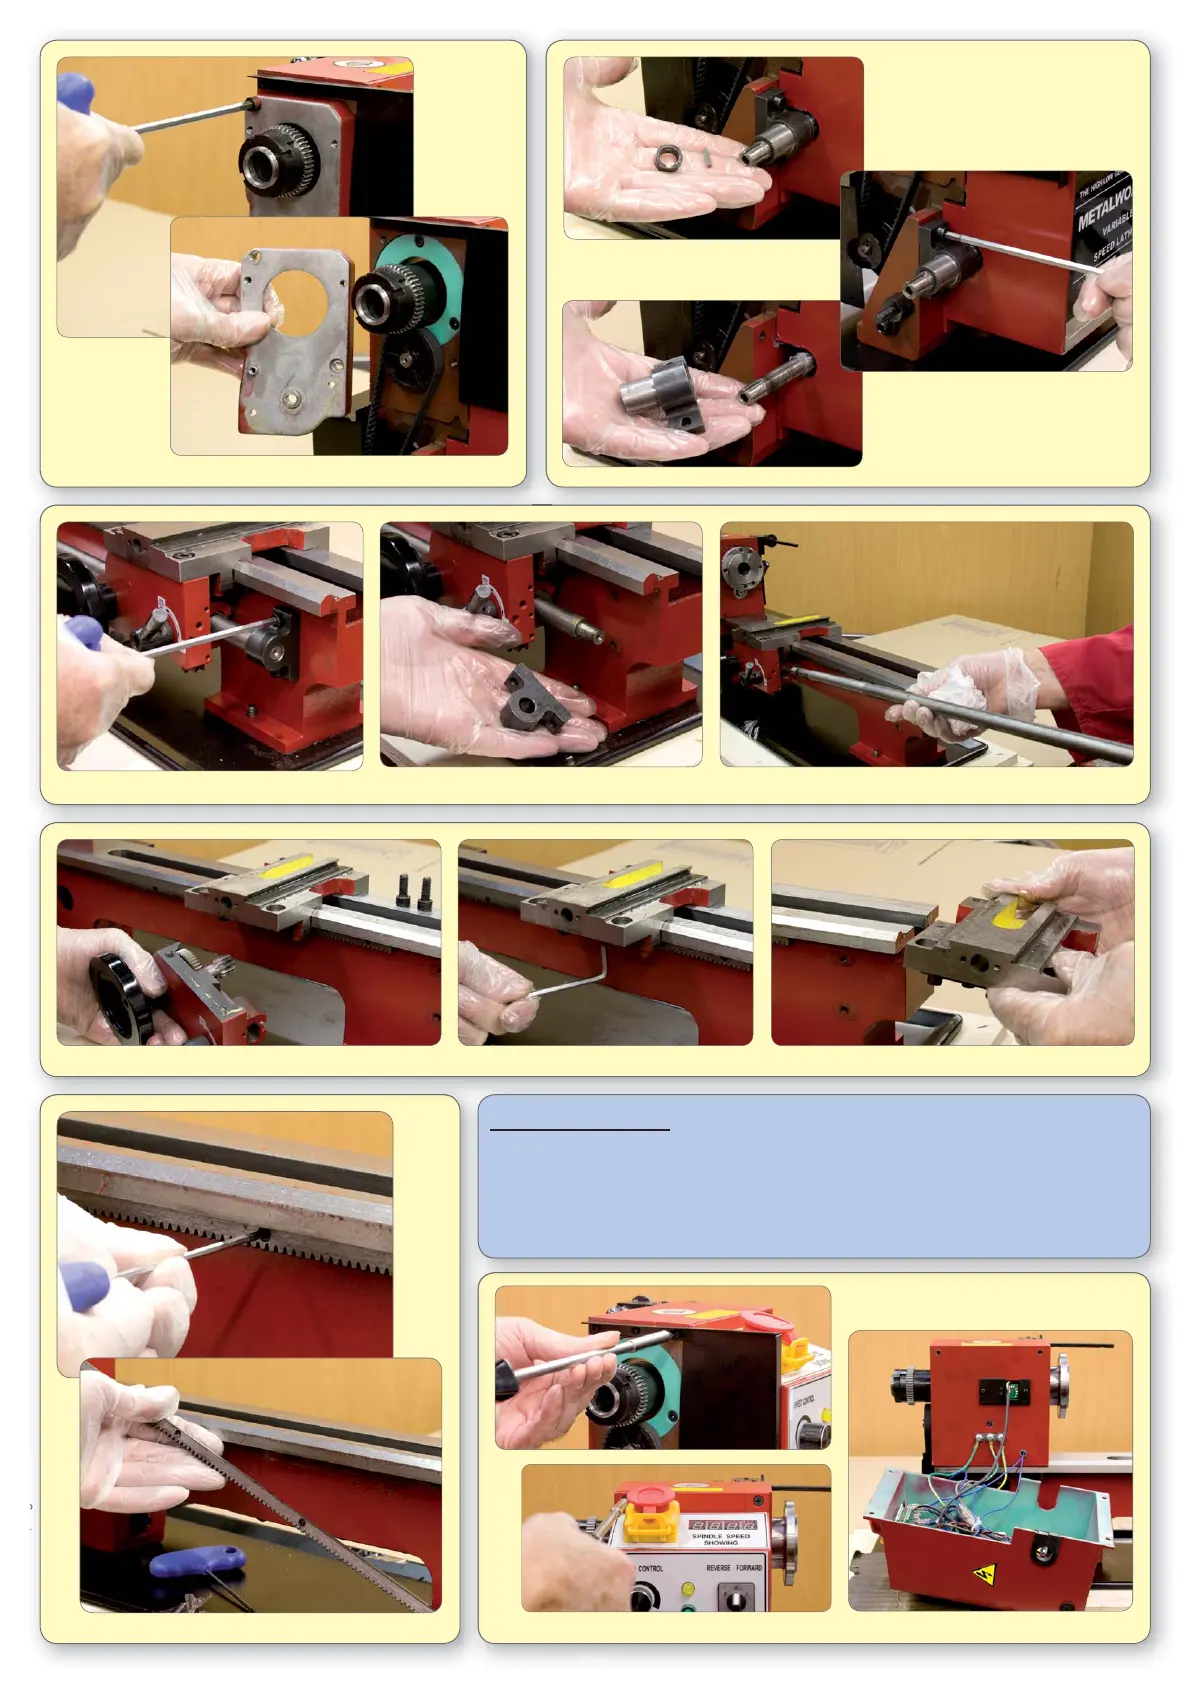
31. Remove the gear cover support
bracket.
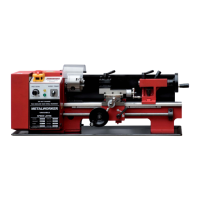
30. Remove the rack from the front of the bed.
28. Undo the screws securing the apron and remove. 29. Slacken the saddle adjusting screws and slide the saddle off the end of the bed.
26. At the tailstock end, removed the leadscrew carrier bracket. 27. Draw out the leadscrew.
24. Remove the spacer and key from
the main leadscrew.
25. Remove the leadscrew carrier
bracket.
23. Remove the drive belt cover/backplate.
Dismantling the spindle
Steps 31 to 81 include a bearing change from standard ball raced bearings to taper roller
bearings. Switching to taper roller bearings will improve the machining accuracies and fi nish.
Since in many cases, taper roller bearings are not an essential upgrade, and because
you will need access to a hydraulic press and bearing separator you may wish to keep the
standard ball races and skip forward to step 82.
32. Remove 4 screws securing the control panel and lay to one side.