
R
Robert SinghSep 23, 2025
How to properly close the door on Siemens Coffee Maker?
- AAndrew FarrellSep 23, 2025
If the door of your Siemens Coffee Maker is not properly closed, press the door firmly shut.
How to properly close the door on Siemens Coffee Maker?
If the door of your Siemens Coffee Maker is not properly closed, press the door firmly shut.
How to remove limescale deposits from Siemens Coffee Maker water tank?
If limescale deposits in the water tank are blocking the system of your Siemens Coffee Maker, clean the water tank thoroughly and start the Calc'nClean service program.
How to clean the milk frother on Siemens EQ300 TF301?
If the milk frother on your Siemens Coffee Maker is soiled, clean it in the dishwasher.
What to do if my Siemens EQ300 TF301 Coffee Maker no longer responds?
If your Siemens Coffee Maker isn't responding, it may have a fault. Try pulling out the mains plug, wait 60 seconds, and then re-insert it.
How to deactivate demo mode on Siemens EQ300 TF301 Coffee Maker?
If your Siemens Coffee Maker is in demo mode, press and hold the button for at least 5 seconds to deactivate it. Then, remove the water tank, fill it with fresh water, and re-insert it.
Why is the LED light on with an empty drip tray on Siemens EQ300 TF301?
If the LED lights up despite an empty drip tray on your Siemens Coffee Maker, the appliance may be switched off and not detecting the emptying. Switch the appliance on, remove the drip tray, and re-insert the drip tray.
How to remove lime from decalcified water in Siemens Coffee Maker?
If decalcified water still contains small amounts of lime in your Siemens Coffee Maker, insert a new water filter and set the corresponding water hardness.
What to do if drip tray was removed too soon from Siemens EQ300 TF301?
If the drip tray was removed too soon from your Siemens Coffee Maker, wait a few seconds after the last drink was dispensed before removing the drip tray.
What to do if there is air in Siemens EQ300 TF301 water filter?
If there is air in the water filter of your Siemens Coffee Maker, immerse the water filter in water with the opening facing upwards until no more air bubbles escape, and then reinsert the filter.
Why is the pipe system dry in my Siemens EQ300 TF301?
If the pipe system in your Siemens Coffee Maker is dry, insert the water tank correctly and fill it with fresh, cold, non-carbonated water.
Read this instruction manual carefully. Keep the manual safe for future reference.
Only use this appliance for preparing hot drinks in private households and enclosed spaces.
Appliance use by children 8+ and reduced ability people requires supervision or instruction.
WARNING – Risk of suffocation! Keep packaging material away from children.
Packaging materials are environmentally compatible and recyclable. Sort components by type.
Set automatic switch-off to minimum, do not interrupt dispensing, descale regularly.
After unpacking, check all parts for damage and completeness of delivery.
ATTENTION! Risk of damage. Use in frost-free rooms. Wait 3 hours if stored below 0°C.
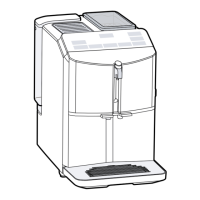
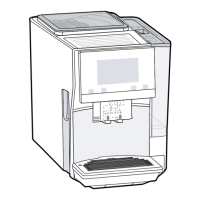
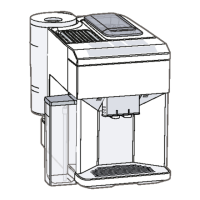
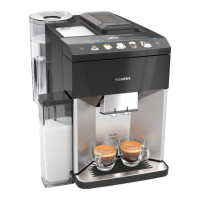
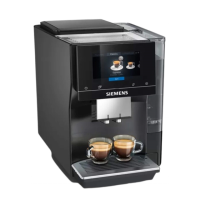
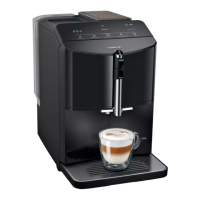
Overview of the parts of your appliance. Individual details and colours may differ.
Use the control panel to configure functions and obtain operating status information.
Remove protective foils and clean the appliance and individual parts. Follow illustrated instructions.
Bear information in mind for best appliance use. Notes on factory settings, grinder, water droplets, auto-switch off.
Use a water filter to minimise limescale and impurities. Instructions for inserting/replacing.
Press the power button. Appliance rinses itself automatically when switched on or off.
Find out how to prepare a drink of your choice. WARNING: Risk of scalding.
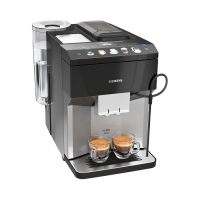
Place cup, set coffee strength, press Espresso or Caffe Crema button.
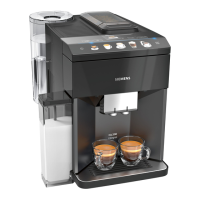
Make coffee drinks with milk or froth milk. WARNING: Risk of burns from milk frother.
Choose between cappuccino and latte macchiato. Fill cup with milk, place under outlet, set strength, press button.
Fill cup with milk, place under outlet, push frother down, press Milk button.
Configure drink preferences such as coffee strength and filling level.
Set the desired grinding level while coffee beans are being ground. WARNING: Risk of injury.
Set the appliance's automatic switch-off time period between 15 minutes and 4 hours.
Switch the signal tone on or off when pressing buttons.
Set water hardness correctly for timely descaling indication. Find out from local water supplier.
Overview of components suitable for cleaning in a dishwasher and those not suitable.
Only use suitable cleaning agents. ATTENTION! Unsuitable products may damage surfaces.
WARNING: Risk of electric shock. Disconnect power. Clean housing with microfibre cloth. Rinse water tank.
Clean and empty drip tray and coffee dregs container daily. Follow illustrated instructions.
Clean milk frother after each use to remove residues. WARNING: Risk of burns.
Remove and clean brewing unit regularly. WARNING: Risk of burns. ATTENTION! May be damaged by improper cleaning.
Use calc'n Clean program to descale and clean. ATTENTION! Improper cleaning may damage appliance.
Check power connection. Pull out and re-insert mains plug.
Check bean container, coffee beans, brewing unit insertion, limescale.
Check for limescale build-up and descale the appliance.
Check grinding level, limescale build-up, air in water filter, or if appliance is soiled.
Check for limescale remover blocking water tank or coffee strength setting.
Clean brewing unit, descale appliance, clean water tank.
Check milk quantity and frothing time.
Check milk quantity, frothing time, or milk temperature.
Use less milk, change frothing time, or use lukewarm milk.
Check coffee type, roast, freshness, and grinding level.
Check coffee variety, roast, and grinding level.
Check grinding level and coffee variety.
Check grinding level and coffee variety.
Check milk type or plant-based alternative, optimise selection.
Check for limescale, clean milk frother, check milk frother insertion.
Check water filter, water tank, or pipe system dryness.
Drip tray removed too soon. Wait before removing.
Locking device jammed. Switch off and on again.
Appliance is too hot. Disconnect and wait 1 hour.
Water tank missing or wrongly inserted.
Check water type, float stuck, filter not rinsed, air in filter, or old filter.
Problems with power supply. Only operate at 220-240V.
Decalcified water still contains lime. Insert new filter, set water hardness, use suitable descaling agent.
Appliance in demo mode. Deactivate demo mode, remove/fill/re-insert water tank.
Door not properly closed. Press door firmly shut.
Appliance too hot. Disconnect and wait 1 hour.
Appliance switched off, not detecting emptying. Switch on, remove/re-insert drip tray.
Water tank missing/wrongly inserted, pipe system dry. Insert tank correctly, fill with water.
Air is in the water filter. Immerse filter in water, reinsert.
Ambient temperature too cold. Operate over 5°C.
Brewing unit heavily soiled or cannot be removed. Restart appliance, clean brewing unit.
Descaling process interrupted. Proceed as described in 'Resetting a service programme'.
Protect appliance from frost. Empty pipe system. Requirements: appliance ready, water tank filled.
Dispose of appliance environmentally friendly. Information from dealer or authority. Complies with WEEE directive.
| Pump Pressure | 15 bar |
|---|---|
| Milk Frother | Yes |
| One-Touch Function | Yes |
| Adjustable Coffee Strength | Yes |
| Adjustable Cup Size | Yes |
| Removable Brewing Unit | Yes |
| Cleaning Program | Yes |
| Descaling Program | Yes |
| Color | Black |
| Power Consumption | 1300 W |
| Coffee Bean Capacity | 250 g |
| Grinder | Ceramic |
| Display | LED |
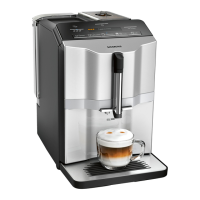
| Type | Automatic Coffee Machine |