Private Communication Systems
Mobile Phones
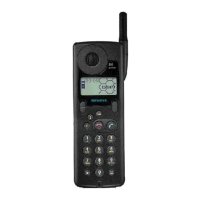
Assembling the S6 Power
1. Put earphone capsule (1120) and microphone (1110) into upper case shell
(1040).
2. Insert keypad (1030) into upper case shell (1040).
3. Place dust protection frame (1075) on display glass frame (1070).
Attention: The smooth side has to face the MMI.
4. If necessary: Insert battery connector into lower case shell (1050).
5. Insert composite of MMI-board (1020) and RF-and controle module (1010)
into upper case shell (1040).
BEFORE (only for level 2 repairs):
a) Put interconnector (1090) to the frame (1060).
b) Position frame (1060) on the RF- and control module (1010).
c) Place MMI board (1020) on top of frame (1060).
d) Connect RF plug of MMI board (1020) to RF- and control
module (1010).
e) Mount ringer gasket (1080) on the MMI board (1020).
6. Close device with upper case shell (1040). Make sure that the 6 hooks of
the upper case shell fit firmly into the respective slots of the lower
case shell (1050).
7. Screw 3 long flat head screws (1150) (Torx 1,8x12 /Torque 25 Ncm) into
lower case shell (1050). Close holes with plastic disks (1170)
afterwards.
8. Screw 2 short flat head screws (1140) (Torx 1,8x8 /Torque 25 Ncm) into
lower case shell.
9. Screw 2 oval head screws (1160) (Torx 1,8x12 /Torque 25 Ncm) into lower
case shell.
10. Screw in Antenna (1130) (Torque 25 Ncm).
11. Insert SIM-Card and battery.
V1.2 Page 7 of 18 PN MP ST
D. Schnoor
4/98
 Loading...