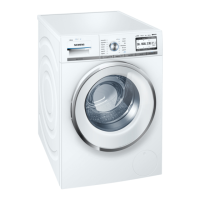
en Operating the appliance
26
Less Ironing *
(æ)
Settings that can be selected:
on – off
Reduces creasing thanks to a special
spin sequence followed by fluffing and
reduced spin speed.
Note: The washing's residual moisture
is increased.
Soak *
(õ)
Settings that can be selected:
on – off
Before the main wash cycle starts, the
washing remains for longer in the water
to partially dissolve intensive soiling.
To be used for particularly stubborn
soiling.
Dose the detergent using i-Dos or add it
into the À Á compartment in
accordance with the manufacturer's
instructions.
Notes
■ Load laundry of the same colour.
■ If your machine does not have this
option, you can soak as follows:
1. Select i-Dos or dose detergent in the
À Á manual compartment in
accordance with the manufacturer's
instructions.
2. Select the Cottons 30 °C
programme and the Ü button.
3. Press the Ü button after approx. 10
minutes. The laundry remains in the
soaking solution.
4. Leave the laundry to soak for as long
as required, then either press the Ü
button again to continue the
programme or change the
programme.
Note: No additional detergent is
required; the soaking solution is
used for washing.
Rinse Hold *
($)
Settings that can be selected:
on – off
The washing remains in the water after
the last rinse cycle. End the programme
~ Page 30
Silent Wash *
(ç)
Settings that can be selected:
on – off
Reduced noise values thanks to special
wash and spin cycle and deactivated
end signal. Especially suitable for
washing at night.
Note: Residual moisture of the washing
is slightly increased.
1 Operating the
appliance
Operating the appliance
Preparing the washing
machine
Note: The washing machine must be
correctly installed and connected.
From ~ Page 46
1. Plug into the mains.
2. Turn on the tap.
3. Open the washing machine door.
4. Check that the drum is completely
drained. Drain if necessary.
Otherwise, the load display may
malfunction. ~ Page 36
 Loading...