www.signamax.com
C-100 SERIES
QUICK START GUIDE
www.signamax.com3 4
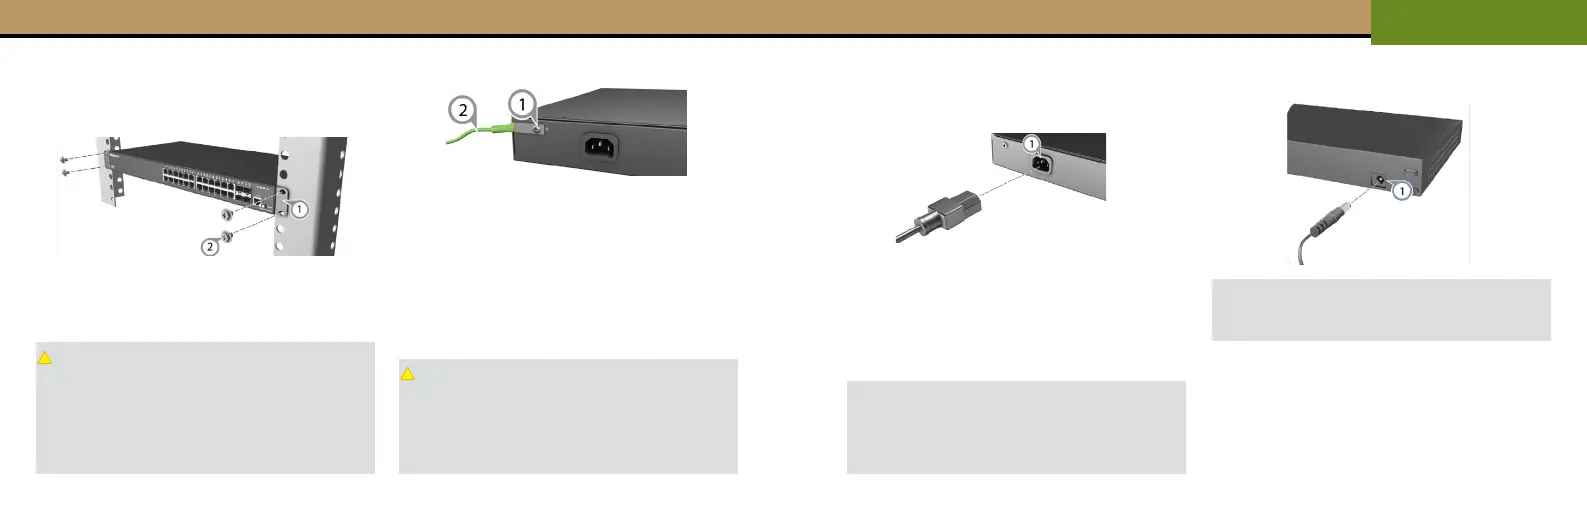
Mount the Switch
Mounting in a Rack
(Only for Rack Mountable models)
1. Attach the brackets to the switch.
2. Use the screws and cage nuts supplied with the
rack to secure the switch in the rack.
Caution: Installing the switch in a rack requires
two people. One person should position the
switch in the rack, while the other secures it using
the rack screws.
Note: The switch can also be installed on a
desktop or shelf using the included adhesive
rubber foot pads.
Ground The Switch
1. Ensure the rack is properly grounded and in
compliance with ETSI ETS 300 253. Verify that there
is a good electrical connection to the grounding point
on the rack (no paint or isolating surface treatment).
2. Attach a lug (not provided) to a #12 AWG (PoE
switch) or #18 AWG (non-PoE switch) minimum
grounding wire (not provided), and connect it to
the grounding point on the switch rear panel. Then
connect the other end of the wire to rack ground.
Caution: The earth connection must not be
removed unless all supply connections have
been disconnected.
Note: The device must be installed in a restricted
access location. It should have a separate
protective earthing terminal on the chassis.
Connect Power
Connect AC Power
(Models with internal power suply)
1. Plug the AC power cord into the socket on the rear
of the switch.
2. Connect the other end of the power cord to an AC
power source. Verify that the external AC power
requirements for the switch can be met as listed: AC
100-240 V, 50-60 Hz.
Note: For International use, you may need to
change the AC line cord. You must use a line cord
set that has been approved for the socket type in
your country.
Connect DC Power
(Models with external power adapter)
1. Plug the DC power cable into the socket on the rear
of the switch.
2. Plug the AC-DC power adapter into a nearby AC
power outlet.
Note: The switches includes an AC/DC power
adapter. Connect the AC/DC power adapter to
the switch and to an AC power source.
 Loading...