14 007-3725-002
Silicon Graphics
®
O2
™
and Silicon Graphics
®
Octane
™
R12000 CPU Upgrade Information
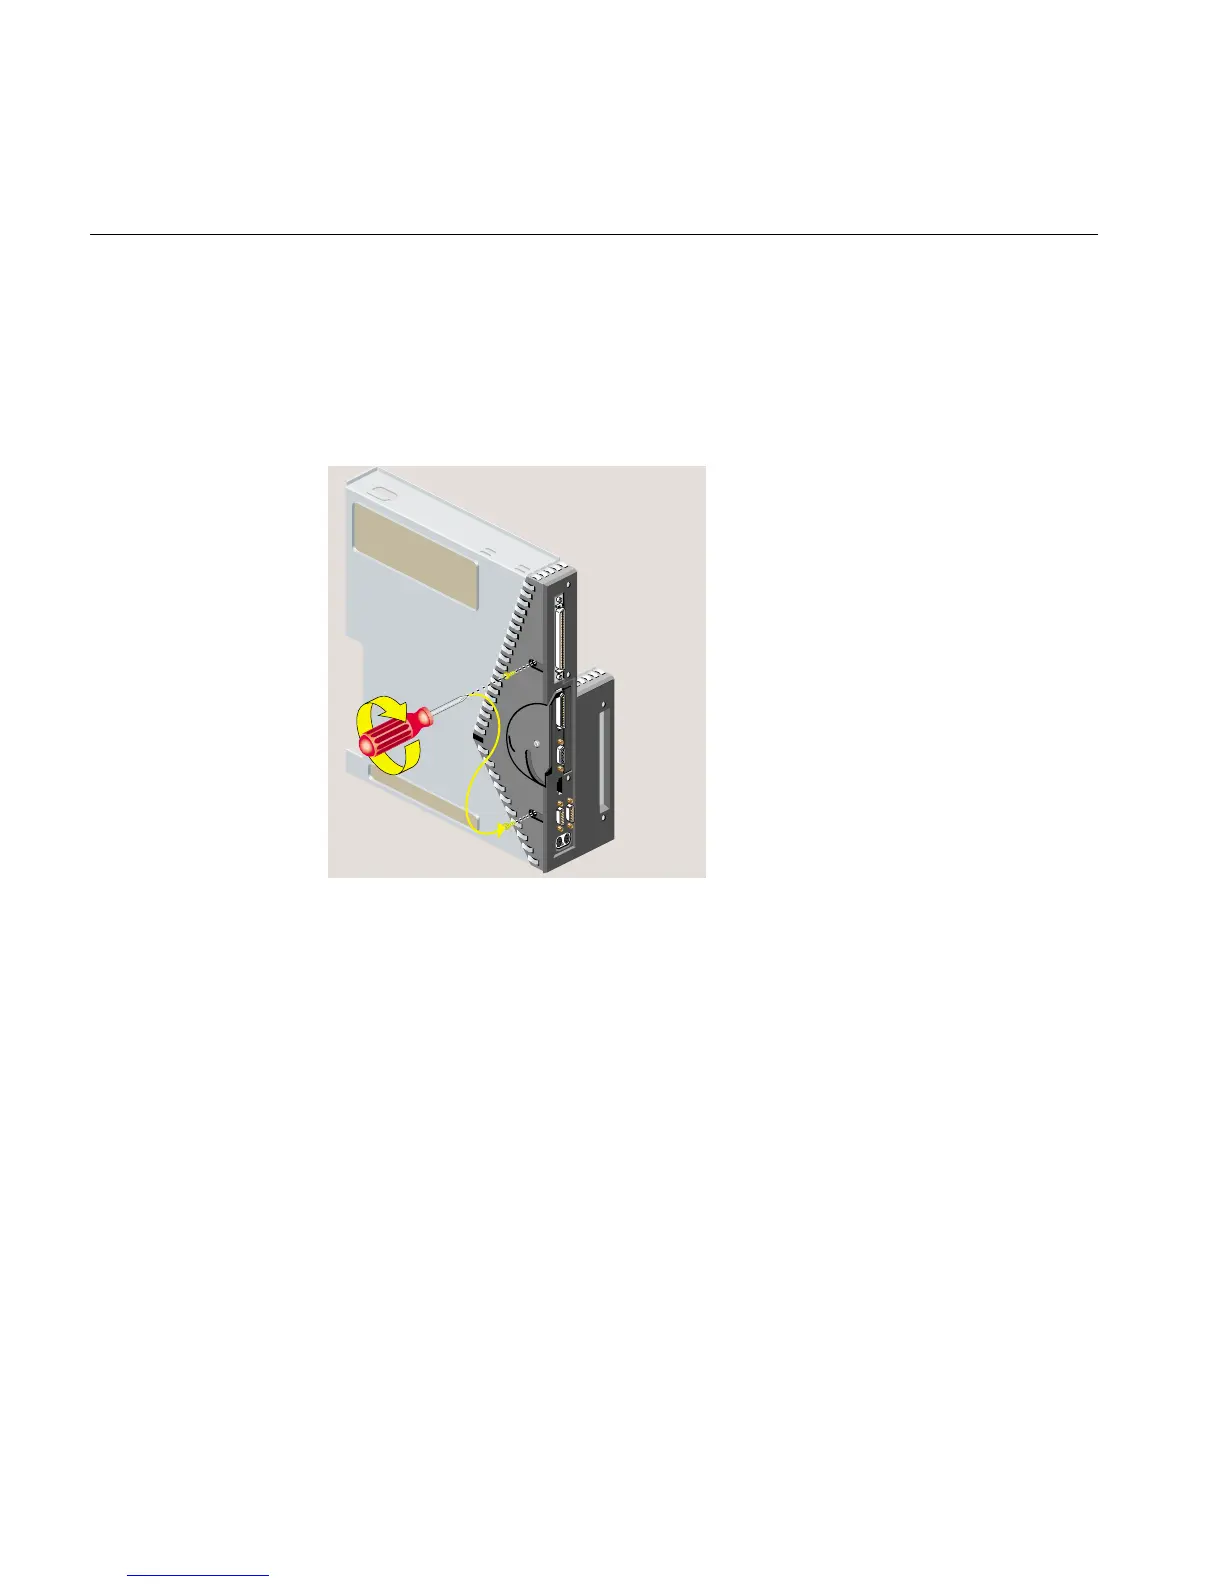
19. Align the screw holes on the faceplate with the screw holes on the system module.
Use a Phillips screwdriver to insert and tighten two screws on the underside in the
locations shown (Figure 14).
20. Replace the filler panel over the I/O opening on the inside of the module. It snaps
into place. If it doesn’t seem to fit, turn it 180 degrees and try again.
Figure 14 Replacing Two Screws on the Underside