GB
│
IE
│
NI
│
CY
│
7 ■SSMC 600 B1
Operation
WARNING!
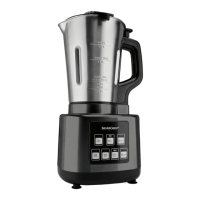
► The motor switches off automatically as soon as the blender 3 is removed
from the motor block 6 or the lid 2 is opened. In such cases it may be
easy to forget that the machine is still switched on. The motor will then start
unexpectedly as soon as the blender attachment 3 is fitted or the lid 2 is
closed again:
Therefore:
– Do not insert the power plug into the wall socket until the blender 3 is
filled and mounted with its lid fitted and closed.
– Before fitting the blender, always check to see that the appliance is
switched off or that the power plug has been removed.
– Switch the appliance off first, pull the plug out and wait until the motor has
come to a standstill before removing the blender 3 or opening the lid 2.
Fitting and filling the blender
1) Remove the blender 3 from the motor block 6 in a vertical, upward motion.
2) Remove the lid 2 by rotating it anticlockwise towards position
(see Fig 1)
until you can pull it upwards.
3) Fill the blender 3.
4) Press the lid 2 firmly down onto the blender 3. Close the lid 2 by turning
it clockwise to position
until it audibly engages (see Fig. 2). Ensure that
the pouring spout on the blender 3 is closed. The motor cannot start until
the lid2 is fitted flush.
Fig. 1 Fig. 2
5) Press the measuring cap 1 into the lid as far as the stop.
6) Place the completely filled and closed blender 3 with the handle to the
right on the motor block 6. Make sure that the arrow q on the blender 3
points to the arrow on the motor block 6. Turn the blender 3 slightly
back and forth if it does not immediately sit properly. The motor cannot start
until the blender 3 is fitted flush to the motor unit.
 Loading...


