SHSS 18 B1
GB
│
IE
│
9 ■
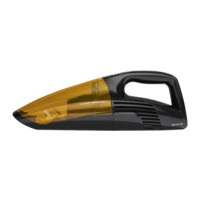
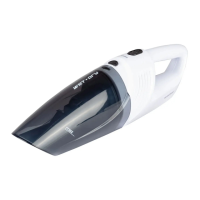
Using the 2-in-1 crevice and
brush attachment
NOTE
► Switch the appliance off before attaching or
removing the 2-in-1 crevice and brush attach-
ment
z.
The appliance’s 2-in-1 crevice and brush attach-
ment
z has two different nozzles for different
applications. Choose the appropriate nozzle
depending on your needs:
Brush nozzle
Use the brush nozzle to clean soft and/or
delicate surfaces.
Crevice nozzle
Use the crevice nozzle to clean narrow and
hard to reach locations.
■ Attach the 2-in-1 crevice and brush attachment
z to the hand element 3.
■ Alternatively, you can attach only the brush
nozzle or only the crevice nozzle to the hand
element
3.
■ When you are done using it, pull the 2-in-1
crevice and brush attachment
z or the single
nozzle off the hand element
3.
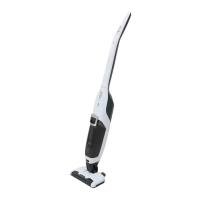
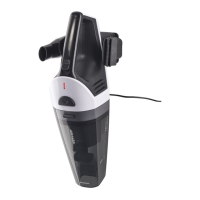
Using the hand element
1) Remove the hand element 3 from the hand
element recess e as described in the section
Assembly/disassembly.
2) If necessary, attach the 2-in-1 crevice and
brush attachment
z to the hand element 3.
Alternatively, you can attach only the brush
nozzle or only the crevice nozzle to the hand
element
3.
3) Press the On/Off switch
2 on the hand
element 3 to start vacuuming the desired
areas. The charge indicator lamp 2 lights
up blue during operation.
4) When you are finished vacuuming, press the
On/Off switch 2 again. The charge
indicator lamp 2 switches off.
Cleaning and maintenance
WARNING!
► Always unplug the mains adapter
u from the
mains power socket. Pull the barrel plug i
out of the charging socket
p on the cradle o
before cleaning the cradle o.
► Always remove the hand element
3 from
the hand element recess e on the handle rod
0 before cleaning
-- the hand element 3,
-- the handle rod 0, or
-- the rotary brush r.
ATTENTION!
► Do not use abrasive or aggressive cleaning
materials. They can damage the surface of the
appliance!
NOTE
► The LED light
t is maintenance-free.
The LEDs cannot be replaced!
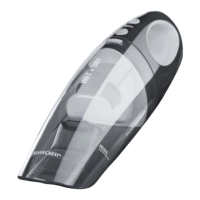
Emptying the dirt container and
cleaning the filter
NOTE
► To achieve the best results, empty the dirt con-
tainer 7 and clean the EPA filter 5 regularly.
► If you need a new EPA filter
5, please
contact our customer service department
(see section Ordering replacement parts).
1) To open the dirt container
7, remove the
hand element
3 from the hand element
recess
e.
2) Press the release button
4 and, at the
same time, pull the dirt container
7 forwards
and off.
 Loading...