7
SMZCD 400 A1
GB
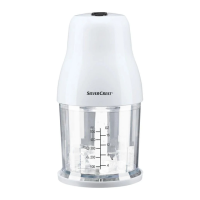
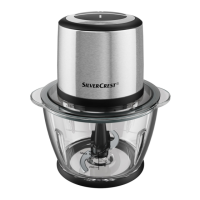
5) Ensure that the sealing ring 4 is inserted into the lid 3: the two rubber lips
on the sealing ring 4 must engage in the plastic rail in the interior of the lid 3.
6) Then close the bowl 7 with the lid 3: Place it on the bowl 7 so that the
lugs on the lid 3 engage in the slots on the bowl 7. Then turn the lid 3
so that the lugs slide unter the slots and the lid 3 locks into place.
7) Place the motor unit 2 on the lid 3.
8) Insert the plug into a mains power socket.
9) Press the motor unit 2 down to start the motor at normal operating speed.
10) To obtain the higher processing speed “Turbo“ for the contents, in addition
to the motor unit 2 press and hold down the turbo button 1. As soon
as you release the turbo button 1 the appliance returns to the normal
operating speed.
NOTICE
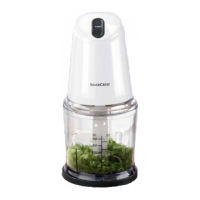
► Should larger pieces of the contents collect on the wall of the bowl while
pr
ocessing, lift the motor unit 2 from the lid 3. Shake the bowl 7 vigorously
and then continue with the processing. Remove possible residues with a
dough scraper.
► Before starting the processing, particularly hard foods must be cut into
smaller pieces (about 2cm). Other
wise, the motor will block. Select a
pulsating processing for hard foodstuff s. For this, press the turbo button
1 repeatedly for a short time (in addition to the motor block 2). Should
the foodstuff not be completely chopped, you can either cut it into smaller
pieces or lift the motor unit 2 from the lid 3. Shake the bowl 7 vigor-
ously and then continue with the processing.
11) When the contents have been suffi ciently chopped, release the motor unit 2
and, if necessary, the turbo button 1.
12) Remove the power plug from the mains power socket.
WARNING - RISK OF INJURY!
► Never attempt to remove foodstuff s from the bowl 7 as long as the
blade 6 is still r
otating. Contents could shoot out and make a mess.
13) Wait until the blade 6 has stopped rotating.
14) Lift the motor unit 2 from the lid 3 and remove it.