Prior to first use
Assembling the appliance
1) Remove all packaging materials from the
appliance.
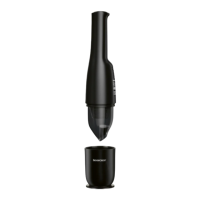
2) Push the vacuum attachment 1 onto the motor
unit 7.
NOTE
► The appliance batteries are not charged on
delivery. Before using the appliance for the
first time, the batteries must be charged for
2.5 hours.
3) Charge the appliance (see Chapter “Charging
the appliance”).
The appliance is now ready for use.
Operation
ATTENTION! DAMAGE TO PROPERTY!
► Do not use foaming, corrosive, aggressive,
abrasive or chemical cleaning agents.
These can damage the appliance.
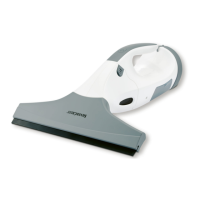
Cleaning
1) Set the tip of the spray nozzle q to STREAM
(jet) or SPRAY (fine water mist).
2) Attach the spray nozzle q to the wiping attach-
ment 0.
3) Place the positioning ring w over the tube and
push it onto the wiping attachment 0 so that
it clicks into place. The spray nozzle q is now
enclosed by the wiping attachment 0 and the
positioning ring w.
4) Fill the spray bottle with water and, if desired,
with a cleaning agent suitable for window
cleaning e.
5) Screw the spray nozzle q with the fitted
wiping attachment 0 onto the spray bottle e.
6) Pull the microfibre attachment z over the
retainer on the wiping attachment 0 and
secure it with the velcro fastener.
7) Spray the surface that you wish to clean.
8) Using the microfibre attachment, z wipe over
the sprayed areas and loosen any stubborn dirt.
Vacuuming
1) Press the On/Off switch 6. The control lamp
5 lights up blue.
NOTE
► If the indicator light 5 flashes red during
use, this indicates that the appliance needs
to be charged (see chapter on "Charging the
appliance").
ATTENTION! DAMAGE TO PROPERTY!
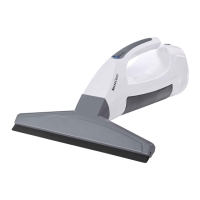
► Move the blade of the vacuum attachment 1
slowly from top to bottom across the wet sur-
faces. Non-compliance can lead to damage
to the appliance.
2) Move the blade of the vacuum attachment 1
slowly from top to bottom across the wet
surfaces. The moisture is removed and sucked
into the dirt container 2.
NOTE
► Never drag the blade sideways across wet
surfaces. Doing so prevents the water from
being vacuumed up; instead, it runs off the
side of the blade.
3) After you have finished a section, always start
again at the top.
ATTENTION! DAMAGE TO PROPERTY!
► Only continue working until the MAX mark
on the dirt container 2 is reached. Then
switch off the appliance and empty the dirt
container 2:
Remove the plug 3 on the dirt container 2.
Pour away the dirty water and reclose the dirt
container 2. You can then resume working.
NOTE
► If any dirty water remains in the dirt container
2, you must remove this from the appliance. To
do this, press the release button 9 and remove
the dirt container 2 from the motor unit 7.
Turn the dirt container 2 so that the nozzle4
is pointing diagonally upwards. Now pull the
liner carefully out through the nozzle4 and
shake out the remaining dirty water.
 Loading...