11 GB
Oiling the blades
It is recommended that you oil the blades before first use and after
cleaning to guarantee complete functionality (see Fig. G, H, I).
Always switch off the product before oil the blade.
A
pply one or two drops of blade oil
20
between the blades
and distribute them evenly.
Wipe off any excess oil with a cloth.
Y
ou can also use any acid-free oil (such as sewing machine oil).
Transport lock
The lock symbol
14
flashes white for a short time if a key is
pressed when the transport lock is activated.
Press and hold the ON/OFF button
11
for approx.
3 seconds to activate/deactivate the transport lock. The
lock symbol
14
flashes for 3 times and then goes out.
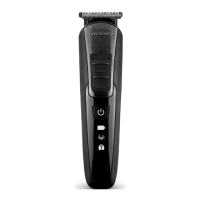
Operation
Note: For all applications hold the shaver with an angle of
45° to your skin (see Fig. F).
Changing the cutting attachments
4
,
5
,
6
,
7
,
8
RISK OF INJURY!
Switch off the hair and beard trimmer unit
9
, before you attach
or remove the attachments.
To attach the attachments
4
,
5
,
6
,
7
,
8
(see Fig. B),
put the lower flap of the attachment
4
,
5
,
6
,
7
,
8
into
the slot in the hair and beard trimmer unit
9
and press the
upper part of the attachment against the hair trimmer until
it audibly locks into place and sits firmly in position.
To remove the attachments
4
,
5
,
6
,
7
,
8
(see Fig. A)
use your thumbs to press the attachment towards the rear
of the hair and beard trimmer unit
9
.
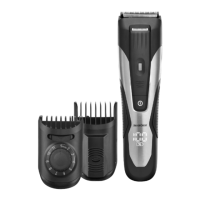
Changing the comb attachments
1
,
2
,
3
To attach the comb attachments
1
,
2
,
3
carefully slide
the appropriate comb attachment over the hair or bread
trimmer attachment
7
/
8
. Press the lower part of the comb
attachments
2
and
3
firmly until they lock into place.
To remove the comb attachments
2
and
3
loosen the comb
attachment at its lower end and pull it off the hair and beard
trimmer unit
9
. Slide the adjustable comb attachment
1
for the beard trimmer attachment
8
upwards from the hair
and beard trimmer unit
9
.
Cutting hair
(Hair trimmer attachment
7
)
Note: The hair to be dressed must be dry. The cutting length
may deviate depending on the cutting angle.
Place a sheet or cape around throat and neck to prevent
cut-off hair from dropping into the collar.
Comb the hair well with included barber comb
22
.
First, start with a comb attachment
2
with a longer cutting
length and then, in the course of the cutting process, use
shorter cutting lengths step by step.
With the comb attachment with dial
3
you also start with
a longer cutting length. Turn the dial anticlockwise to shorten
the cutting length and clockwise to lengthen it. (see Fig. C).
Start by cutting the hair in the neck or on the sides and cut
towards the center of the head. Then, cut the front section
of the hair towards the center of the head.
H
old the hair and beard trimmer unit
9
in such a way that
the comb attachment
2
lies as flat as possible on the head.
Move the hair and beard trimmer unit
9
evenly through
the hair.
Hold the hair and beard trimmer unit
9
with comb attach-
ment
3
in such a way that the flat area above the dial lies
on the head (see Fig. D).
Cut against direction of hair growth.
In order to catch all the hair, move the hair and beard trimmer
unit
9
several times through each section ofthe hair.
Comb the hair repeatedly and well.
Using the switch for cutting length fine tuning
10
the
cutting length can be slightly varies with three levels:
1/2/3 (1.8 mm–0.8 mm).
In order to achieve a straight cutting line for cutting lengths,
the hair and beard trimmer unit
9
should be passed through
the hair several times from different directions.
Trimming a beard
(Beard trimmer attachment
8
)
Note: Please note that the cutting lengths will only be achieved
if the switch for cutting length fine tuning
10
is at position 1 and
the hair and beard trimmer unit
9
is held at a right angle to the
skin surface.
Comb the beard in the direction that it grows.
Trim the beard downwards from ear to chin. First trim one
side, then the other.
Comb attachment
1
: Adjust the cutting length with the slider
according to the desired hair length and read off the cutting
length using the marking on the side of the comb attachment
1
(3/4/5/6 mm) (see Fig. E). Now, shorten your beard step
by step.
Using the beard trimmer attachment
4
without a comb at-
tachment
1
, to cut the beard very short or to cut a mous-
tache and hairline.
Using the switch for cutting length fine tuning
10
the cutting
length can be slightly varied with three levels:1/2/3
(1.8 mm–0.8 mm).